Contents Top
Introduction and Context Top
Greetings and welcome to my (what is intended to be) full and comprehensive guide to the Evolution Master of the Zerg: Abathur. I've played many games with Abathur, and he is generally my most utilised Specialist hero, and in my top three most played heroes collectively.
I've been playing HoTS since beta testing (around the time of the Sylvanas patch) so have had ample time to acquaint myself with the game. Abathur stood out for many reasons:
- He's ridiculously fun!
- He's Zerg (I love me some Zerg).
- His concept for a MOBA game is incredibly unique.
- His playstyle is varied and asks much of you as a player, making games interesting.
He's one of my favourite heroes, of my favourites I'd definitely say he's among the most fun to play in a game.
|
|
|

|
|
Abathur Says: "Spin sequences. Enhance host. Improve thesholds. Endorphines released. Enjoyment indubitable conclusion. Satisfactory outcome."
|
My own gaming habits with HoTS focus almost exclusively on Quick Matches. I don't have a predictable gaming timetable and thus it's difficult for me to pre-made with friends. I will occasionally play with my brother however, that's about as pre-made as it gets.
All advice in this guide is primarily aired within this context, that is Quick Matches where your comp is not predictable. Abathur only gets stronger in pre-made comps from what I've watched and read, but chances are if you're playing Abathur in a pre-made, you don't need a guide to understand how to use him. You might pick up some ideas and tips though.
Terminology
Within the guide I will be using certain terms as shorthand for mechanics, abilities or heroes. These are explained here. The guide covers several the two primary build paths of Abathur and their variations and some of these terms are specific to certain builds.
|
|
|
|
|
Stabathur: I use this term to refer to any build that centres around Symbiote and your talented role being supporting allies in combat and lane. I'll use terms like "Balanced" or "Full on" in relation to Stabathur to indicate whether the build picks up Carapace talents (Balanced) or whether it's primarily geared at full-on offensive boost (Full on).
|
|
|
|
|
|
Mapathur: This term refers to any build with a siege focus, talenting Locusts and picking up Monstrosity. If the early talent picks revolve around Mines rather than Carapace I will refer to it as the Trapathur build.
|
|
|
|

|
|
Riding: I use the term "ride" or "riding" to refer to when we're casting Symbiote on a target. Eg. "When Riding Chen".
|
|
|
|

|
|
Mines: Toxic Nests are referred to simply as mines.
|
|
|
|

|
|
Clone: To use Ultimate Evolution or refer to the created hero I use the term clone.
|
|
|
|

|
|
Zerg: I use this term "Zerg a lane" to refer to when we put a heavy siege focus on a lane. This is applicable only to the Mapathur builds, as it refers to when you create a Locust Brood, Locust Nest and Monstrosity on a lane very quickly in order to create pressure, and then focus on supporting that lane with Symbiote.
|
|
|
|
|
|
Host: This term is used to describe the lucky guy or gal you're riding who will inevitably gib the opponents whilst taking no damage thanks to your diabolical support. Okay, maybe that's an exaggeration, but still...
|
|
|
|

|
|
Gib: This term is used to refer to the act of killing another hero. The question is, can you Gib it?
|
|
|
|

|
|
Le *****: Nova is referred to as Le *****, because she's a cloaking, roaming pain in our *** who is frequently responsible for Abathur-related accidents in the workplace. That and she really needs to get over the 80s jumpsuit fashion craze.
|
|
|
|

|
|
Le Douche: Le *****'s partner in crime, also wanted for crimes against Abathurkind pertaining to his douchy cloaked behaviour. Wears a face veil to hide his terrible acne.
|
Jokes aside these terms will be used. The last two get a special mention because matchups with Abathur isn't a simple affair. It entirely depends upon your Host. Some details of this are covered in the "Meet Your Host" section.
Le ***** and Le Douche will always be a threat worth monitoring as they can roam easily and often take it upon themselves to use this to hunt you down. This forces a very defensive positioning game, which makes Mapathur builds less effective due to your Locusts being unable to travel down the lane very far.
Who is Abathur? What can he do for me? What can't he do? What do I need to play as him? Top
Who is Abathur?
Abathur is the Evolution Master of the Zerg Swarm. He's also famous Blizzardverse wise for his world record of "Longest dialogue without pronoun use". I could go into massive detail about the story of Abathur, but I could also
do this. Go ahead and read if you want to know about such things.
In this game, Abathur is a Specialist. Typically this label means the hero focuses on what I call the "PvE" objectives of the game. This is things such as lane dominance, destroying structures and such. Unlike other Specialists however, Abathur is capable of behaving in a purely pseudo-assassin role through focusing on a Stabathur build. Abathur is varied, and in my mind he can play in quite a few different ways.
Abathur Is horrendously weak himself. Don't believe me? Click the link to the left and be amazed by his awful base and scaling health and attack values. if you want to know Abathur, you must appreciate this weakness, so you take good care of him.
What can Abathur do for me?
Abathur's strengths are as numerous as his many feeble appendages. He has much to offer the player who is interested.
Strengths
- Mapathur siege game is brutal, and mobile. If enemies don't stop you focusing lanes they lose buildings, simple as.
- Global presence means you're never out of position to help in a fight.
- Mines are a good way to safeguard common gank routes, bonus points if Le ***** or Le Douche are revealed in the process.
- Stabathur can contribute a truckload of damage, especially late game. Best part is, a lot of opponents don't take precaution because your presence is less obvious than that of another hero.
- Deep Tunnel means we can escape pretty fast if trouble is heading our way. We can also use it to secure far-off objectives when the enemy team is otherwise engaged.
- Clone is just so powerful is used properly in teamfights, it's seriously ridiculous and can easily turn a 2-man gank attempt on one of your allies into two gibs for you.
- We can soak two lanes quite easily, Locusts soak for us, and Symbiote also grants soak. Use this when objectives happen to gain exp advantages for your team.
What can't Abathur do for me?
Abathur may be a cunning mastermind of a maggot, but he still has weaknesses we need to be aware of.
Weaknesses
- We can't contribute to capturing objectives without putting ourself in danger.
- We can't solo a game to victory unless the opposing team are idiots. Our helpfulness in teamfights depends a lot on your allies, their behaviour and your comp. If people don't utilise your support correctly, your presence in the game will be restricted to trying to get a decent Zerg on a lane and hoping the enemy doesn't defend it (unlikely).
- Take hits, just hell no to that.
- Get you glory. It's rare your efforts are recognised during the game due to your "invisible" activity. Scoreboards reveal the truth!
- Crowd control: Abathur offers none, outside of Clone.
What do I need to play as him?
Abathur asks for certain skills in order to play him to his utmost. I would group these into "Essential" and "Desirable" camps.
Essential
- Map awareness, map awareness, map awareness. You can support any lane, any ally and travel between lanes. You are squishy as they come. You must always have an eye on the minimap to see where you need to focus, but also to make sure nobody finds you before you can tunnel away.
- Patience. Abathur takes time to learn well, but every game gives you new lessons, and lots of fun.
- The ability to land a skillshot and shoot predictively. Stab isn't going to be much help if you can't do this.
- Humility. As mentioned above, Abathur is rarely called out for good work during a game, and there's still a mindset (less frequent now) that he doesn't contribute as much to the game as other heroes. You may be called a troll, a 4v5er, or worse. You will rarely be commended for your Stabs making that gib happen, or your Carapace saving that Thrall so he could escape.
Desirable
- Knowledge of every hero's Q, W, E and Trait and general playstyle so you can utilise your clone perfectly and work with your hosts well. This will require you to become a walking library of the game, granting you the title of Philosothur.
- Courage. You can easily spend the entire game in the safety of your Nexus and still contribute, but a great Abathur puts himself in risky positions to help capture distant objectives, open chests etc. due to his ability to travel near instantly.
- Good map knowledge of common gank spots, entry points etc. This will allow you to maximise your positioning, so you can be forward enough to be effective, but still safe enough to escape (rather than hiding in base all game, don't be a Slackerthur).
|
|
|
|
|
Abathur Says: "Knowledge of opposition essential. Knowledge of cooperation essential. Knowledge is evolution. Evolution is survival. Survival is success. Success agreeable outcome."
|
The Spawning Pool: Trait and Abilities Examination Top
It's time to look at what Abathur has to offer. I will not cover the nitty gritty stats of each ability, that's what hovering over the image is for. Rather i'll gloss over general usage, general functionality and so on.
|
|
|
|
|
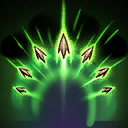
Trait: Locust Strain
|
Our trait is passive and doesn't need to be turned on or off, we keep spawning locusts as the game progresses. They help push lanes and soak exp for us, so position yourself along any line you want some soak, and a slightly stronger push on. Always make sure the Locusts are reaching the lane where the combat happens otherwise you'll get no soak from them.
Mapathur builds empower Locusts through talents, leading them to become very effective at taking down buildings, especially when they build up. They're not great at doing much to heroes due to a lack of AI, but if enough are swarmed a hero needs to be careful approaching them as they can do some serious damage.
Always be aware, Locusts scurry from where you are positioned. They will give away your position and clever enemies will use them to try and track you down. This is why you must always keep an eye on the minimap! You can use Locust Nest late game as Mapathur to fool enemies into thinking you're somewhere you're not, which is pretty neat.
|
|
|

|
|
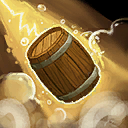
Z: Deep Tunnel
|
We don't get a mount, the thought of Abathur riding a horse is pretty horrific anyway so that's fine. Rather we have the ability to use this nifty skill to effectively teleport anywhere we have vision of on the map. It presents itself as a grand escape in many cases. A skilled Abathur will also use it to take advantage of being able to quickly get to objectives such as distant Tributes or a Dragon Shrine to help the team out.
Always be aware, there is a cooldown. If you're making a risky positioning play (such as going for a lone chest, shrine etc.) don't just sit there and wait for Deep Tunnel to refresh when done, move back to safety as far as you can, and then use it to get into a more secure position.
Unless you are stunned, this ability will always complete unless you die before it casts. Have your finger on the trigger when enemies are getting near your general vicinity and if in doubt, always Tunnel back into your base and wait out the cooldown before you tunnel back into a better position.
This gives you great mobility so don't spend all game on a single lane, switch it up to suit soak needs and keep the opponents on their toes. You mustn't make your positioning predictable, otherwise you can enjoy being headhunted for cheap and easy exp all game.
|
|
|
|
|
Q: Symbiote
|
|
|
|
|
|
Abathur Says: "Spin sequences. Presence but detail. Direct host. Shape outcomes. Repeat. Presence superfluous."
|
Your most important ability. Allows you global support presence, the ability to soak on distant lanes and lend a helping hand to combat with shields and damage. Symbiote will centre your vision on the host, and render Abathur himself helpless (no tunnelling! eeek!) so long as you maintain it. You'll still spawn Locusts though.
Symbiote offers you 3 brand new abilities to use from the host. Learn them well, these are essentially your "real abilities".
When Symbiote is cancelled, the cooldowns of your Symbiote skills are refreshed. This is very important to high-level Abathur play! As the optimum DPS rotation requires you to leave your host partway through to refresh your cooldowns. This is more relevant for when you're protecting an ally and have taken
 Sustained Carapace
 as you can potentially shield them every 4 seconds. These tactics are covered in the playstyle section in more detail.
|
|
|

|
|
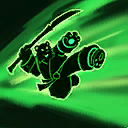
Host Q: Stab
|
Send a spike in the targeted direction. Light-moderate damage, low cooldown, low charge time. It's reasonably spammable, and Stabathurs can spam it for days for pretty nice damage.
The range is pretty decent for a skillshot, made better with Needlespine. It's a good way to get poke on towers when supporting a lane too. It allows you to attack irrespective of your hosts behaviour, so you can poke the enemy when your host is out of range, or attack them when your host is being chased, which can discourage their further pursuit.
Due to the charge-based nature of this ability and the potential to unleash them quickly, it offers nice surprise burst. You can use this element to suddenly assist an ally and unleash some nice opening burst in tandem with Spike Burst which can make enemies think twice before continuing.
Remember, no mana cost. You can use this ability to scout bushes nearby by firing a stab into the brush. This can reveal enemies and stop them getting the jump on your allies.
|
|
|

|
|
Host W: Spike Burst
|
Sends a blast of spikes in a circle around the host. Deals fair damage to all enemies around, and is good for contributing additional burst to an enemy target.
It's useful for waveclearing when you use this on a host who engages in melee combat. It can be granted some neat utility in
 Envenomed Spikes
 if you so wish, turning into a decent slow. This is a good talent pick for Stabathur if you have hosts who can close on several of the enemies at once.
If you don't take
 Pressurized Glands
 it's worth leaving your host early to refresh this ability, so long as you use all your stab charges first, and within 2 seconds of using Spike Burst, otherwise the refresh isn't worth doing unless you also want to refresh Carapace.
It can be used to reveal stealthed heroes lurking nearby, and also is a good way to kill Creep Tumours laid down by Zagara.
|
|
|

|
|
Host E: Carapace
|
Shield the target for up to 8 seconds for a fairly decent amount. If you leave the host, the shield fades unless you take
Sustained Carapace. It's definitely worth a pick, as you can use leave the host to refresh the cooldown without losing the shield, meaning you effectively reduce the cooldown to 4 seconds. Also this talent allows you to shield an ally, stop riding them and then shield another, and greatly increases the flexibility at which you can protect your team.
Generally advisable to use this ability first due to the long cooldown and fair duration. It's also good to do this if you have taken
 Regenerative Microbes
 as then the shield has time to do some healing for you.
This can be used to protect your towers and keeps too, although
Regenerative Microbes won't heal structures, booooo.
Host R: Leave
Leave the host, pretty self explanatory. You will be using this often as it's riding in and out repeatedly which keeps your cooldowns fresh and allows you to maximise ability use. You'll find it's rare you stay in a single host for a long time (outside of your Monstrosity, because the neutral AI can make it do stuff you don't want it to).
|
|
|
|
|
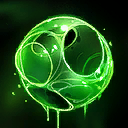
W: Toxic Nest
|
Place a mine. Has 3 charges which take a fair while to charge. After a few seconds the mine arms itself, going invisible. The mine deals light-moderate aoe damage when triggered, and you can't stack them on top of each other (but you can place them side by side).
The mine grants vision of anyone who trips it for 4 seconds, thus it's really important to use it as a way to safeguard entry points on lanes (such as the lane you're soaking with locusts) in order to give you fair warning when a gank may be coming. Stacking up lots of mines in a single area can create "death traps" for enemies who aren't on full health, and it can be a sneaky way to turn the tides when fights break out near brushed areas where you've loaded lots of mines.
Use them to scout important locations with high traffic too. The range is pretty good, so often you can place them where you need to whilst maintaining a safe distance.
Mines can be seen by the enemy before they arm, this is why if you're going to place them during a fight (whilst waiting on Symbiote, you should always be using mines to make your time productive) place them in brush if possible so the enemy can't see them prior. Fights often take people in and out of brush anyway, so it's a good bet they'll be tripped eventually.
The gimmicky siege build that is Trapathur can use their mines to secure some pretty surprising kills, but it's a gimmick build so outside of wanting to have a fun and different game, I'd advise against it.
Mapathur should be using mines to help kill minion waves. Same for Stabathur if your immediate area is already secured with mines to scout out approaching foes. Drop them in the minion wave archers and when they trigger they can kill them all if you placed enough. This allows you to kill the melee minions with Spike Burst and Stabs, making the push effective.
|
|
|
|
|
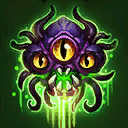
R1: Ultimate Evolution
|
|
|
|
|
|
Abathur Says: "Worthwhile evolution outside Swarm? Probability: low. Anomaly detected, pursue encapsulation method. Replicate strengths, improve, evolve. Swarm sequences perfect anomaly."
|
Powerful heroic indeed. Gives you a clone hero who is stronger than the original in power and mobility, but can't use their heroic. Once cloning a hero there is a brief delay, and you are rendered helpless much as you are when riding an ally. use this to add muscle to teamfights or turn around what the enemy thought was a 2v1 gank.
This is generally a good pick for a Stabathur or any build focused on helping in team fights. It varies with your comp. Generally speaking, you'll want to clone assassins, as they benefit the most from your bonus movement speed and attack damage bonuses. Sometimes it will be better to clone a hero with good CC, or AOE, or even heals. Make the assessment and clone accordingly.
I still favour assassin cloning though, because of how hard you can wreck the opposing team with a second Valla, or Illidan for example. You benefit from all talents the hero has picked too, which is awesome. The clone be used to safely phase or engage enemies because its death is not counted as a hero death. Still you want to save it where you can, as it's valuable. Still, better it dies than an ally.
generally use just prior to a fight breakout due to the deployment time of said clone. You don't want to use it too far in advance as each second should be used for fighting or sieging.
The range is global, so if you can see the ally, you can clone them.
|
|
|

|
|
R2: Evolve Monstrosity
|
Turns the target minion or locust into a Monstrosity. It's a pet which is suited to sieging thanks to some lovely passive damage reduction from PvE sources. As minions die around it, it becomes stronger and tougher. If left on a lane long enough, it can become quite difficult to take out and is capable of taking on heroes 1 on 1 if you ride it.
Speaking of which, yes, you can ride the Monstrosity! Not only does this give you the typical host skills to use, but it allows you to manually control the Monstrosity, making you a "pseudo-hero". This is advisable if you have several stacks accumulated and a hero is sent to take you out, as you can focus fire on your attacker and sometimes fend them off or even kill them. Without Symbiote your Monstrosity would probably just smack a minion a few times and die eventually. The supporting Symbiote skills make it a threat worth being aware of.
Additionally some Stabathur talents work well with Monstrosity if you go for a hybrid build (or don't take Ultimate Evolution as your comp doesn't work with it).
Envenomed Spikes and
 Adrenaline Boost
 give it some nifty mobility.
Regenerative Microbes and
Sustained Carapace give it durability.
 Adrenal Overload
 boosts the attack speed making it tear down minions and structures even faster, and making it deadlier for enemies who want to take it on.
Again, global range. You can elect any likely candidate for the job. This allows you to start pressuring a lane instantly. Use this to your advantage, if the enemy team is occupied, start a Monstrosity on a lane. You won't need to focus on it particularly with Symbiote for it to do some valuable siege work, so you can return to supporting your allies. The enemies either have to send someone to scare it away/kill it, or they remain engaged and risk the Monstrosity destroying buildings and growing larger through minion kills. It creates a nice catch-22 position for them.
The Evolution Chamber (Talents Overview) Top
In this section, i'll look at a variety of different builds Abathur can run with, explaining differences between them, why certain picks shine in certain situations over others and also go over any possible swaps you may feel like making within the general scope of these builds.
Stabathur Builds (Symbiote Focus)
There are several different paths a Symbiote focus can take us down. I'll look at some here, alongside a brief coverage of the talent choices and general ethos behind the build, when it's applicable and where it shines best. These builds all focus on Symbiote as chief, so we're generally better within combat than Mapathur builds, but our siege requires more focus (which keeps us away from team mates).
This is the closest thing I have to a "go-to" build for Abathur. Every build has options of change though. I call this build balanced, because although it takes many great offensive talents to maximise Stab damage, I begin with early defensive talents which allow allies to make safe exchanges early game, and allows me to provide top up healing each time I visit a Host. This build will be leaving and re-entering hosts regularly to apply good shield application and healing, firing some nukes each time it does.
This build is suitable for a well balanced comp that has a good mix of defensive and offensive heroes. The aggression you bring to a Host really benefits supports and defensive tanks, whereas the more protective talents are great for squishier heroes. Hivemind is taken because once we hit 20, Stab damage becomes crazy through it and allows us to strongarm during teamfights and nuke buildings down easily.
If your team is more hyper-offensive especially with melee/auto attackers then consider the Full-On build instead to compliment an aggressive game plan.
Similar to the above, except we skip the more defensive talents and instead make our Spike Burst quicker, wider and grant it slow. We also take the Adrenal Overload steroid, which makes this build great when you have some good AA heroes. Otherwise it resembles the above build closely. You can't offer much in the way of defence, so aggression is the key to succeeding with this build. This build should make sure it spends more generous time on assassins due to Adrenal Overload and the fact Spike Burst will often be nearly ready once all Stabs have been fired (if you use Burst first) which means leaving the host isn't necessary.
Fundamentally similar to the Balanced Build except we take the Monstrosity instead. This is a good idea when your team comp isn't really suitable for Ultimate Evolution, or you need some extra siege power. Unlike the Standard Mapathur build, this build supports the Monstrosity very well because of the powerful Symbiote, which means your Monstrosity can be very dangerous when it has stacks, and is capable of killing heroes 1 on 1 with you riding it.
This build mixes great team fighting with good siege, and I often use it. Hivemind is taken because it allows us to control our Monstrosity and buff a nearby hero at the same time, the extra damage again is always welcomed.
I haven't used this build often, but when I have it's been okay within the right comp. Maybe your team lacks dedicated support but instead of going hyper-offence with Full-On Stabathur you think some defensive qualities would make a larger difference? This build has you play an almost cleric role, we focus on defensive talents to boost health, mobility and are still capable of providing some damage with our clone, which in turn keeps our ally of choice protected. MULE is thrown in to help us repair buildings and really settle into that defensive role.
This build works really well with melee-heavy comps with a healthy dose of frail assassins who have problems with getting gibbed too quickly.
Mapathur Builds (Siege Focus)
These builds are less varied because generally you're focusing on a very singular objective, pushing lanes with locusts and helping minion waves persist where possible. Variation can be found in early picks if you want to look at a more gimmicky Trapathur build. This build will lack durability in the support it offers lanes and Locust duration, but will be good at clearing waves with mines and setting up traps for enemies. It's a risky build and I only use it for fun.
A general siege build, focuses on locusts with late talents to allow us to Zerg lanes quickly. Early game focus on defensive talents so we can shield minion waves to help them push. To this end we do not tend to Symbiote our Locusts when not in Monstrosity because Networked Carapace does not work when used from a Locust, which sucks. We can keep shielding the minions by popping Carapace and leaving the host though to repeat, which gives them some great staying power and helps tem stack up unless an enemy comes to ruin your fun.
This is essentially a troll build, but it can have merits within certain situations. Your waveclear will be godly due to massive mine damage and ability to spam mines. We further focus on this with Volatile Mutation to make sure we're just clearing waves like there's no tomorrow. The idea is to stack a Monstrosity very quickly so it can siege reasonably well on its own. Once it attracts attention we can try and lure enemies into mine traps we have laid around the lane in an attempt to kill them.
As I said it's a trolly build and it rarely works, but on the occasions it does, it's massive fun. Feel free to take Locust Brood instead of Volatile Mutation, but I prefer the passive waveclear granted by Volatile Mutation (plus it makes kiting as the Monstrosity through slowing mines a viable tactic).
This is a very experimental build I haven't tried often, and like Trapathur, is quite trolly. The general idea is you focus on your Monstrosity, gaining stacks, keeping it alive through Regenerative Microbes and Some Transference. You try and keep it alive as long as possible so it can siege and jungle for you, which it is suited to doing thanks to these talents. It won't be as powerful in a combat situation as a Petmaster build, but will be better at sieging and waveclearing.
Once you hit 20 the build finally comes together, because now your Monstrosity can teleport, allowing you to instantly swap lanes to split push. from here on you play "catch me if you can" with the enemies, taking out buildings before teleporting to the next one.
This build requires immense amounts of focus on your Monstrosity as we don't take Sustained Carapace but take Adrenal Overload to help it siege quicker. This means your team may feel neglected, so use this build at your peril.
Directing Evolution (Playing as Abathur, General Guide and Sneaky Tricks) Top
This section will look at playing as Abathur, divided into different sections. It will cover some of the general tricks and tips you will be using in general. The map-specific stuff will be covered in the next section.
Positioning
Positioning is key, we spend a lot of time sat on our maggoty behind so we need to be doing it from a safe spot. Generally the rule is if you're not in one of these places, you're doing it wrong. In order of priority:
- Inside Brush/hidden territory
- In the open, surrounded by tower and keep and positioned in a spot with no immiedate access that allows you to be reached without aggroing the structures (Early game this will be norm until your lane pushes a bit).
- In your Nexus safe spot (not ideal, yay wasted Locusts)
It's so important to allow your Locusts the opportunity to actually get on lane mostly because of soak, but also because they help push. Early game we don't have the luxury of being able to sit in the lane grass (unless you want to be squashed early) so we'll have to make do with being near our towers.
You may not need to be too cautiously positioned depending on the map. Certain maps have better protected keeps than others (covered in map section). Generally do not stand right near the fort walls, as then enemies can snipe you over the wall which isn't ideal really.
As your lane pushes the first keep down, you can now move into the grass on the lane to get the locusts further down. You keep doing this as your lane advances. Each time you move further down the lane, realise your chances of getting caught go up. So keep an eye on the map at all times! If an enemy is on the way, tunnel back into your closest standing fort. If none present themselves either
a) Go back to Nexus or
b) Tunnel onto a lane with allies and hang around in their grass to help them push with Locusts, but soak with Symbiote on another lane.
When I have more time to complete this guide fully, i'll be adding details on the map-specific section of good places to position for each map.
Symbiote Rotation
Master the rotation, master it! Depending on your priorities and talent picks, this may change so i'll cover them all!
Situation: Ally is in melee range of enemy, both attacking eachother OR ally is fleeing enemy, who is within health range where the fight could be turned OR ally is near enemy, but nobody has engaged yet.
|
Rotation: |
|
|
|
|
|
|
Exit host |
Repeat if necessary |
The above should occur over the frame of 2-3 seconds. As you are mixing in offence with defence, you won't be able to shield the ally every 4 seconds due to the delay with casting aggressive abilities. This is generally my "in combat" go to, when my ally is standing around to fight and needs protection or I figure poking the enemy a bit may give my ally the upper hand or cause the enemy to flee.
If you take Spatial Efficiency you can cast another Stab (or maybe two) after Spike Burst. Just bear in mind the longer you spend stabbing the more time it will be until you shield your Host again, so judge the situation accordingly.
if the enemy isn't in range yet use Stabs first, and shield before leaving the host (only if you've taken sustained Carapace, if you haven't it must always come first).
Situation two: Ally is fleeing the enemy and not fighting back and enemy is healthy. You have taken sustained Carapace.
|
Rotation: |
|
|
Exit host |
Repeat if necessary |
No frills, no flashing lights. At this point it's just shield, leave, shield, leave to get those chain shields in place and (if you've taken it) get speed boosts from Adrenaline Boost. If you've taken Envenomed Spikes and the opponent is melee, feel free to use it before leaving the host to help escape. Regenerative microbes will help heal the ally too if you've taken it.
Laning
|
|
|
|
|
Abathur Says: "Limited perception of physical space; limitation of singular psychic output. Abathur beyond limitation. Swarm numerous. Hosts numerous. Conclusion: Abathur presence numerous."
|
Laning is not always where your Locusts are going, but it can be. If you're lanining "alone" (no allied hero) then focus on the minions. Shield minions, Spike Bursts, Stabs etc. You can poke an enemy hero if present to try and wear them down. This can be effective if done several times. Always Carapace first as minions have poor health and you'll need the shield to get Stabs and Spike Burst off.
Place Mines on the archer minions to kill them quickly and try and get a quick fort push. Mines can be used to attack structures too, but only a minion will detonate it.
Your laning is generally wider than everyone else's, because you can focus anywhere you want. Minimap is key, whenever there's a clump of heroes in a space, investigate and consider whether you should ride someone. Any time not in host is downtime for Abathur, so you should minimise it. If you allies don't need you, you should be soaking on a lane as Symbiote or repositioning yourself onto a new lane.
Early game soak is so important. Abathur isn't great with objectives early game, as his talents are what boosts his abilities so much. It's always worth making sure your locusts are soaking during objective time, and occasionally riding a minion on an empty wave to gain more soak (such as when everyone is in the mines). The level advantage you can gain can make a huge difference here, and Abathur is capable of soaking both Haunted Mines lanes for example whilst everyone else is busy. Unlike the Lost Vikings, he can at any point decide to support in the teamfight, at the expense of his soak for a brief period.
You should always be asking yourself am I needed? or soak? These are your two modes of operation. As the game progresses it becomes a question of whether you're supporting an ally or looking to help a lane push more. Soaking for the sake of soaking becomes less important.
Mines
Mines are instant cast with only a charge time. Whenever you're waiting on Symbiote's cooldown you should be placing mines to make the time productive (unless you're about to tunnel somewhere).
Untalented mines don't last a huge amount of time, but long enough to keep us pretty secure. Priority 1 is always place them on the brushed routes leading into your lane as a gank route. This keeps the lane safe for your allies and in many cases will also keep you safe too.
Priority 2 should be placing them in brush on lane, or spots where enemies may try and hide to engage on your allies. This prevents enemies using the lane brush without being punished first, and can encourage your ally to initiate if their health is taken low enough.
Priority 3 should be placing them near key neutral locations such as enemy boss camps or objective points so you have an idea of when they start an objective.
Other than this, mines can be used to blow up minion waves. The main thing is use all charges you have each time you leave a host. If you're out of range to place them somewhere, don't move to do so unless that was your plan anyway.
Clones
Clone before a fight breaks out...just. You mustn't waste any valuable clone time! Pick your target wisely, remember the damage boost is phenomenal, so assassins should always be priority number 1.
Don't be afraid to be bolshie, you don't count as a real hero death, so you can be the initiator, even if an assassin. If this is what's required to get your team to safely engage, so be it, job done so long as it results in a wipeout on the enemy.
If the clone dies, mop up with Hivemind unless you took Evolutionary Link. If you indeed took this ability, cloning support heroes is much more worthwhile as you can protect them greatly, and heal yourself to keep yourself alive. Treat the clone with great care if you've gone with this level 20 talent as it's ridiculously powerful and can provide 80% more effective health for the target if the duration is maximised.
My Little Po...Monstrosity
Protect your beloved, it's easy to let it die, undernourished and underfed...but invest in it, and he'll do his share of work for you and present a great splitpushing risk to the enemy!
Remember, the spawn is instant, this is as important keeping it alive, creating one at the right moment. Spawning it in the middle of an occupied lane is beyond foolish. It needs a little time alone to begin to grow. You should always pop it on an empty lane to start with. As with Symbiote and Locusts, it will soak for you, so you can technically do your three lane soak thing when Monstrosity is active.
If Monstrosity is on the lane, use Symbiote on it rather than minions, because then you can control it to make it avoid being put in bad positions, and also heal it with Regenerative Microbes. If it doesn't need topping up, you can shield minions instead for Networked Carapace bonuses.
Remember, the Monstrosity takes less damage from buildings. It should be tanking them always for your minions. This allows them to stack up alongside Locusts. If your Monstrosity is about to die to a tower, back it off and heal with Regenerative Microbes. Do not let it die unless it can't be helped. Especially if it is stacked.
If you are stacked, do not run away if a hero arrives on your lane, and do not ignore them. You are capable of taking on solo heroes (even 2 if they're both support heroes or heroes who are **** at duelling) when you are stacked and have Symbiote support. Monstrosity AAs can hit pretty hard and between the shields and healing, it isn't easy to take out for non dedicated damage dealers. The one exception is heroes like Diablo who are really tough. Focus on buildings as you'll get more productive outcomes as you're not likely to kill Diablo anyway.
Hivemind
Many of my builds end with Hivemind, because the talent is so ridiculously powerful for any Abathur build that wants to deal damage. Double Stabs? Double Spikes? yes please! Double shields on allied heroes is also useful too.
Hivemind requires the second host to stay near your first target. The second Host must be a hero, but your first can be anything you like. So Hivemind means sometimes it is best to ride that random, confused looking wizard minion near a hero. This means you'll get double damage for a moment so long as the hero remains close. Minion movement is generally more predictable than heroes, so it's easier to maintain the link. Obviously if two heroes are paired, ride on and thus ride them both.
It's important to communicate to your team that they should stay together because you're helping both of them so long as they do. Not many opponents or indeed groups of opponents can stand up to two heroes with Hivemind between them, or indeed a Monstrosity with a Hivemind hero in tow.
Zerging
It's quite easy to put massive pressure on a lane near instantly with Locust Brood, Locust Nest and Monstrosity. If you want to start Zerging you need to be on said lane as Locust Brood and Nest has small deployment ranges.
Once you enter a lane, just wait a bit until Deep Tunnel is closer to being ready. Your Zerg will attract attention very quickly in most cases and you need to be gone when it is confronted by the enemy. Remember, your Zerg will only work if the enemy is an idiot, the idea is you divert their attention when your allies also push, so your team push can't be countered so strongly.
As soon as Deep Tunnel is nearly ready, pop Monstrosity, Stick Nest in the nearest bush and cast Brood on the lane, you should have at least 5 Locusts present now, and a Monstrosity. It's best to start a Zerg within reasonable distance of a building as remember your Locusts can't last forever. Move yourself into a different bush from the Nest once you have summoned everything.
Stay on this lane to provide passive Locusts until you see enemies arriving. At this point get ready to Tunnel. The confusion over which bush you may be in usually gives you enough time to get away. As said they'll likely kill your Zerg, but the point is the distraction worked. In many cases a Zerg will still deal considerable damage to structures even if interrupted quite early due to how quickly the damage manifested. If started near the enemy walls their towers at the least will be going down, if not more.
The real threat you pose is endgame, you can Zerg the enemy core with no problems. Monstrosity is more than capable of tanking a core for long enough for the minions and Locusts to take it out. In this way to can make the enemy team paranoid by constantly giving them a reason to have to back to base, or even stay at base to stop you trying to backdoor them.
Remember, you don't always need to focus on a lane you set up, feel free to ride teamates from far away, your zerg minions will do the work on their own, just be mindful you may need to check on your Monstrosity every so often to make sure it's not being killed when it could be spared. You want the stacks to count!
During a Zerg Monstrosity is usually the first thing targeted (surprise surprise, it's the biggest and most obvious and the tank, so it's good to kill it first). Use this as an opportunity to use it to kite enemy heroes around to keep them away from the Zerg. If they return to the Zerg, begin using the Monstrosity to attack structures elsewhere to punish their decision to leave it alone. The Petmaster build is best at this as the 16 talents grant your Monstrosity mobility tools to kite with, and your powerful Stabs allow you to keep up nice damage on structures whilst moving.
Le ***** and Le Douche
If these heroes present themselves in the early game be prepared to adjust your positioning. These guys have an easy time scouting you out, and both are capable of huge burst, which means you die near instantly without chance to tunnel.
Tactics for avoiding them are covered on some of the maps below, as certain maps make it easier for these two douchebags to get you early game.
Generally, if your keeps are falling, you'll need to backpedal massively into your base if these guys are present. Trust me when I say these guys can make it their match objective to see how many times they can find you in the grass and kill you. As they don't come up on the minimap when they enter your general area it's usually too late when they find you.
A View from the Spire (Specific Map Strategies) Top
In this section, I will look at each of the maps in turn and address map-specific concerns and things to look out for with Abathur, as well as how you should approach each maps unique "objective". Each map will come with various tips on positioning. As I polish this guide I will be adding maps of each battleground, with markers and such.
Tomb of the Spider Queen
Some opening concerns...
Ugh, this map. This map is horrible for a few reasons. Firstly Gem collection is not really our thing, as we are rarely inside the actual lane. unlike coins on Blackheart's Bay, they don't last forever so we can't sneakily grab forgotten about gems left over from combat.
Additionally, entry to the first keeps is not completely impaired by walls, rather there are side entry points away from the main towers. This makes accessing your keep internally quite easy, and whilst no hero is reasonably going to solo a keep until late, late game, it does mean certain heroes (such as Le ***** and Le Douche) will be able to waltz into your base, kill you, and walk out.
Positioning is very tricky on this map because of this, there are always access points to the inner lanes that go around the walls so you need to be extra vigilant and always hide in concealed terrain. If there is a stealth hero on this map don't be afraid to stay back in your inner base. Very early game you should generally survive long enough to tunnel, but Nova can burst like a champ from 7 onwards, so even if you position yourself in the middle of several towers, she can kill you and escape easily.
However...there's hope
This map isn't very long, which means our Locusts can cover a lot of the map without us being too far forward. This negates the risky positioning you need to occupy somewhat.
Heroes are regularly going to be accessing the turn-in points, which are limited in access. Also many entry points to lanes are very thin on this map. This means our mines are very good at giving us map control. If we position on the central lane for our Locusts, we are within range to mine both turn-in points, so consider this as your default lane for the early game.
This map is all about gems, even mercenaries are a lesser priority, and actually in many cases, leaving lanes to go gang a merc camp can put you behind enough in gems to cause the match to become an uphill struggle. I'd only grab mercs when the enemy team is down or off-lane. Bosses or not. They mustn't get free gem reign.
This extends to turn-ins, this is why loading up tons of mines near them is important, it can dissuade people from hanging around to turn in as it's made riskier if you're on low health. Nobody wants to die and lose all their gems! If an enemy trips your mines but still turns in, ping immediately to let your allies know. Or try dropping mines on them just as they start channelling. It should arm and blow up just before they finish, so if you space your charges, so you can keep interrupting them in this way. Eventually the cooldown will catch up though so allies need to help you out here. You should have delayed them enough for this to work though.
Monstrosity Moments
- The enemy team is doing the boss, this puts pressure on their structures straight away, meaning someone will have to hearthstone out, slowing their boss attack down.
- Your web weavers have been summoned. Wherever the enemy team is concentrated least of all. A good thing to try and do here is try and get your allies to force a big push on one lane to encourage the enemies to defend this lane. You then evolve Monstrosity on an empty lane with a Web Weaver. These two paired can wreck structures very quickly. Even if a hero is sent to stop you, the siege damage inflicted will be immense, and for every second they focus the Monstrosity, the Web Weaver is dealing damage, and vice versa.
Blackheart's Bay

Shake Your Booty!
Blackheart's Bay is all about booty, gold that is. It's the most important part of this map, and securing a round of cannonfire contributes significant, guaranteed structure damage. There's no way you can delay or prevent it, unlike Garden Terrors and whatnot, which makes playing to this objective so important.
Early game a lot of people obsession over the vision stone in the centre. Inadvisable in my opinion. If you focus on it for too long, you are out of position to get the first chest spawn on the mid lane. This is more a concern for allies than you, but make sure you let them know they need to be ready. The vision can be secured later, and actually isn't important until true lane roaming begins (which it isn't until after the first chests are down).
Although you can't contribute to chests directly per say, offer your support. Stab allows you to help an ally to pick up a chest more quickly which is always helpful. Place mines in the smoke near the bottom chest entry points and on the bridges near the top chest to make sure allies know when trouble is coming.
Your early game position should be top lane. A lot of people neglect this lane early as they fight over the chests and bot lane usually has a 1 v 1 going on. This allows your Locusts to grab soak on the lane whilst all this is going on.
As the game progresses and fights are more spread out, with death downtimes being larger, do not be afraid to go for chests yourself if you can see the enemy team is occupied. Abathur is unique in that his attack speed scales as he levels (oddly). This does however mean as the game gets further along, he becomes better at opening chests, becoming one of the better heroes to open them as his late game attack speed is pretty fast. Steal the coins and run away quickly! Don't be afraid to Deep Tunnel to grab dropped ally or enemy coins in the event of them being left uncollected, so long as enemies aren't on the way. No sense just handling the coins back to them along with a side order of EXP is there?
As with Tomb of the Spider Queen there are ways to reach behind the fort walls in your earliest bases without going through the front door, so be aware. This is particularly prevalent on the bottom lane. Utilise the plentiful amounts of brush over the map for your positioning. Mines should be generously applied to these brushes, specially those on the bottom lane near the mercenary camps and doubloon camps as you don't want the opponents to get coins without a fight.
As the game progresses use Deep Tunnel to move and secure the vision point when nobody seems concerned. It will grant to helpful sight on the mid lane and prevent your opponents seeing your team's movements if they are moving up to the boss or doing the doubloon camps.
Merc control is quite important on this map due to the coins they give. Make it a part-time job to track the spawn timers for your team and ping when the camps are about to revive. If possible use mines to scout the area near the camp so you know if it's safe in advance.
Monstrosity Moments
- Both teams are fighting near the Pirate. This happens often. Lend your support to the teamfight, but first produce a Monstrosity on the top lane. It's far enough away that it requires a concentrated effort for someone to go up there and deal with it, which takes them away from the Pirate fight.
- A fight near or over the boss, spawn it on the bottom lane and apply the same logic you would to supporting within a pirate fight.
- Enemy is beginning to make a concentrated push on your bases. Spawn a Monstrosity on the furthest lane and try to lure one of them away by creating a scene on the lane. If you really want to apply pressure and it's lategame, start a Zerg on the lane to force some of them to go back.
Garden of Terror
Down at the bottom of the garden...
This is a huge map, and is often the map with the longest game times. This comes with pluses and drawbacks. On the plus side, it means endgame builds come into play, and many Stabathur builds skyrocket in power at 20. However, it does mean the risk of us getting caught and hunted down increases and is made deadlier as lategame heroes can kill us in a matter of seconds. The large size of the map with the generous amounts of brush need to be utilised to maximum effect.
The Objective of this map takes people away from the lanes for various periods to fight over seeds. Advantage to us, as our Locusts will still soak whilst this goes on, resulting in a small exp advantage if the enemy leaves their lanes open. We can and should ride allies within the jungle though as grabbing seeds is important, and an enemy terror will cause significant damage to your buildings. You need to be flexible with this however, as when your allies have the advantage and control of the jungle it's far more effective for you to soak on another empty lane with Symbiote to further increase any exp advantage you have rather than necessarily help them take down the big terror.
Mines need to be placed in all entry points to nearby lanes from the jungle. If you have spares, there are several brushes within the jungle that should be mined as well so you can detect enemy movements within your nearest jungle patch.
If you're taking Monstrosity, you can use it to soften up Merc camps and shamblers for your team prior to their arrival, making their out of lane time reduced. Just be mindful the Monstrosity cannot capture merc camps or pick up seeds, so you need to ping allies to let them know that they need to fly by to pick up. You need to have some stacks on your Monstrosity for this to work as it won't be able to solo merc camps effectively without some nice base health and damage.
If the enemy grabs a Garden Terror, it is quite effective for you to try and start pushing on a neglected and empty lane. Abathur is not terribly effective at assisting in taking down Garden Terrors without a concentrated focus on doing so, and piling pressure on a lane can distract the attention of the opponents, meaning they don't support their Terror, making it vulnerable to be attacked by your allies. The Terror alone isn't actually that dangerous when it has no backup. Bear in mind your ability to force sieges early game will be less effective and only really starts from level 10.
Monstrosity Moments
- Enemy Terror is approaching your base, spawn Monstrosity on empty lane to force pressure on opponent to respond, taking support away from their terror.
- Consider using Monstrosity on lane supported by your Terror when pushing. A good Terror player will kite opponents and run around a lot, which means opponents either follow it off-lane, leaving you to wreck buildings, or they let the Terror get a head start on the next lane.
- Whenever a push is occurring on your lane with all of the enemy team present, spawn Monstrosity in furthest empty lane to force pressure on them to respond. The map is large, so travel time requires a hearthstone response.
Dragon Shire
Go Go Dragon Rangers!
This is a small map with some nice, tight objective points which makes our mines rather useful and our Locusts able to get soak across much of a lane. This is a map where neglecting objectives in favour of soak isn't really advised, your passive Locust soaks will be enough in many cases.
Early game you should be going on one of the side lanes, mid is typically solo (which you can't feasibly do early game without a good host). Support your ally and lane mines around the brush to keep them safe. Prioritise shielding them.
Once the shrines spawn, it's on! Burrow to the middle lane to grab the soak there as most hero movement will now be to the sides. This way you'll get a little exp advantage if they leave lanes empty. Once there, you need to be riding your allies at the shrines to help them capture the shrine. To this end, use Stab to scout the brush near the shrines, enemies frequently wait inside to burst down approaching targets. This way you can prevent the jump and counter-engage. Keep eyeing both shrines and alternative support between them where it's needed most.
Also remember, if a Shrine is lost and the enemy takes it upon themselves to storm the one you hold with most if not all of their team, you can Burrow to the distant shrine to take it back. Don't stick around, it's enough to force them to come back for it. This wastes their time.
Additionally, if you're feeling brave and daring, you can burrow to the central statue to take it pretty much as soon as it is ready to be taken. This makes you ideal at being a Dragon Controller. Bear in mind you will be a sitting duck when it ends, so be mindful of your timer and consider repositioning somewhere safer when you have a few seconds left so you can be ready to burrow away in an unexposed position.
As with other maps, when enemy objectives are active it is an ideal time to start counter-pressure on one of their lanes to make gains and exp whilst your team tries to address the threat of the Dragon. Support your team as they do this, your Monstrosity/Zerg can take care of itself well enough to do what it needs to. If you are a Stabathur build your ability to generate this pressure quickly is impaired outside of spending much time focusing on minion hosts, so you're best suited aggressively supporting allies to take down the dragon quickly. If the Dragon is being supported, Stabathur should focus on harassing the heroes supporting it. You can use Clone to do this effectively. Like the Terror, the Dragon is a bit of a sitting duck without support, and will die quickly if confronted by multiple heroes.
Monstrosity Moments
- Enemy Dragon active near your base with enemy team support. Monstrosity on distant lane as typical counter-pressure tactics.
- Whenever allies make a concentrated push, split push to generate catch-22 pressure.
- When fighting at shrines is going on, soak one your locusts, spawn Monstrosity here too, but focus on riding near the shrines. This means opponents have to address the Monstrosity or they risk siege damage, which leaves their shrine game understaffed slightly.
Haunted Mines

Sticks and stones...
Another small map, and a 2 lane map! This means Abathur can effectively man both lanes without his allies help thanks to Locusts and Symbiote. This double soak comes in handy when the mines open, and we'll use this to our advantage during the game...
The golems are very important in this game, don't get me wrong. However! It is unlikely the first golems will win the game. For this reason we should actually stay back from the mines with our support first round, and instead focus on soaking both lanes when they are empty. We want to generate a level advantage so our team can push effectively without the golems. This kind of pressure means the opposing team entering the mines leaves them open to being sieged heavily whenever they do so, even if it's by one hero. Mapathur is brilliant on this map for this very reason. Monstrosity is well suited to causing trouble when the enemies are in the mines, and as the lanes aren't large, it doesn't need to go too far to be on the opposing doorstep. This allows our allies to focus on the skulls.
Your support in mines should be more full-time once you have Monstrosity under your belt. Spike Burst can help clear waves very quickly, and your general benefits for your host means fights in the mines will be more favourable for your team. You don't need to babysit your Monstrosity unless the enemy comes for it. Keep an eye on the minimap, if it is in danger consider making it flee. Depending on how dogged your opponent is you may be able to start on the opposite lane, it depends whether they give up the chase.
Early game, if you have other siege suitable heroes, position on their lane and try to go for as much early building damage as possible. There's plenty of brush on this map, but avoid using any brush around the middle area in the period after skulls are fully collected as frequently mercs are done next.
This map is very snowball in the first half. You may get hate for not helping in mines early, but actually you don't need to rely on golems to make good pushes on this map, and lots of people don't play this way enough. The enemy can't afford to send people into the mines in a secure fashion if their walls are at risk of falling. This leaves them open for 1-2 of your heroes to collect majority bones and then spawn a powerful golem to finish the job. This game is a constant balancing act of mine and lane focus, and no team can do both 100%. So if the enemy is enjoying a good mine game, you need to generate a very real threat for them between golems so they can't just up and leave the base.
Monstrosity Moments
- Everyone is in the mines (more or less) spawn Monstrosity and let it force their attention elsewhere, whilst giving you soak.
- If you're 5-man pushing one lane, have Monstrosity start on the other to generate split push threat.
- DO NOT spawn or focus on your Monstrosity if enemy golems are alive. Enemy golem needs to go down as priority. only do this if the opposing golem is weaker than yours, but has the support of the enemy team. You can buddy up with your own golem to deal nasty siege damage.
Cursed Hollow

This map is huge. Locust problems for us, but great news for split pushing! Mapathur again comes into great shape for this map. Even the trolly Precious Pet path build has fun here as a alrge map makes the ability to burrow around invaluable.
Focus on soak, soak soak early game. Tributes attract a lot of attention, ignore the first one entirely and focus on soaking. Like the Mines, we want to generate an exp advantage so we can cause siege threat earlier than the opponent irrespective of the curse. Places mines in the grass near the tribute if it's spawning nearby though.
Even though you can ignore the first tribute, do not let the opponents get 3 if you can help it. Your allies should always challenge tributes, but your services are far better spent hogging exp trying to get an early level 10. Monstrosity means your siege game is now brilliant, and split pushing too. Taking Clone with Stabathur means ability to threaten Tributes and boss attempts skyrockets.
Oh yes, this map as two bosses. Eeek. If you can get both, that's some epic siege right there. Bosses present as a good moment to focus on starting a Zerg as they take a while to capture, and the opponents will likely deal with your Zerg as priority, leaving their Golem alone, and vulnerable. The golem bosses on this map are deadly yes, but if left to walk without hero backup they go down quickly when attacked as a group. Keep mines near golems are game reaches post 10 point, to have vision of when they start bosses. Wiping the enemy team to capture a boss they started can be a total gamebreaker, and the bosses are more involved in victory for this map than the curse objective is a majority of the time.
Go on whichever lane you like first, just remember you aim to soak early when people leave lanes. Occupy empty lanes when this occurs and ignore the first tribute completely.
The jungle is large on this map, so mine placement is going to be important to help us spot ganks. Additionally, entry to the first keep isn't fully walled, and there are jungle access routes. Be aware of this, else you can be ganked in your base. frequently siege minions enter from this point on the lane so be aware.
Monstrosity Moments
- You have the curse! Spawn on empty lane to present split push threat. Monstrosity will grow very quickly during curse due to instant minion deaths. This is an ideal time to set one up.
- Regular split-push pressure builder - ie allies focusing one lane, you Zerg another with Monstrosity.
- You know, or are fairly sure enemy team is starting boss. Begin Monstrosity to force some to abandon their boss to deal with Monstrosity, allowing team better time to kill the captured boss merc.
Sky Temple
Great lasers of light!
Moderately sized map. Static objectives and frequent brushes present several good spots for us to lay mines, particularly at entry point to the temples.
Temples demand a certain amount of attention, especially early game as the minions are tough! Always position yourself on empty lanes when temples spawn so you can soak whilst the action is going down. Early game your siege push is weak so your best bet is to focus support by riding allies at temples. As the game progresses and your siege improves via talents (be it Monstro or your awesome stab power) you can consider using these opportunities to split push to take focus away from the temples for your enemy. Remember, you are Abathur, you do not see small glories at temples or shrines, you always see the bigger picture of the map, and the end game!
Lay mines generously at the top and bottom temple entry points that are covered by brush. This allows you to wound entering enemy heroes to sometimes kill those who try and run outside. Kill stragglers by using minions on the nearby lane as hosts to Stab the fleeing foes. Most enemies think they are safe because they've escaped enemy heroes, think again! This stops them using healing fountains and coming back to the temple for more.
This is one map where you can't use sneaky tunnels to capture objectives, because these objectives are guarded by minions, who will kill you. Only if the temple is clear can you do this, but it's very rare a temple is clear, and uncontested.
Monstrosity Moments
- Temple fights are going down and lanes are being neglected.
- Contests over the boss, Monstro on top lane.
- Typical split push utilisation during ally pushes.
The Eternal Conflict

Angels and Demons!
The newest battleground is a two-lane battle royale with a very centralised objective. The lanes are very short and wide, and there's plenty of hiding places with concealed territory. WHat does this mean for our Zergy schemes?
Well, two lanes means our exp soak is less useful, but short lanes works well enough for Locust viability. This lane has lots of hiding places. However given the short length of the map, staying far back in base isn't so punishing. You don't have the comfort of being able to plant yourself in concealed territory for too long on this map outside of the base because of how small the map is.
About 2-3 minutes in the centre lights up and the Immortals will begin to fight (yours will be blue, the opposing one red, either angel or demon). Here you can either DPS rush the enemy Immortal or defend your own by killing the opposing team. whichever Immortal survives the battle, will spawn on the strongest opposing lane with a damage shield equal to the surviving health it had. They're not as durable as golems until much later in the game, but they are strong enough to cause some real structure damage and they mustn't be ignored as they scale very well into the game and draw enemy fire.
The objectives present us with a cool opening as generally most teams can't afford to have a team member AWOL on the battlefield as you want your Immortal as healthy as possible. We can use this fray to get a Monstrosity up and split push a lane. Don't forget to support allies with Symbiote in the battle though. Generally speaking prioritise attacking enemy heroes over the Immortal (unless none are nearby) as your DPS is more bursty and suited to spooking/killing heroes than whittling the Immortal down.
Also; if you win the DPS race (shweet!) you can pop Monstrosity on the opposite lane to your Immortal for some nice split-push threat.
The mercs on this map are different from the typical maps. Fallen Shaman are actually really tough and if they're coming up a lane they should be killed asap else they will keep ressing their hounds, and they will push a lane far if left alone.
The goatmen aren't as tough as siege giants but there are more of them. They're actually easier to deal with than giants for us as they don't wreck our Monstrosity so hard even without stacks.
Overall get a feel for this map with other heroes before you Ab it up. It's a map that is pretty good for us in many ways, but dangerous in others. It can snowball very quickly with the right plays, and Mapathur (or a Monstro Stabathur build) will be good picks here.
Monstrosity Moments
- Your Immortal is pushing a lane, spawn Monstro on the opposite lane.
- During the Immortal fight, spawn Monstro to divert enemy attention away from the battle or punish them with siege damage.
And Let's Meet Your Host... A-L (Symbiote Host and Ultimate Evolution Guide) Top
In this section I will go over each potential host, looking at what benefits you can offer them, general behaviours and give a brief overview of their abilities for Ultimate Evolution use. The best way to of course get acquainted with each hero is to play them directly! You have all basic abilities and traits, and remember, you can mount!
|
|
|

|
|
Anub'arak: Anub'arak is a warrior hero. He enjoys collecting insect specimens and long walks in frozen undead wastelands.
Anub'arak is a great host. He benefits from the fine blend of offence and defence to offer as he is pretty balanced in this way himself. The main thing you offer him is some burst, which he sorely lacks. He'll he getting in close to opponents, so Spike Burst gets some good action here. He benefits most from the Balanced and Defensive Stabathur builds. Keep him shielded often, as he lacks the durability of other warriors. Fire off Spike Burst and the occasional Stab before you leave to reapply shields.
|
Ultimate Evolution: Anub'arak isn't a terrible clone choice, but his heroic is often key to how he plays and without he can be less effective than other heroes. You still get the benefits of being able to spawn scarabs though, and a Hive Master if he's taken it. He won't be as potentially durable as he can be without active talents like Hardened Shield, so utilise his aggressive qualities in his CC and initiation.
 Scarab Host
:Trait: You spawn beetles with every ability cast. Spam those skills! Your Beetles do not despawn if the clone dies.
 Impale
:Q: Send a line of spikes to stun targets for one second. Use this to CC as much of the enemy team as possible and to peel assassins from your squishies.
 Harden Carapace
:W: Shield yourself, pop this as often as you can to extend your durability in combat.
 Burrow Charge
:E: Tunnel to location, reactive to surface and stun enemies upon surfacing. Good initiate, which you can take advantage of not being a "true" hero. You are not concerned too much with using it to escape, so use it aggressively.
|
|
|

|
|
Arthas: Arthas is a warrior hero. He's the CEO of a worldwide "non-organic" corperation, whatever that means. He enjoys popsicles, anything frosty really.
Arthas is a good host as well. He's tough, has good melee presence and like Anub'arak, loves the burst you offer. He's tougher than Anub'arak, so you can focus on getting those Stabs out before you leave to reapply shields. He benefits most from the Balanced and Defensive Stabathur builds. You offer him consistent ranged poke, so utilise this to harass ranged attackers who may try and poke him in lane.
|
Ultimate Evolution: Arthas offers more consistent damage than Anub'arak thanks to Frozen Tempest. We don't need to worry too much about mana as a clone, so activate this straight away. Use Death coil aggressively to get the 20% damage boost and don't forget to utilise your trait. It will hurt quite a bit thanks to the damage bonuses. Get in thick of the enemies and slow them for your team!
 Frostmourne Hungers
:Trait: Your next attack is readied, strikes twice as hard and restores mana. Given our damage bonuses, this is pretty nice. Use it whenever you can after AAing.
 Death Coil
:Q: Ranged nuke or heal. The nuke benefits from our 20% buff, so we should use it to nuke whenever we can (talents may well give us the heal anyway). Focus it on frailer targets within range unless you can't follow up.
 Howling Blast
:W: A skillshot that roots the target hit. Use it to trap fleeing enemies and gapclose for Frozen Tempest. Talents usually taken to make it root many enemies, so take aim and fire!
 Frozen Tempest
:E: Slowing aura that deals damage. Keep it toggled on, our mana is not a huge concern as we are temporary anyway. It benefits from the damage buff for nice aoe damage. We want to be slowing as many enemies as possible at all times, this also keeps us in range for our melee attacks and trait.
|
|
|

|
|
Azmodan: Azmodan is a chunky specialist hero who is good at sieging. He likes holidays to warm places, and going caving. His ideal weekend is a combination of both.
Azmodan enjoys the protection Abathur can offer him. His damage isn't too bad if he focuses on a single target, his problem is can he stay alive long enough? We should thus make shields a priority with occasional nukes if he's in combat. He benefits most from the Balanced and Defensive Builds of Stabathur. Adrenaline boost is a great boon for him, allowing him to stay out of range whilst using March of Sin.
|
Ultimate Evolution: Azmodan is a pretty good pick if you want to wreck a lane. His has lots of good abilities which are buffed with our +20%. Although we have no ultimate, it's not a huge issue as most of our damage comes from our basic abilities anyway. Spawn demons regularly and use your trait upon them quickly to create pressure.
General of Hell:Trait: Spawn a demon at the minion or demon, buffing their attack and health and doing attacks of its own. You should not hesitate to use this straight away upon your demons.
 Globe of Annihilation
:Q: Long range nuke of doom. Use it to wreck building or snipe heroes. Very good range.
 Summon Demon Warrior
:W: Summon these asap, so you can summon a total of 4 during your clone time.
 All Shall Burn
:E: Use this whenever you are not using another ability, it channels for intense damage which ramps up. This will be huge DPS with your damage buff. Focus it on squishies.
|
|
|

|
|
Brightwing: This funky fairy dragon is a support hero. She talks a bit too much about loving the taste of flesh, possibly because she's forever tripping on those yummy Ashenvale mushrooms.
Brightwing is a balanced choice for a host. She's pretty mobile, able to heal reasonably well, she does benefit from your damage greatly. She'd be a great candidate for a full-on build, but her auto attacks are pants so instead Balanced is the best way to support her as she needs the offensive buffs of this build. Poke opponents regularly with Stab, thise in conjunction with her Q allows you to zone enemies quite well.
|
Ultimate Evolution: Brightwing isn't the best clone of choice, but she can offer some good additional CC and supporting traits to your team. Your Q will hit pretty hard on those who stand in the middle of it though.
 Phase Shift
:Z: Brightwing does not have a mount, but can teleport to any hero she has vision of. You can use this once per clone, don't be afraid to do so to support a distant ally if they need it.
 Soothing Mist
:Trait: Every 5 seconds you heal nearby allies. This will stack with the original Brightwing's heals, meaning the two of you will be giving some pretty nice passive healing.
 Arcane Flare
:Q: Shoot a ball of energy at target area. Enemies in innermost area take moderate damage, those on outside take light damage. Use this on ranged stationary targets to try and force them to move, losing AA time or focus.
 Polymorph
:W: Transform target into critter and deal damage. Pretty cool skill, use towards start of Clone so you can unleash 2 casts before clone ends. Prioritise assassins.
 Pixie Dust
:E: Speed buff and block buff to target. Can cast upon yourself. Cast this on assassins or warriors to help them survive and engage.
|
|
|

|
|
Chen: Chen is a tough warrior hero with good mobility and exceptional single target tanking potential. He likes pretty much any form of alcohol and keeps bonsai trees as a hobby.
Chen is a good host, he's tough as they come, but lacks consistent burst so we give him a big helping hand. His trait allows him to shield huge amounts of damage, this means we can heal him really well with Regenerative Microbes, so save shielding for when he drinks! This will also help him re-engage the enemy. You can also use his shield time to Stab and Spike Burst so communicate with any Chens, as being able to attack during his trait channel is ridiculously effective. balanced build is best for supporting Chen. Defensive would be overkill, and he needs the damage more imho, but the defensive build will still be effective.
|
Ultimate Evolution: Chen isn't the best clone if honest. He lacks the "wow" factor in his damage, and as he is required to channel to tank effectively, we lose ability and AA time when doing this. Still, if you're going to clone him, best learn how he works! Your job will be engaging and getting into the opponent's faces.
 Fortifying Brew
:Trait: Channel massive shields over the duration and restore Brew. Brew is your resource which you have to worry about as unlike mana, it won't last your entire clone duration. You use this after an engage rotation, or when you're being focused (but CC has been used, as CC will interrupt this channel).
 Flying Kick
:Q: Leap to enemy and deal damage. Use this first to engage.
 Keg Smash
:W: Slow enemies in target area and drench them in brew. Use this after Q to slow targets for follow ups.
 Breath of Fire
:E: Deal cone damage to all enemies and additional DoT on drenched targets. Use this after W. Then use your trait.
|
|
|

|
|
Diablo: Diablo is an aggressive warrior. He's tough, has lots of CC. He likes soul music, spicy food and scary movies.
Diablo is a good host, like Chen he's tough but lacks reliable damage so you offer him a solution to his problems. Diablo can take a lot of hits so he won't let you down. He's good at keeping targets close so landing Stabs shouldn't be hard. Keep up the shields, despite his toughness the more effective health the better. Use Spike Burst to help him farm creeps for his trait. Balanced build is best for Diablo. Defensive could work, but he really misses the additional damage.
|
Ultimate Evolution: Diablo is a poor choice of clone. His trait does not work (unless your target took Siphon the Dead trait), his damage is low outside of ultimates and his AA dps isn't amazing. If you clone him, maximise on his CC and engage qualities and use him to be the tank.
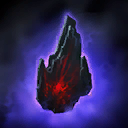 Black Soulstone
:Trait: Would usually revive you in 5 seconds upon collecting 100/60 souls. Doesn't work for us. We do retain the passive HP bonus though, so that's something. If our target took Siphon the Dead, you can use this to heal 15% of your HP over 3 seconds.
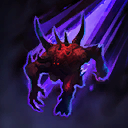 Shadow Charge
:Q: Dash to target, knock them back, stunning them briefly. If they hit a wall, they are stunned for longer. Use to peel assassins of your team, or to displace a target making them an easy gib. Can be used to engage.
 Fire Stomp
:W: Sends flames in all directions dealing aoe damage. Spam this whenever possible during the clone.
 Overpower
:E: Lift target up and behind you, slamming them down to stun them briefly. Good displacement tool, ideal for peeling or displacing targets. Some Diablo builds will make this have 2 charges, so keep an eye on this.
|
|
|

|
|
E.T.C: ETC is a beefy warrior hero with good CC and sustain. Despite what you may think, ETC loves listening to softer genres and is chairmen of the Katy Perry fanclub in Azeroth.
ETC is a good host for the same reasons as Diablo and Chen. Good toughness, awkward damage. With the offensive kick, ETC is a royal pain thanks to his ridiculous toughness and sustain already. The two of you can make some great siege together. Balanced build is the way forward.
|
Ultimate Evolution: ETC is a poor clone choice, like Diablo if you've cloned him, focus on engages and tanking. Your damage is pretty pants outside of AAs empowered by your trait (with talents that is) but you can't rely on this being the case. Slide into enemies, displace them and make the engages nobody else dares to.
 Rockstar
:Trait: Your ability casts increase attack speed for nearby allies. Spam those skills!
 Powerslide
:Q: Dash in line to target area, stunning foes along the way and dealing damage. Good initiate tool and CC tool. Follow up with W for some good displacement.
 Face Melt
:W: Knocks enemies back and deals damage. Cast this after Powersliding to push enemies into your team.
 Guitar Solo
:E: Heals you over 4 seconds (8 if talented). This is cheap, spam so long as you are taking damage during clone.
|
|
|

|
|
Falstad: Falstad is a ranged assassin capable of good burst or consistent damage depending on his build. His greatest secret? He's allergic to bird droppings. His life is tough as a result, hence why he's grouchy.
Falstad is a mobile hero with good range. You can supplement his poke with your Stabs, but quite a lot of the time he'll be poking the enemy outside of your range unless he's trying to flee. Falstad enjoys your defensive buffs more than your offensive ones if he is a caster build (burst). If he is building for AAs, a more aggressive build can work as he'll be in closer range, and you can gib enemies quickly. Balanced, Full-on and Defensive can all work.
|
Ultimate Evolution: Falstad is a good choice for cloning, especially if he is an AA build. His abilities and attacks hit hard, and he is mobile so he can stay out of trouble. He should be one of your priority picks if he is an AA build Falstad. The burst build uses heroic in rotation, which we don't have sadly.
 Tailwind
:Trait: We move more quickly if we haven't been attacked in a while, makes engaging with our +10% movement speed a literal breeze, same can be said for fleeing.
 Hammerang
:Q: Throws a hammer that returns to you, dealing damage and slowing with each hit. Some builds may have BOOM-erang, so keep eye on Q after use to see whether you can re-active for additional aoe damage. AA build sometimes take a talent where AA damage is buffed during hammer flight, so this is when you focus hard on enemy.
 Lightning Rod
:W: Blast enemy and so long as you remain within range blasts them continually over duration. Decent range, good for killing runners. Activate whenever a target is within range and try to keep them in it!
 Barrel Roll
:E: Dash and shield. Use this to get away from enemy or to keep target in Lightning Rod/AA range.
|
|
|

|
|
Gazlowe: Gazlowe is a specialist hero who is a zoning expert. Gazlowe is obsessed with Lego, and thinks of it as a superior material to any metal.
Gazlowe is an okayish host. He lacks escapes and can be caught out of position quite easily. We can't grant him mobility until later in the game, so there is a risk he can die quite readily if focused. Supporting him in teamfights in general better than doing it in lanes, as then you can shield and give him a speed boost. In lane he is a capable soloist and clever Gazlowe players will ward their lane with turrets so they see incoming ganks and avoid them. This said, he can appreciate your Stab damage during fights, as Gazlowe's damage is entirely location based, be it turrets, bombs or the laser. Gazlowe works best with the balanced build.
|
Ultimate Evolution: Gazlowe is only a good clone if you want to absolutely demolish the enemy base. Your AA bonus will stack with Robo Goblin, so you will liquidise buildings in moments. Your turrets and bombs are stronger, so use them regularly. Trouble is, location based so enemies can dodge it and you lack the heroic ability to draw them into your damage trap.
Salvager:Trait: only useful over a longer period, so for us, not great.
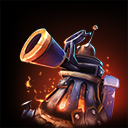 Rock-It! Turret
:Q: Spam these babies, you have no limit to how many you can deploy and if you do them early, you'll get a second lot out before clone ends. With the original Gazlowe's as well, you can section off a lane from the enemies quite easily.
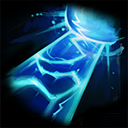 Deth Lazor
:W: Charge up a beam to deal damage to all enemies in the line. Slow, easyish to avoid. Use this on buildings as the bonus damage makes it hit like a truck on them. You could try sniping the enemy team with it from the distance for the same effects though.
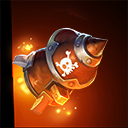 Xplodium Charge
:E: Drops a bomb that detonates after 2.5 seconds. Enemies hit take some nice damage and are stunned for 2 seconds. Use in tandem with your original to zone the enemies or punish them with nice stuns.
|
|
|

|
|
Illidan: Illidan is a mobile assassin with a cautious early game, but awesome late game. Illidan is seriously compulsive about using planners and calendars. Being unprepared is his worst nightmare.
Illidan is a fantastic host and we compliment eachother very well. We give him some early game durability thanks to our shield and can dissuade enemies with additional stab. Late game offering him either shields through Evolutionary Link, a clone or even simply the
Adrenal Overload Steroid is enough. All additional damage only makes him gib harder. Illidan can benefit from Balanced, Full-on or Defensive Builds.
|
|
|
|
|
|
Abathur Says: "Betrayer unique specimen. Potential: vast. Hosting capacity: agreeable. Viable clone material. Abathur recognise Betrayer sequence."
|
Ultimate Evolution: Illidan is a great clone as well. He has fantastic damage rolled into his abilities and his AA DPS is good. The additional movement speed is great for helping us to stick to enemies. We do lack the greatness that are his heroics (both are really good) but we can still kick some backside.
 Betrayer's Thirst
:Trait: Our AAs heal us and lower cooldowns. Some Illidan take Thrill of Battle, where you can activate this to double the cooldown reduction effect for a small duration. Basically, we want to be AAing as much as possible.
 Dive
Dive:Q: Dash to target, leap over them. This causes immediate bodyblock. Use this to gapclose with the enemy.
 Sweeping Strike
:W: Dash through area, damaging all enemies in the way. Follow up to Q after engaging, only use when opponent is travelling in direction you W in else you will lose melee range with them.
 Evasion
:E: Activate to halt basic attack damage taken. Use within first 5 seconds and you'll be able to use it twice during clone duration.
|
|
|

|
|
Jaina: Jaina is a ranged mage-type assassin. Like her once-beloved Arthas, she has a fondness for popsicles and her favourite movie is Frozen.
Jaina is a burst damage machine. As a host, she may not be in range for your Stab a lot of the time due to the long range on her Frostbolt. You can still assist her with shields to help her gain advantage in poke exchanges and the additional mobility from Adrenaline Boost really helps her out. Of course when within range, help her out with the additional dps from your skills, the two of you can turn targets into mincemeat pretty quickly. Jaina benefits most from Balanced or Defensive builds.
|
Ultimate Evolution: Jaina is a pretty good hero to clone. Even outside of her heroics she can offer some very good burst damage. When fighting alongside another Jaina you provide exceptional aoe slow and damage. The additional mobility is pretty helpful for keeping out of trouble too. Just be mindful, certain abilities have longer cooldowns so use them as soon as possible to get two casts out.
 Frostbite
:Trait: Our abilities slow the enemy and subsequent ability casts on chilled enemies boost the damage of abilities by 50% (65% if talented, which is typical). Very nice for burst combos.
 Frostbolt
:Q: Short cooldown skillshot poke which snares. Has great range. Use this to apply chill to targets to set them up for heavy blizzard damage.
 Blizzard
:W: Heavy damage in an area for two waves. Cast this to cut off enemy escapes or punish grouping up. You want to cast this after Cone for maximum Frostbite and exposure damage, it hits very hard when used in this way. Blizzard has a long cooldown so cast it within the first 5 secs to get two casts out.
 Cone of Cold
:E: Chills enemies in a cone. Helpful for escapes. Many Jaina take Northern Exposure, which makes Cone of Cold cause enemies to take 25% more damage for 2 seconds. As this is the case, this should be your opening spell for any combo, although Frostbolt's cooldown is so small it isn't too bad if you use Frostbolt to gapclose first. A good combo is:
Frostbolt -> Cone of Cold -> Blizzard -> Frostbolt
|
|
|

|
|
Johanna: Johanna is a very bulky warrior hero. She struggles to reconcile her love of Bible study with Orange is the New Black.
Johanna is a good host. She lacks consistent damage but is as beefy as they come. She's good at getting in the face of the enemy so our damage abilities have the means to contribute easily to the damage. Additional shielding and healing only makes her harder to take out. Johanna works best with a Balanced build, she needs the offensive power, but
Adrenal Overload is kinda wasted on her, although
Envenomed Spikes and
Pressurized Glands would work. Hybrid build potential opens!
|
Ultimate Evolution: Johanna is a so-so clone. She has good area influence and presence in the form of her Q and W. Her trait makes it quite easy for her to engage safely and her E reduces the damage dealt by AA reliant heroes in an aoe. So if you have a Johanna clone, be aggressive, get in the thick of melee and start disrupting the enemy, the 10% movement boost will help you do this.
 Iron Skin
:Trait: Our trait gives us a nice shield and makes us immune to CC for the duration. Use it to gapclose as you lack your heroics to do it for you. You only get one use per clone cast, make it count!
 Punish
:Q: Damage and slow enemies in area nearby. The slow is potent at first, the cooldown is low enough that you can get three casts if you use it nearly right away during Clone. Once in melee, start spamming this so long as targets are in range.
 Condemn
:W: Draw in enemies after a delay. You get two casts per Clone. Once in melee range, after your first Punish use this to retain the enemy within range, which you can follow up with another Punish. Alternatively use it to set up wombo-combos with the other Johanna if you team has potent aoe spells (Cast yours after hers).
 Shield Glare
:E: Blind enemies in cone making them miss attacks. Use whilst advancing to reduce damage taken. Good to use after enemy displays any use of steroids that enhance attack damage such as Frostmourne Hungers for example. Use in conjunction with Punish to peel assassins off your softer allies.
|
|
|

|
|
Kael'thas: Kael is a ranged mage-type assassin. He has a fondness for fried chicken, but is disliked for his constant reminding of other people's lateness.
Kael'thas is a very powerful hero in terms of damage. He's vulnerable throughout the game, especially early. His mobility is pants, and he can't use his E to combo and escape at the same time. He really appreciates your shielding to help him poke, and
Stab damage really helps him early game. Later in the game he'll mainly need your mobility from
Adrenaline Boost as his own damage improves vastly as he levels. Balanced and Defensive Builds for Kael.
|
Ultimate Evolution: Kael'thas is a cool clone pick. He has massive aoe damage potential, and two Kael can easily wipe the enemy team under the right circumstances. The mobility boost helps you stay light on your feet. You need to be careful, you die very quickly. Make sure you unleash hell on the enemy before you go.
 Verdant Spheres
:Trait: This empowers your next ability cast making it stronger.
 Flamestrike
 becomes much larger and deals more damage.
 Living Bomb
 will render no cooldown and mana cost and
 Gravity Lapse
 will hit up to 3 targets. In the interests of maximum damage, Living Bomb is the way to go for the lategame.
Flamestrike:Q: After a brief delay, you blow up the target area dealing good damage. Tempting to use this with your trait, which can be advisable prior to level 16. From level 16 many Kael take
 Ignite
, which makes Flamestrike apply Living Bomb. So we should use Verdant Spheres for Bomb always after 16.
Living Bomb:W: Place a short DoT on the target which then explodes dealing aoe damage. Initially the explosion is rather pitiful, from 7 many Kael take Fission Bomb which makes the explosion pretty nice. Casting Bomb on a target already Bombed causes the first one to explode instantly, and applies the DoT. Seeing as how Flamestrike applies Living Bomb from level 16 with Ignite, our best damage combo is:
Gravity Lapse -> Flamestrike -> Trait -> (wait till Flamestrike connects) Living Bomb -> Living Bomb.
This will deal large burst to one target and additionally hit all nearby targets for effectively the same damage.
Gravity Lapse:E: Shoot a projectile that stuns the first target hit for 1.5 seconds. Use this to guarantee Flamestrike hits to set up your combo. Any target in the way will block it, so aim wisely. It's hard to land your combo without this.
|
|
|

|
|
Kerrigan: Kerrigan! Our Queen! Kerrigan is a melee assassin with some great burst and decent survivability. She claims to be "kinda into" James Raynor, but we've seen the way she pats our head within the Evolution Chamber, just saying...
|
|
|
|
|
Abathur Says: "Queen of Blades. To symbiotically cooperate: is honour. Queen supreme host. Abathur unworthy."
|
Kerrigan needs to be close to be as deadly as possible. She is a great host for us, combining decent damage with pretty good toughness for an assassin, so long as she remains aggressive. Your job is to allow her to do that with shields and
Stab pressure. If you allow Kerrigan to keep picking the opponent she becomes pretty difficult to take out. Give her all the openings she needs and poke for her during lane. Keep mines nearby in brush, Kerrigan has poor escape, she needs your scouting to help her out. Kerrigan benefits from Balanced, Full-on and Defensive builds.
|
Ultimate Evolution: Kerrigan is a cool clone choice. Although her heroics are BEASTLY she still has good damage potential outside of them. Difficulty is working out her build, some focus on melee and shields (which means they're pretty tough) others focus on playing as a caster. These builds have varying levels of comfortability being in melee for too long. Generally speaking, you're a clone, go crazy! Be aggressive. You'll waste the duration if you hang back. Make the plays so Kerrigan 1.0 can attack with confidence.
 Assimilation
:Trait: Our attacks and abilities give us a shield equal to 10% (20% for hero damage) of damage dealt. Makes us tough so long as we be aggressive, so be aggressive! The more targets we hit with our combo, the bigger this shield is.
 Ravage
:Q: Jump to target to deal damage. This is your gapcloser. Good to use at the start, and end of fights.
 Impaling Blades
:W: A long delay targeted AOE which then deals huge damage and stuns targets. This is what we need to land to ruin the enemy, so our combo relies on it, which i'll explain under the E skill.
 Primal Grasp
:E: Drag enemies inwards and inflict damage. Another gapcloser but mainly for our lovely combo. We use this to drag enemies into our W so they are definitely hit by it. We accomplish this by casting W at the area in front of us and then E immediately after. Any enemies caught by E will be dragged into the AOE of W and be stunned. This combo HURTS especially if you Ravage someone too. Use the stun to begin moving ahead of your opponent and AAing them. The further your opponent, the further you will need to place W ahead of you. You should play Kerrigan to get a feel for her range (plus she's awesome fun).
|
|
|

|
|
Li Li: Li Li is a positional support hero, good at healing consistently and supporting her lane. She acts really cute, and full of wanderlust. In truth she most enjoys slobbing out on her sofa watching grotesque forensic shows.
Li Li is pretty tough for a support thanks to her trait and her low cooldown heals. She doesn't need much protection. You do offer her the ability to actually deal damage though (her damage is beyond poor). It's very rare Li Li is alone on a lane, so you may not need to support her at all in truth. During teamfights though if she's being chased, help her out with shields and start attacking her pursuers, she can keep herself alive whilst you kill them. Li Li only benefits from a Balanced Build as she needs the offence boost, but is rarely in
Spike Burst range for the talents that boost it to be useful. Also her AA damage is so poor
Adrenal Overload is a waste.
|
Ultimate Evolution: Li Li is a poor clone choice. I'd advise against it completely. At least Brightwing and Uther bring CC and passable damage. If you do accidentally clone Li Li, you may as well take advantage of her low cooldown heals. All of her abilities can pretty much be spammed so long as a target is within range. Just bear in mind two Li Li is not going to turn a fight around unless other members of your team are there to actually do some damage.
 Fast Feet
:Trait: When struck, we move more quickly for a brief period. Handy to keep us out of trouble, more so with our mobility boost. We'll be nearly impossible to catch at least.
 Healing Brew
:Q: The only reason you'd really want to clone is this. Cheap, low cooldown auto target heal. Spam it like your life depends on it.
 Cloud Serpent
:W: Place a serpent on target that auto attacks for it's own damage. It's additional damage so use it during the Clone duration asap. It won't turn a fight around in most cases however, it's more useful early game or when heavily talented (rare).
 Blinding Wind
:E: Blinds and damages two nearby enemies. Like Johanna, use this especially when attack steroids are visible to make those big heavy hits mean nothing. Even with the damage buff, the damage is pants unless heavily talented (rare).
And Let's Meet Your Host... M-Z (Symbiote Host and Ultimate Evolution Guide) Top
|
|
|

|
|
Malfurion: Malfurion is a ranged support capable of decent healing and fairly decent CC. Malfurion was the original hipster, he was into beards and kale before it become cool outside of Kalimdor.
Malfurion lacks mobility, so he appreciates your shields and post 16 speed boost. His damage is fairly light unless he goes for a DPS build, so he welcomes the poke you can bring. You balance him out quite nicely, and unlike other supports, you can actually use him pretty well to harass or even kill enemies thanks to the fact his damage is ranged too, and his heal is potent (and your shield gives it breathing room to actually work). Malfurion benefits most from a Balanced build, but offensive Malfurion builds would benefit from a more Defensive build too.
|
Ultimate Evolution: Malfurion's viability depends on his build. Support Malfurions are generally a poor pick because a lot of his power is tied up in
 Tranquility
. He's a better clone than Li Li though, because he offers better damage and has CC. Damage builds are an okay pick, as their build revolves around Moonfire spam, which you boost with your +20%. Your movement speed boost will additionally allow you to keep up with the target as you poke them.
 Innervate
:Trait: Cast on an ally to grant them 100 mana over time. Don't use on yourself, use on your own Malfurion most of the time as he chews mana up as he heals.
 Regrowth
:Q: Nice heal, especially over time. With the ability power boost it heals a lot. Keep this up on other targets, don't cast on yourself if it can be helped as chances are some ticks will be wasted before you die/expire. As your own Malfurion will likely be focusing tanks, consider keeping him alive.
 Moonfire
:W: Spam like this you used to in WoW as a level 4 druid. It's your best source of damage and the cooldown is really low. It is targeted AOE so be predictive. If you are a clone of an offensive Malfurion then spam as priority as the more you cast it the better it gets.
 Entangling Roots
:E: Sends creeping roots from the target area that bind targets they encounter for a duration and deal a DoT too. Good for pinning enemies for a bit, cast it after your own Malfurion's for some nice chain-CC.
|
|
|

|
|
Muradin: Muradin is a tough warrior hero with decent CC, gapclosing and overall toughness. Try to take his hammer, go on, I dare you...
Muradin is a good host, like other tanks he'll appreciate your gentle healing and additional damage. His own sustain is pretty great too, so in combination with
Regenerative Microbes he can be in and out of fights like a revolving door. His stuns and slows make landing
Stab easy too. If you can get your damage abilities off, you and Muradin can have lots of fun together. Muradin does benefit from both Defensive and Balanced builds but Balanced is probably better.
|
Ultimate Evolution: Muradin is an okay clone pick. A lot of his defensive or offensive power is tied up in his heroic ability, but you can still stun, slow and be a tanky son of a gun for the duration. If the original has taken Stoneform, even better for you, as your trait will now heal you. Awesome! Most of all Muradin loves the 10% speed boost so he can stay in range for Thunderclap shenanigans.
 Second Wind
:Trait: When out of combat you heal super quickly. great for the original Muradin, but for us, we shouldn't be wasting our clone time healing up! It's rare we'll be outside of combat, but if Stoneform has been taken you can activate this for a nice big heal over time.
Stormbolt:Q: Skillshot that stuns and inflicts fair damage. Many Muradin talent it to hit up to 2 targets, so aim at lines of enemy heroes as priority, just in case. Use it to interrupt channels as priority. Alternatively, some Muradin will take Skullcracker, which means a 3rd melee blow will stun the opponent. So focus AAs on channelling targets just in case.
Thunderclap:W: Melee aoe that slows enemies. Spam it! Aim for as many targets as possible, quite a few Muradin will take a talent that reduces the cooldown for every target hit by Thunderclap making it good sustained CC in large groups.
 Dwarf Toss
:E: leap to location and deal light damage on landing. Use this aggressively, and follow up with Thunderclap and Stormbolt on priority targets. You shouldn't be using it to escape unless you still have a good duration left on clone which means you can leap out and come back for at least one more Stormbolt.
|
|
|

|
|
Murky: Murky is a melee specialist who excels at aoe damage. Rumours abound that he's Blizzard's majority shareholder, why else do you think he's being publicised that heavily?
Murky benefits from your relationship more than you do. He's frail as they come, and your shield is a big deal to his HP pool. Additionally he likes the extra damage you grant him because his is very location based and potentially unsafe. Regenerative Microbes actually heals him for a decent amount too. He'll be engaging in melee range a lot, but not for sustained periods though (slime and run) so time
Spike Bursts correctly. He benefits from Balanced and Defensive Builds,
 Soma Transference heals him for a lot of damage. Soma Transference heals him for a lot of damage.
|
Ultimate Evolution: You cloned Murky? NOOOO. Murky has poor HP and his heroics are definitely some of his better points. Once you die, you're out, so your trait is useless! This means you're really easy to kill and have no rapid comeback. Murky can still be useful when cloned, but he's not the best pick unless you want to do a number on the enemy buildings or are a skilled duellist Murky player.
 Spawn Egg
:Trait: Useless for us. You can plant an egg but you won't revive at it if you die. Maybe some dumb enemy may attack it if you drop it, but otherwise I can't see much use.
 Slime
Slime:Q: Your bread and butter, it slows enemies and inflicts nice damage if you are already slimed. Spam it with all your might. I can't confirm whether it counts your slime and the original Murky as two separate Slimes or not, but if the original Murky's slime buffs the damage of yours, there's potential here.
 Pufferfish
:W: Throw a fish into target area that puffs up before doing big damage in the area. Some Murky take a talent which makes this fish slime the area before it blows up, meaning if you throw this down after sliming the enemy, you'll have an additional bit of burst damage coming at them for subsequent slimes.
 Safety Bubble
:E: Makes you invincible. You can cast this twice before clone ends. If you're trying to support the original Murky the two of you can alternate the use of this to make opponents have to split their focus whilst the other slimes them down.
|
|
|

|
|
Nazeebo: Nazeebo is a ranged specialist who excels in area damage and control. he has pretty good single target damage too when he focuses. Always a hit at masquerade balls or anything requiring elaborate masks.
Nazeebo is a fairly decent host. He can keep himself well sustained and if you help him kill minions, even more so. He benefits from your protection and mobility but the damage is welcome too, targets within the Zombies are easy
Stab pickings. As with Kerrigan, mines help him scout so he positions himself well to stay out of trouble as he lacks escapes. He benefits most from Balanced and Defensive builds.
|
Ultimate Evolution: Nazeebo makes a fair clone, his damage potential is pretty damn high especially for DPS builds. Without his ultimate he can still pack a fair punch and contribute good play to any teamfight thanks for Zombie Wall. The additional movement speed helps keep him in safe position.
 Voodoo Ritual
:Trait: Our attacks and spells will DoT targets and deaths will heal us. It's passive damage, which is cool. Some DPS builds will take a talent which makes this fairly potent, but it's all passive so don't actively worry about it.
 Corpse Spiders
:Q: Hurl spiders at the target area and they will seek out the closest priority target and attack them. They can't be killed and can be difficult to run away from. DPS builds that focus spiders make them your best source of DPS. Drop them when a target is trapped in Zombie Wall and they'll deal a lot of damage.
 Zombie Wall
:W: Spawns zombies around target area after short delay, which trap the enemy within. Zombies hit the target for some damage too, they can be killed and you can trap allies. This is a Nazeebo "make or break" ability, which determines the good from the very good. Correctly trap targets and they can be as good as dead. Press W again to send the zombies back into the earth for early release.
 Plague of Toads
:E: Send toads in an expanding wave that deal damage to enemies they touch. The further they go, the wider they spread. The closer you are to the target, the more likely it is all the toads will hit them for massive damage. Again, if a target is trapped unleash the toads as close to them as you can to get the biggest damage potential. If unleashed in melee range it hurts a lot.
|
|
|
|
|
Nova: Nova is a ranged assassin who plays more like a mage than anything else. She's into 80s jumpsuits and wrecking your day. I guess we should help her though if she's on our team right?
Nova is a pretty good host as it turns out. She has huge burst, and we supplement that further to give her much better odds of blowing a target to pieces. She enjoys our shield and mobility as it allows her to scurry away from a fight. Just be mindful your errant
Stabs don't betray her position until she's ready. Nova has a specific rotation to follow when breaking stealth to maximise damage so let her be in control of when she reveals herself. She is best served by our Balanced build, as she isn't within range to abuse the Full-on
Spike Burst, and
Adrenal Overload is less useful as she rarely AAs back to back. Defensive could work too, but it's best to work with her damage fully to secure clean gibs.
|
Ultimate Evolution: Nova is a good clone, maybe not as good as some others but definitely a viable choice. As she relies on burst combos from stealth, she takes moments to engages, disengage and repeat, which our duration doesn't give us optimum time for unfortunately. We can still wreck hard with some huge burst damage however, and we move very quickly around the battle which means we can kite anyone who tries to chase us.
Permanent Cloak, Sniper:Trait: Gives us stealth (we emerge stealthed from the clone pod) and some other range bonuses for the first attack. We use this to skulk around and get to the soft targets at the back to blow them up.
 Snipe
Snipe:Q: Skillshot that has fair range and deals nice damage. Most if not all Nova take talent which makes this deal 20% more from stealth or within 1 second of stealth. We don't open with it as Pinning Shot frequently is talented to make the target vulnerable, so we want Snipe to benefit from this, as well as our first basic attack. This makes use our standard rotation:
Pinning Shot (From stealth) -> Snipe -> Basic attack and then we try and restealth and do it again. It sounds like a small rotation, it hits damn hard thanks to the level 7 talent (which again, most take) which makes our basic attacks very slow but very powerful.
 Pinning Shot
:W: targeted shot which slows enemy, frequently talented to make it makes enemies vulnerable. Open with this to abuse that bonus and Snipe quickly so it still gets the "from stealth" bonus.
 Holo Decoy
:E: Creates clone (or two) at area which can distract opponents. If you're working with an original Nova you can mindgame big time with both of your clones. Focus on dealing damage though, you want as many snipe rotations as possible.
|
|
|

|
|
Raynor: Raynor is a ranged assassin who centers on auto attacks. He's actually pretty tough thanks to his Adrenaline Rush. Although he wouldn't admit it, Raynor finds Kerrigan's new look very appealing.
Raynor enjoys us riding him, despite what he might say. He lacks true mobility and additional protection goes a long way towards helping him stay out of trouble. Raynor doesn't have many damaging abilities at his disposal, so
Stab will help him out. As an AA hero he comes into the fore late game, where his exceptional range and attack speed will quietly tear the opponent a new one. His typically fights out of Stab range at this point, so Adrenal Overload and shields are pretty much all he'll take from you, but giving Raynor a 25% steroid lategame is pretty awesome and enough reason to ride him in all honestly. Raynor benefits most from a Balanced build that takes
Adrenal Overload instead of sustained carapace.
|
Ultimate Evolution: Raynor is a good clone, he deals a lot of AA damage and has good range, meaning you can harm the enemy from a distance. You do lack the awesome power of your heroics, but thankfully as many builds focus on AA buffs you majority damage remains intact. The 10% movement speed is so good, as we have no escape tools outside of a talented Inspire.
 Advanced Optics
:Trait: Our attacks have bigger range than all other ranged heroes (except Hammer in siege mode) and we can see further. Abuse maximum range wherever possible.
 Penetrating Round
:Q: Skillshot that knocks opponents back. Use it to make enemies disengage from you. Don't be tempted to use it to burst unless it kills the target. You need to stay safe so you can AA the hell out of the enemy.
 Inspire
:W: Gives you and allies an attack speed boost. Crank this up ASAP after spawning and when you're in range. Talent usually give it a movement speed boost too, but we want to focus on damage during our clone uptime and not escape too much (Adrenaline Rush will keep us alive long enough unless we are 5 manned) so use it to maximise your damage.
 Adrenaline Rush
:E: Heals us when we get weak for a good chunk of health, making us quite tough. Some Raynor take a talent where we can activate this on demand. I wouldn't worry about it too much as it activates by itself, focus on aggressive positioning and keep shooting.
|
|
|

|
|
Rehgar: Mobile melee support with decent utility. Ironically Rehgar is harassed by animal rights groups for his controversial wearing of fur.
Rehgar is a so-so host. He is pretty safe and durable (in good hands) but lacks damage, so that's your main benefit to him. He can heal himself fairly well and many take talents which allow them to shield as well. He has in combat mobility too. Plenty of survivability tools so your main role when riding is to hit the enemies and deal the damage for him. He's be within
Spike Burst range quite a bit, so this should be easily achieved. He benefits most from a Balanced build. Play hit and run by firing relentless
Stabs as he kites in Ghost Wolf.
|
Ultimate Evolution: Rehgar is a pretty poor clone choice. His heroic abilities are where a lot of his power lies and his damage potential isn't great. If you're cloning him you need to focus on healing and placing earthbind in good overlap locations with the original to get some decent CC down. Just hope the rest of your team can prop up the damage.
 Ghost Wolf
:Trait: We can mount in combat in the form of a Ghost Wolf form. This gives us great mobility, so use it to kite enemies regularly. You should be in this form whenever you aren't casting or attacking.
 Chain Heal
:Q: Heal primary target and jump to 2 nearby targets. Spam this where possible.
 Lightning Shield
:W: Makes the friendly target emit a damaging aura for duration. Many take talents that cause this to shield target too. Place on assassins and warriors in the fray.
 Earthbind Totem
:E: Good aoe snare for location. Make sure you and the original place them wisely to get maximum spread for the snare.
|
|
|

|
|
Sgt.Hammer: Sgt.Hammer is a high-ranged siege machine. Ironically she's never used a hammer to repair her beloved tank, that's what SCVs are for right?
She is an okay choice of host, mainly for her benefit than yours. She outranges targets a lot of the time, so Stab is only useful when enemies are coming for her. If she's positioned correctly she should be placed between minions, obstructing direct entry which makes Stab less useful, still fire them where you can. She does enjoy the healing properties of
Regenerative Microbes. Save your shield for when enemies gapclose her so she takes minimal damage. Your aim is to keep her in lane for as long as you can. Consider using mines near her position to punish enemies who get close to her. Defensive Build works really well, as does an augmented Balanced build with
Adrenal Overload for some really nice siege and hero damage (late game her AA is pretty crazy).
|
Ultimate Evolution: Can you say SIEGE? If you want to totally obliterate enemy buildings then clone this hero. Two of you will level a fort in moments. Hammer has good damage against heros too, despite being a specialist so she's a pretty good pick. She has great range which works nicely with your additional damage to help snipe targets from afar, hard. You miss the heroics in terms of consistent ability damage, so you need to be AAing as much as you can.
 Artillery
:Trait: Basic attacks deal more damage the further the target is from us. Maintain maximum range where possible at all times.
 Spider Mines
:Q: Lays mines that then get up to follow targets, damaging them and snaring them. Place them in front of you to discourage direct approach, allowing you to escape. Use your mount skill to boost away as well, you only get one use per clone time though.
 Concussive Blast
:W: Cone that knocks enemies back, use if enemy gapcloses successfully and deactivate siege mode to begin escape with thrusters.
 Siege Mode
:E: This is where it's at. Activate to gain ridiculous range, deal bonus siege damage and your AAs are now partially aoe. use this to snipe enemies from very far away, or to wreck buildings. Many Hammer will build for some partial AA in their build so like Raynor, AA a lot in this mode during clone.
|
|
|

|
|
Sonya: Sonya is an aggressive warrior hero. Her sustain is good and her resource is limitless. She's not a natural redhead, the shock!
Sonya enjoys your ride, she thrives on staying in combat for extra Fury, so shield helps her do this. Your extra damage and range also helps her maintain good exchanges with enemies on lane. She'll be in melee a lot, so yay for
Spike Burst! Sonya will benefit from a Balanced, All-in or Defensive build. Be aggressive in playstyle because she certainly will be!
|
Ultimate Evolution: Sonya is a pretty good clone pick. She's an aggressive warrior who actually deals decent damage. The extra mobility is going to help her out a lot when gapclosing with the opponent. Be mindful, you use
 Fury
Fury, not mana, so you may need to hit a few times to be able to use abilities. Some Sonya will take a talent which allows you to activate your trait to gain Fury, so try activating it upon your birth to get some initial Fury behind you.
Fury:Trait: We don't have mana, but Fury instead. Using abilities causes us to move quicker, so time them wisely to keep this buff up for as long as you can.
 Ancient Spear
:Q: Pull you to target with this skillshot. It's our gapcloser of choice. Use it to initiate upon the target group.
 Seismic Slam
:W: This is our most efficient damage/Fury ratio ability against single targets (and multiple if certain talents are taken) so if you're duelling against very little targets, save Fury for this.
 Whirlwind
:E: Spin to win! Heals us whilst we are doing so. This is good against groups of enemies and should be used when you're fighting more than one target, ideally more than 3.
|
|
|

|
|
Stitches: Stitches is a chunky tank with some good area influence and initiate. Ironically, he can't sow. So many hands, so few fingers.
Stitches appreciates our damage buffs much like his cohorts Arthas and Anub'arak. He's pretty tanky with good sustain so damage should be your priority. Many Stitches focus on a slam build, so these Stitches may need more defensive care. benefits from Balanced and Defensive builds. Use
Stab to exchange with ranged chumps who try to poke Stitches.
|
Ultimate Evolution: Stitches is not the best Clone choice outside of Slam builds. He'll provide another temporary meatshield for the most part. A double hook could be useful though. Mainly though, Slam damage spam is what we hope for, because then we can tank a bit and wreck in an aoe.
 Vile Gas
:Trait: When hit, we release gas which DoTs the attacker. Many talents link this to abilities, such as
 Slam
Slam builds making Slam DoT targets too. The DoT itself is pretty good actually, the damage adds up.
 Hook
Hook:Q: Skillshot, when landed pulls target to you. Use to single out of position targets and bring them in for a group gib. Can be used to peel assassins from squishies too.
Slam:W: Main damage skill. Slam in cone for some pretty okay damage, much better if talented. Slam builds have this deal good damage, slow and DoT targets. Slam spam is the way to go! Just make sure you're in range (which is actually pretty good).
 Devour
:E: Bite target and heal 20% of max hp. Does huge damage to minions and mercs. You can use this to deal huge damage to captured mercs so make them a priority if they are present. The hero damage isn't too awesome.
|
|
|

|
|
Sylvanas: Sylvanas is a ranged specialist, and queen of the most angsty people in all of Azeroth. She's a right barrel of laughs.
Sylvanas ia frail and delicate, relies on her E to escape. The shields you provide can keep her active for much longer. Sylvanas has a very strong minion and lane game, so focus your poke on the enemy heroes, let Sylvanas do the PvE work, you do the PvP poke. Keep this up and you'll be at their tower with the opposing hero in a position where they may be reluctant to commit to a defence for fear of being killed.
Sylvanas really appreciates adrenaline boost due to her lack of escapes. The Balanced build offers her the best survival odds and supplements her well.
|
Ultimate Evolution: Sylvanas is a so-so- clone pick. She has the potential to be a fair damage dealer, so if she is a damage build her eligibility for cloning goes up. Bear in mind you miss out on her heroic arrow, which is one of her biggest teamfight draws. That said the mobility and extra damage will make you a worthy addition to the fight.
 Black Arrows
:Trait: Our basic attacks and abilities stun minions, mercs and towers. Offensive Sylvanas pick talent that makes this apply to heroes, but as a slow, so this is a pretty cool passive if that is taking. If not, it means you can disable offensive PvE targets nicely for a good siege.
 Withering Fire
:Q: Very short cooldown single target nuke that aims automatically. Gains stacks upon enemy deaths. Spam it when in range. Purple targets on nearby enemies indicates who is the current target.
 Shadow Dagger
:W: Deal damage and apply DoT that spreads around to nearby enemies. Talents can make this make afflicted enemies vulnerable, so if so, use this before anything else.
 Haunting Wave
:E: Shoots Banshees in a slow moving line, you can reactivate to teleport to their location. Use it to escape trouble if you're being focused so you can return to sniping the enemy.
|
|
|

|
|
Tassadar: Tassadar is a ranged support, good at lane control and pretty durable himself. Despite his calm exterior, he is the kind of guy who'd fly a ship into you if you annoy him enough, he's done it before.
Tassadar benefits from your offensive Stabs as a host. He's pretty durable despite his poor HP. His shield is fantastic and his E is a great escape tool. Your
Regenerative Microbes will supplement these well. Stab poke with
 Psionic Stormmeans your zoning game will be very good and keep the enemies away from you. He's actually probably the best Support host, as he can take care of himself fairly well, but together you become really quite strong, especially if he's running an offensive build. Balanced build is the way to go always. Psionic Stormmeans your zoning game will be very good and keep the enemies away from you. He's actually probably the best Support host, as he can take care of himself fairly well, but together you become really quite strong, especially if he's running an offensive build. Balanced build is the way to go always.
|
Ultimate Evolution: Tassadar is a pretty poor clone pick. A lack of damage options and his defensive qualities being limited to one basic ability means you won't be nearly as effective as another pick. ironically the best support host is the worst clone. You really miss being able to cast Archon. That said, your
Psionic Storm is going to hurt, so if you are Tassadar II, make it count.
 Oracle
:Trait: reveals area around us for greater vision and stealth detection. In combat this will really only help you find stealth heroes so you can focus them first.
 Plasma Shield
:Q: Shield a target for a substantial amount. Use every time you can, you'll get 3 casts. Prioritise other heroes, you can always E if you're in trouble.
Psionic Storm:W: Our one damage skill, does good damage over an area over time. Many Tassadar talent this so you can cast a second one for free after the first, but they don't stack on top of eachother. Cast it to the side of it for extra zoning or just before the "free cast" timer ends on top of the first to keep up consistent single target damage.
Dimensional Shift:E: Your escape. Cast when you're in trouble as you become untouchable and invisible for a small duration, so you can reposition. Use this over shielding yourself unless the shield is going to save you from death and your attacker will die. Shields are best served on other heroes.
|
|
|

|
|
The Butcher: The Butcher is a vicious melee assassin who is reasonably bulky. He tried Quorn sausages once by mistake, and he LOVED them.
The Butcher is a good host for us as he's tougher than many frail melee assassins but can still hit like a truck. [{Adrenal Overload]] in tandem with
 Butcher's Brand is ridiculously strong, the bonus attack speed is great at all times thanks to his great attack damage values.
Envenomed Spikes and
Adrenaline Boost both help him to gapclose if he's taken out of melee range. Full-on builds are the best for him, but a Balanced build will work very well too. We should enjoy his immense hosting potential whilst it lasts, because I anticipate nerfs for this guy because
Butcher's Brand is frankly overpowered. Butcher's Brand is ridiculously strong, the bonus attack speed is great at all times thanks to his great attack damage values.
Envenomed Spikes and
Adrenaline Boost both help him to gapclose if he's taken out of melee range. Full-on builds are the best for him, but a Balanced build will work very well too. We should enjoy his immense hosting potential whilst it lasts, because I anticipate nerfs for this guy because
Butcher's Brand is frankly overpowered.
|
Ultimate Evolution: The Butcher is a great clone pick. He has mobility (further enchanced by us) with lots of damage. His heroics are strong, but his basic abilities are responsible for most of his damage in combination with strong auto attacks. Butchers will either use a bursty Hamstring build or an auto attack reliant build. Your playstyle won't vary too much in either case as the basic idea is the same, gapclose and smash!
 Fresh Meat
:Trait: Enemy deaths drop meat, we collect this to gain attack damage % and if talented (most take) attack speed %. We won't have much time to minion farm, so I'm unsure how viable this is. If you copy the original's meat stacks at time of clone birth, then that's awesome, but i'll need to confirm.
 Hamstring
:Q: Slow targets hit, dealing damage and readying your next basic attack. This is our primary damage skill and can contribute nice burst. Use it after gapclosing with E to stick to your target. Coupled with your 10% movement boost they shouldn't escape.
Butcher's Brand:W: Horrendously strong ability (predict it will be nerfed), makes a huge chunk of our auto attack damage heal us when striking the branded enemy. You are effectively unkillable when attacking the branded target, unless you are wildly outnumbered. This makes the Butcher a crazy duellist and capable of dominating in 2v1 situations. Our buffed attack damage makes this even better. Cast when you have closed distance and need some healing.
 Ruthless Onslaught
:E: The gapcloser. After tiny charge, you begin to run towards target at great speed whilst Unstoppable. If you collide with them they are damaged. This is an insanely good initiate and sets up Hamstring nicely. Use this to get into melee range but be cautious you don't run into a situation where you'll be gibbed quickly. You want to stick around and deal some damage!
|
|
|

|
|
The Lost Vikings: The Lost Vikings (TLV) are a melee specialist hero, despite the fact 2 of them are ranged. Their hunger for plunder is only matched by their loves of 80s-90s console gaming.
TLV are varied in hosting potential across each Viking, but generally they all benefit quite nicely as they are weaker than "typical" heroes. Olaf, being tanky but about as offensive as a marshmallow, benefits from Stab damage and Spike Burst greatly. Eric, being as robust as a paper towel, enjoys a shield for effectively 75% of his health pool (no joke) as well as the (to him) massive healing
Regenerative Microbes grants. Baelog, being a mix of the two, enjoys both.
If TLV split up supporting them becomes more viable as individual Vikings are weak on their own. When they're grouped it becomes less pertinent to unless one is being attacked directly, in which case it's shields up! The Balanced build serves them best.
|
Ultimate Evolution: TLV are terrible clone choices. Arguably the worst. Like Murky, they are weaker than the average hero. Unlike Murky, they do not have individual abilities as powerful as Murky's to back them up (most of their abilities work better when they're vaguely together at least). TLV's trait does not work with clone either. A talented Olaf who stuns with his charge is probably the best you'll get for his CC, but avoid cloning these guys where possible. The assumption is they work together late game, and their best ability is the Longboat, and you don't get either of these features.
 Viking Hoard
:Trait: Bonus HP regen goes up for all Vikings for each globe gathered. We only have 1 Viking, so this is a weaksauce passive. That, and it's effective over great periods of time, not a 20 second window! Hope your original has stacked it high before cloning if you mistakenly clone a Viking, but it's not going to help you out much.
 Spin To Win!
:Q: If taken, this is an aoe attack around the Viking. The cooldown is large for the damage it deals, working under the assumption you have multiple Vikings attacking with Impatience Is a Virtue. You don't have that sadly, so it's just a mediocre damage skill with a big cooldown.
-or-
 Norse Force!
:Q: If taken, place shield on Viking according to how many Vikings you have. You have ONE Viking as a clone, which makes this a poor shield with a huge cooldown. Huzzah!
 Jump!
Jump!:W: If taken, makes you invincible for a brief moment as you jump. This helps you avoid trouble, which given your accidental cloning of said Viking (how else to explain it?) helps you live out your poor choice for 1.5 seconds longer.
-or-
 Nordic Attack Squad
:W: If taken, makes the Vikings deal an additional 1% of a hero's maximum health as bonus damage with basic attacks for 5 seconds. Problem here is we have 1 Viking, just the 1. This means we'll be getting out 5-7 basic attacks in 5 seconds depending on our original target. I'm sure any target will tremble in fear at our additional 5% of their maximum health damage!
 Viking Bribery
:E: Bribing skill. Again, it's tweaked to work best with multiple Vikings. There is no realistic way you're going to get the stacks needed to use this in 20 seconds.
Moral of the story, don't clone a Lost Viking ever.
|
|
|

|
|
Thrall: Thrall is a deadly melee assassin who hits very hard and can heal himself. This former warchief is an all round nice guy and takes good care of his hair.
Thrall is a viable host for several reasons. He can take care of himself pretty well in his trait, so we supplement this with shields and health to make his survivability pretty awesome. His damage is good but ours is ranged and more consistent so we can give him reliable poke (Thrall's ranged damage should not be used as poke, but as an engage attempt). Lastly Thrall needs to be in melee to wreck the opponents,
Adrenaline Boost/
Envenomed Spikes say hello! Look after Thrall and he'll look after you. Balanced build works best for Thrall, or indeed Defensive. A variation of Full-On can work, but Thrall doesn't particularly benefit from
Adrenal Overload as most due to his low base attack speed, but it still helps.
|
Ultimate Evolution: Thrall is a great pick for cloning. You don't need his heroics to deal huge damage, his basic abilities give him tons of it. The extra movement speed is going to help you gapclose big time, which is enough post 20 as many Thrall take
 Nexus Blades
 to help them stay in melee once they're there. Land your wolf skillshot and let's wreck!
 Frostwolf Resilience
:Trait: Every 5 ability damage hits heals us. Yes, this does include each jump of lightning, or hit of windfruy weapon as a separate hit for this ability. Make sure these two abilities deal their full damage for maximum Frostwolf stacks and good healing.
 Chain Lightning
:Q: Good range nuke which jumps to 2 nearby targets. Each hit generates a charge for your trait, making for a max of 3. Use this after wolf is fired whilst engaging and it'll be ready for when the enemy is fleeing.
 Feral Spirit
:W: Send a wolf forwards which roots the first enemy hero hit, dealing damage. Talents usually make this give us 3 stacks for a hero hit, so be sure to land it! This is your opening spell and first cast.
 Windfury
:E: When activated we gain a movement speed boost for a short duration and our next three attacks happen 100% quicker. Talents can make the last attack be split into three hits of 75% weapon damage each for face melting amounts of damage given Thrall's ridiculously high base melee damage. Use this when engaging to smack the enemy into oblivion and generate nice healing charges whilst at it.
|
|
|

|
|
Tychus: Tychus is a bulkyish rangedish assassin. He looks super tall in his suit, disclaimer: part of it is artificial heels, he's 5 ft 1.
Tychus is a cool choice for a host. His low ranged attack means we are in
Stab range a lot. He benefits from the defence we grant with shield and later mobility as his own options are limited, but he needs to be stay safe to unload his impressive damage. If you can keep him protected during his Q, he can be really aggressive and deal tons of damage if your
Stab lands too. We're talking fairly easy level 1 kills here. He benefits most from the Balanced build and Defensive build.
Adrenal Overload is honestly overkill on Tychus given his already insane attack speed but that does mean the 25% goes that much further.
|
Ultimate Evolution: Tychus is a cool clone choice, as he can deal a lot of damage to many targets. Although he really appreciates the raw power of his
 Commandeer Odin
 and the safety his
 First Aid
 and
 Stoneskin
 talents he can still unleash a lot of fury on the enemy if they're not careful. Additional movement is great for his large behind.
 Minigun
:Trait: Our basic attacks wind up the gun to increase our attack speed each hit up to a maximum amount. Our dps is actually really awesome if we keep AAing a target, but we need to be pretty close to do this. Prioritise ability damage over AAing unless you're not being focused, then combine both.
 Overkill
:Q: Wind the minigun up and spray an enemy with lead, damaging enemies around them too. You can move whilst this cone channels. It deals ridiculous damage over the duration in a nice area. Talents make it slow too. This is your primary damage tool. Even with no AAs, between this and grenade you can mess the enemy team up easily. You can cast other abilities whilst this channel is active.
 Frag Grenade
:W: Throw grenade at target point. It deals good damage and knocks targets away from the impact point. Use it to push enemies away from you whilst channelling
Overkill or use it to push them towards your team and into your Overkill if they're fleeing you.
 Run and Gun
:E: Dash a short distance and wind up the minigun. Use this to avoid targeted aoes or get away from an opponent. You can use it to keep a target in Overkill range, but this shouldn't be an issue with the typical slow it grants and your bonus movement speed.
|
|
|

|
|
Tyrael: Tyrael is a melee warrior, a tough cookie with great mobility. For someone who's supposed to be a good guy, he sure looks suspicious...
Tyrael is an excellent host. His great mobility means keeping us in
Stab and
Spike Burst range is easy. He lacks consistent and inexpensive damage so he loves us for this. He lacks inherent healing despite being tough, so
Regenerative Microbes works well on him. We can keep him shielded when he shields himself with
 Salvation to ensure his Salvation to ensure his
 Angelic Absorption triggers as much as possible for even more healing as our shield is targeted first. Quite a team we make indeed. Tyrael benefits most from Balanced and Defensive builds, but he can benefit from the Full-On if he's more offensively built. Angelic Absorption triggers as much as possible for even more healing as our shield is targeted first. Quite a team we make indeed. Tyrael benefits most from Balanced and Defensive builds, but he can benefit from the Full-On if he's more offensively built.
|
Ultimate Evolution: Tyrael is an okay clone choice, better than some other tanks. This is because he can deal quite a bit of damage, but his mana costs ruin it. We don't care about that, as we're only alive for 20 seconds. So we spam his skills for decent damage. Get in the front lines, disrupt the enemies and soak for your team. Even without
 Judgment
 we still have great engage.
 Archangel's Wrath
:Trait: Tyrael normally goes boom when he dies. We do not sadly, it would be ridiculously broken if we did.
 El'druin's Might
:Q: Place sword at target location, slowing all enemies and hurting them. When we reactive this skill, we deal similar damage again around the sword and teleport there, reapplying the slow. Use this to engage and slow the enemies for your team.
Salvation:W: Shields you and nearby allies. Use as often as you can in combat as the cooldown is large and so is the mana cost, which we don't really care about. If our original took
Angelic Absorption then this will also heal us.
 Smite
Smite:E: Rake target area to deal fair damage and speed up allies who pass through the raked area. Use to engage, escape or just deal damage. Damage builds that aren't AA focused will make Smite the bread and butter of the build so look to it for primary damage.
|
|
|

|
|
Tyrande: Tyrande is a ranged support hero. She combines offence and defence quite nicely, along with awesome range. She doesn't look too bad for her age all things considered. Better than Malfurion has turned out anyway.
Tyrande lacks mobility in her basic toolkit, and her self-protection is actually quite poor (her heal is weaker if used just on herself) so she likes the protection we can offer. Her damage is better than many other support heroes, but limited by cooldowns, so
Stab provides the gap fillers. Like with Malfurion, the playstyle of an offensive Tyrande can mirror an offensive Malfurion where you can actually work together very well for some good lane dominance. Balanced build serves her best. Very rare offensive AA Tyrande builds will also be served well with an
Adrenal Overload addition.
|
Ultimate Evolution: Tyrande is a moderate host. She provides some good abilities and potential if used correctly. She can stun targets, make a target vulnerable and heal too. What's more, more often than not her Owl will be talented to snipe, making this very powerful with our +20% damage. Your damage is very limited by cooldowns though.
 Hunter's Mark
:Trait: Mark an enemy to make them vulnerable for 4 secs. We get one use during our time (unless it's been talented) so use it early on on a key target and hope you get the second!
 Light of Elune
:Q: Heal the target, and yourself more weakly. If used only on you, you only get the weaker heal. Use this to keep allies topped up, prioritise them over yourself due to how this heal works.
 Sentinel
:W: Send an owl across the map to scout the area, it damage the first hero hit. Talents make the owl pierce targets and gain damage the further it flies, turning this into a long ranged snipe capable of hitting very hard (if talented as such, yours will easily do over 1000 damage if not more if shot from across the map).
 Lunar Flare
:E: Calls down an arrow to hit the location after a brief delay, stunning all enemies hit and dealing damage. Good range, good damage, good stun. This is a good ability, so time it correctly with Hunter's Mark for some awesome damage and opportunity to follow up.
|
|
|

|
|
Uther: Uther is a melee support. He's tough, great at healing and providing defensive support. For a Paladin, you could say he's very "stunning". See what I did there?
Uther likes your
Stab. His damage is poor outside of moderate cooldowns that eat his mana. We want him to save his mana for decisive stuns and keeping himself healed. If we allow him to do that, he can stay on lane for just about forever. Ward off enemies with
Stab and
Spike Burst so he can melee to get his mana back with
 Hammer of the Lightbringer (most Uther take this). In this way you and Uther can lane together very well, the fact he's melee means he's going to at least let all of your damage abilities be in range. He benefits most from the Balanced build. Hammer of the Lightbringer (most Uther take this). In this way you and Uther can lane together very well, the fact he's melee means he's going to at least let all of your damage abilities be in range. He benefits most from the Balanced build.
|
Ultimate Evolution: Uther is an okay pick for a clone, as supports go he's one of the better ones. His natural AA damage and ability damage outstrips that of many supports. He's chunky so he's likely to stick around for a while too. Sadly we don't get his trait benefit, nor his heroics, which are two of his strongest points. Oh well, we can heal pretty nicely with some CC and smack some skulls with our hammer.
Eternal Devotion:Trait: This doesn't work for us, it's be pretty damn overpowered if it did.
 Holy Light
:Q: Heal a target ally for a good amount of health. Spam this on allies who need it. Don't be shy, you don't last forever.
 Holy Radiance
:W: Sends light through an area, healing allies hit and hurting enemies. Like Holy Light, don't be shy, time is fleeting after all! Aim at the largest group of individuals.
 Hammer of Justice
:E: Stun for 1 second. Lowish cooldown. Time this after any other CCs to pin target for a gib. Or use it to stun assassin who would otherwise kill an ally.
|
|
|

|
|
Valla: Valla is a ranged assassin with a decent mix of ability and AA damage. She's pretty mobile as well as far as assassins go. Often mistaken for a little girl fleeing from a bid bad wolf. You can see why.
Valla enjoys the protective side of our relationship. Shields and healing she appreciates to top her up between pokes. Our
Stab will provide a little assistance when she's chasing an enemy which can sometimes help, but often not as much as keeping her alive as she is frail as they come and prone to being blown up very quickly (she's focused a lot too due to her scary damage potential and heroics). Hold up your end of the bargain and let her unleash her wrath upon the foes! She benefits from different builds based upon her own. AA centered builds will benefit most from Full-On due to the synergy between
 Manticore, Manticore,
 Rancor and
Adrenal Overload. Other builds will appreciate Balanced or Defensive more. Rancor and
Adrenal Overload. Other builds will appreciate Balanced or Defensive more.
|
Ultimate Evolution: Valla is a great clone choice. Although her heroics are really really good, she can still deal plenty of damage outside of them. They're mainly used to phase and keep her safe whilst she deals damage. So we need to play smart. +10% movement in conjunction with Hatred will allow us to kite enemies quite easily though.
 Hatred
:Trait: basic attacks increase attack damage and movement speed. If
Rancor is taken they increase attack speed too. Basically, attack things a lot, and don't be afraid to move a little between attacks to maintain mobility and damage.
 Hungering Arrow
:Q: Skillshot that will shoot two more arrows after hitting a target which seeks out new targets (can hit the first). Good damage if target is alone. Often what finishes off runners.
 Multishot
:W: Decent ranged cone for fair damage. Spam into enemy groups for the best effect.
 Vault
Vault:E: Dash a small distance. Helps you keep out of trouble when being pursued.
|
|
|

|
|
Zagara: Zagara is one of the Zerg broodmothers. She's a ranged specialist who excels in using many summons to destroy enemy structures. Her hero damage is also respectable. Zagara finds it hard to get dates, nobody is willing to take on her kids.
Zagara is one of the game's most self-sufficient heroes in the correct hands. She has damage, mobility and passive healing. When played well she can comfortably solo a lane and not need much help if any at all until later. She lacks burst mobility and defensive abilities however, relying on distance to secure her advantage. In cases where she is gapclosed upon used shields and
Stab to discourage enemies from chasing her. Your attacks may be enough to turn the fight as her own Hydralisk and roaches hit pretty damn hard over the duration and people tend to forget them when they focus on trying to kill Zagara. Balanced build works best, Defensive can work too however.
|
Ultimate Evolution: Zagara can be a great pick as far as specialists go. Her damage is very good and she can siege buildings really nicely too. Maintain distance with enemies and kite them over creep where possible, using your Hyrdalisk and Roaches to deal damage whilst you occasionally throw back AAs of your own at them.
 Creep Tumor
:Trait: Spawn Creep Tumour at location to provide creep, which increases our movement speed and regen. The regen ain't so important, the movement speed is though. With it we're impossible to catch on creep thanks to our +10% movement speed from being a clone. Drop it around fights so you can maintain distance.
 Baneling Barrage
:Q: Brief channel of banelings at target location and they splash in a series to deal aoe damage. Good at killing groups of minions or damaging a lot of structures. The splash is okay in size, can take some targeting to get used to when dealing with heroes. If all 4 connect though, it's good damage.
 Hunter Killer
:W: Spawns a Hydralisk to pursue an enemy for 8 seconds, dealing damage per second to them with attacks. It hits hard over the duration, very hard. The Hydralisk can be defeated and needs to be in range to attack however. You should pop one as soon as you can, the damage is enough to make people run away. Most Zagara talent for two charges of this, meaning you can create 2 at a time!
 Infested Drop
:E: Zerg drop pod smashes target location and spawns 2 roaches. These roaches attack nearby enemies and can soak tower hits and such. Their damage isn't in the Hydralisk range, but it is ok if they focus a target for their short lives. Drop it on top of the enemy heads to make them move apart.
|
|
|
|
|
Zeratul: Zeratul is a melee assassin who specialises in stealth and large amounts of burst damage. Is his veil compensating for something? Does it really need to be that long?
|
|
|
|
|
Abathur Says: "Protoss material: incompatible. Host potential: still viable through parasite. Zeratul: identified as remarkable specimen. Replication advised."
|
Zeratul, like Nova operates mostly in stealth, so we must be mindful not to disrupt his play by revealing him before he is ready. We can contribute to his already fantastic burst so this can result in some nice early kills. In those instances where the target doesn't die, and begins to pursue Zeratul we can keep him protected generally for long enough that he can restealth. Balanced build works best, Full-On can work too, but Zeratul doesn't AA long enough (outside of niche builds) for
Adrenal Overload to be worth it so maybe an altered Full-On build would work.
|
Ultimate Evolution: Zeratul is a great clone pick. Like Nova you're operating in cycles of stealth combos, but unlike Nova you can follow up with some AAs due to the melee nature of your combo, your bonus mobility and the fact your attack speed isn't gimped. This can make you a very deadly target capable of killing targets very quickly.
 Permanent Cloak
:Trait: We are cloaked if we have not taken damage for a while, we begin life cloaked, we should always strike from cloak.
 Cleave
:Q: Slice around you for fairly good damage. Some builds will talent
 Void Slash
 which makes this the opener of choice and gives it a big jump in damage. I would always open with this just in case as it also has the lowest cooldown.
 Singularity Spike
:W: Skillshot a spike onto the target. When it explodes the target is slowed and dealt high damage. After Cleave, follow up with this and move into attack range. Many Zeratul take
 Double Bombs
 so be aware that you may be able to cast a second one too.
 Blink
Blink:E: Teleport short distance. Many Zeratul use this to escape. We'll be using it to initiate. If
 Wormhole
 has been taken we can hit and run effectively. Otherwise we'll use this to chase down runners for example.
How to Work with the Zerg? Top
This section of the guide is intended as a section aimed at other players who may be working with Abathur. Additionally it can be used as a means of letting you, as Evolution Master best inform your team of how to capitalise on your strengths whilst patching up those unfortunate weaknesses. Seeing as Abathur requires team cooperating to work effectively, this is very important.
|
|
|
|
|
Abathur Says: "Examine previous success of Swarm. Perimeters: various. Prime component of success identified: hive activity. Many as one. Purpose singular. Component present: success inevitable."
|
About those Objectives...
The primary mistakes many make with Abathur is assuming that as a specialist, like many others he can solo a lane in it's entirety. This is incorrect unfortunately. Abathur can hold a lane very well despite having no physical presence. In this way he can often easily keep a lane balanced against one opponent (Specialists like Gazlowe and Zagara are a challenge however). What he can't do, is take any objectives that come with the lane without assistance. This is a primary mistake of assumptions with Abathur, and leads to the typical mouthbreathing "lolol 4v5" comments when things end up going bottoms up.
The best example is Blackheart's Bay. I can count several times I have been pushed into taking the bottom lane solo, despite protesting that I'm better served not soloing this lane in the early game. Why? When the chest spawns there is nothing I can do to stop the enemy hero taking all the coins. There is not enough time to stack mines that would kill them, no minions path near the chest (so I cannot use one as a host to kill the enemy or harass them) and that's not even considering I'd need to slide out with my rather dashing 550 HP and 18 attack damage to actually go out and contend the coins. Just NO.
Later in the games, Abathur can handle objectives as enemy presence isn't always stuck on a certain lane. Early game, lanes are manned quite tightly. Without a host to act as my capture aid, I cannot assist in these early objectives. People don't seem to understand this. They only see the inability to tag the objective. What they don't see is the global support range and inherent exp bonuses any Abathur worth their Zerg will accrue for a team (if done right, you should always be top).
if you're being pushed into a solo lane like this early, where an objective flags up within the first minutes, contest it. Let your team know they need to have a different hero there. On Blackheart's bay Abathur is best posted at the top, for exp soak. This doesn't stop him supporting any other lane. People don't seem to get this. His position is irrelevant outside of exp soak from locusts. Putting him on bottom lane does not "secure it" any more than placing him mid lane does. You can always support the solo bottom hero anyway, as well as the mid-lane chest fight, so the fight is effectively 1.5v1 in many cases.
Don't be bullied into such pidgeonholes. Abathur is strong, only if used correctly. His objective issues are an inherent penalty, which is justified in my opinion because his global presence and exp bonuses are ridiculously strong. It's a shame it's invisible in game until the end! You can easily be giving your team nearly 40% of their total levels gained yourself if you do your job correctly and soak effectively. People don't understand that until they see it on the board however.
Never be afraid to venture for cheeky objective caps later, but not at the start.
Other heroes: don't bully your Abathur into doing this. Work with him, not against him. Remember your Abathur is watching every lane, their game is not tied to the position of their actual hero. If you are in a game where Abathur is being pushed into a bad starting lane with objectives, go on that lane yourself as well. He'll appreciate the gesture.
We are Legion, For We are Many...
Hivemind. It's a potent talent. It effectively doubles Abathur's presence in teamfights if used correctly. This can make your DPS power outnumber the opponent's almost every time, IF you keep formation. Hivemind leads to ridiculous gibs.
When at 20, you may ask your Abathur "Hivemind?" or maybe just wait and see if two of your friendly Zerg symbiotes appear next time he rides a host within a group. If so, be mindful that in those instances where two symbiotes are active, stick close. From this point (I know I do) I will pick my targets specifically so I can activate Hivemind easily. Do not ruin this for Abathur. Quite possibly the worst crime is running away constantly, totally ignoring Hivemind's potential threat.
For example: a 2 vs 2 brawl. I have seen so many times a hero utilise all of their escapes to try and run from the opponent, breaking the Hivemind link and generally appearing to have no confidence in the support offered. This leaves their ally open to attack, and then I have to wait until Symbiote is ready to begin trying to bail this new target hero out of trouble.
In such instances, try not to run. Hivemind effectively makes this a 4 vs 2 (or at the least a 3.5 vs 2)! At 20 with Needlespine Stab is contributing 550ish damage every time it is used! With a 3 sec charge and 3 charges, that's 550 DPS right there! Factor in Spike Bursts and it climbs even higher. In this way Abathur can deal approximately 2000 damage very quickly (within a few seconds) and many opposing heroes back off when spiked in such a way quickly. If they start to run, you now have advantage, and running from Hivemind is incredibly foolish due to Stab's range, the fact that Adrenaline Boost means both heroes can keep up...
Recognise the strength of Hivemind and have confidence in it. It causes enemies to blow up if active. Why would you not want that?
Chessboards, Not Pieces...
Worth being aware of when working with Abathur is that the game focus is much wider for an Abathur player, their game is almost disembodied, the hero character only providing a point of Locusts for soak and a point of attack for enemies. In this way an Abathur's location is no indication of where the game focus currently is for the player, and should be judged as a means of determining which lane they are soaking (it should usually be lanes left open and distant).
Similarly, an Abathur is not slacking off, if you do not constantly see Symbiote in a team fight. Remember, high level Abathur players will jump in and out of hosts to refresh cooldowns, so Abathur is not abandoning you just because it appears so.
Alternatively they may be focusing elsewhere, remember you are not the only hero in the game, and Abathur will be looking at them all, and the lanes too! Maybe your team fight is actually going pretty well, and looks to end favourably? Can't see Symbiote? Chances are your Abathur is taking the opportunity to crash one of the opposing lanes with a Monstrosity. Abathur's game is about the chessboard, not the individual pieces.
Note, whilst support is always good, it is not all-powerful. Carapace will prevent some damage, and Stab will add some to the opponent. Abathur cannot save those who cannot save themselves. Whilst you should be more confident in combat with Abathur riding you, it does not put you in position to make reckless dives and wonder "where were the shields?".
Also, do not demand continual support. Abathur players have their eye on the wider game most of the time. As I said, you are not alone, and demanding continued support all the time takes away one of Abathur's greatest strengths (global presence). You must understand, you may not currently be the most important factor on the map to Abathur. Sometimes breaking that keep is more important than you, or another hero needs the support more, and will gib as a result, turning a fight. Demanding support and bemoaning your Abathur when you don't think you're getting enough only serves to irritate the player which isn't good.
In Closing Top
Thank you for taking the time to read this guide, I'm finally finished and would appreciate any feedback and such. I'll periodically update the guide to include better visuals clear typos etc. So check back when you can! And remember...
Zerg like you mean it!


Quick Comment (9) View Comments
You need to log in before commenting.