Hero Discussion Top
Anub'arak is a versatile Tank who has mobility, crowd control, as well as a shield for self-sustain.
Anub'arak's
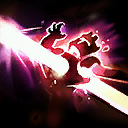
 Burrow Charge
 is the most important ability to consider in the hero's kit.
It can be used as an engage, as an escape, as a mobility tool, and as a self-cleanse (Anub'arak is unstoppable during it.)
How this ability should be used depends on the situation as well as on the enemy team. You will barely use it to engage when playing against
 Garrosh
 and rather use it to escape after being thrown, you might also want to keep the cooldown ready to move back and peel for your backline when they are getting dived by a
 Sonya
Sonya and
 Diablo
, and in the ideal scenario you can use it proactively to engage on a target that is out of position so you can get kills with your team.
All in all, remember that
Burrow Charge should not always be used to engage, it is a big mistake to only use it that way, and it will cost you games!
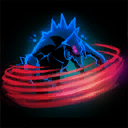
 Impale
 however can be used with less consideration, the cooldown is less important despite being impactful. Don't hesitate to press the button, landing a stun is never bad in itself.
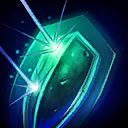
 Harden Carapace
 is the ability that will help Anub'arak sustain through damage. The shield it grants gives a small time-frame where taking damage is not an issue, and the cooldown is quite low. On top of this, the ability grants Anub 40 Spell Armor, making it even harder to kill the beetle.
On the other hand, Anub'arak is one of the lowest HP tank in the game, and going through his shield means he is very vulnerable and quick to kill. Spell Armor does not work against Physical Damage, and thus strong auto-attackers will put a lot of pressure on the hero.
The other two things that Anub'arak brings to his team are his beetles spawned from
 Scarab Host
, and his ever impactful
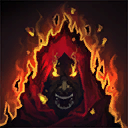
 Cocoon
.
The beetles are notorious for blocking projectiles, such as
 Li-Ming
's
 Magic Missiles
, but another use is to tank shots from structures to enable your team to push. As they attack heroes, they may also dismount or deny mounting for the enemy team for a few seconds.
The
Cocoon is a very impactful ability, as it can entirely deny an enemy hero for a few seconds. High-tick damage, such as poison,
 Disintegrate
,
 Burning Rage
,
 Dark Swarm
, or fast attack speed such as
 Tassadar
's
 Resonance Beam
,
 Tracer
 or
 Tychus
, all of these example can destroy the cocoon very fast and make it lose impact. Thus, the first thing to note about this ultimate is to identify who can break the cocoon, then you will have the choice to either cocoon those targets, or engage those targets so they cannot break the cocoon; for instance
 Ana
Ana's
 Shrike
 makes her a cocoon breaker, and she is also a good target to dive in many cases, so engaging her while using the cocoon on her frontline is a fine option.
The second thing to note is that the
Cocoon can be used at various points in a fight.
I see too many people using it as a setup on an isolated target... If the target is isolated, simply engage them with your stuns, the cocoon gives their team enough time to join and take a fight where you will not have cocoon anymore! If you do get the initial kill without the cocoon, you will instead be able to use it right after to get more kills or at least force enemy cooldowns.
As mentioned earlier, you can use the cocoon on a target while you engage a different one, but you may also use it after the enemy engages you to punish them:
Diablo engages your team, you
Cocoon him and engage his team while they can't reach the cocoon yet. Of course it will all depend on the situation and the team compositions, but it is important to understand that you can use the cocoon both proactively and reactively!
If the enemy
 Zul'jin
 uses his Taz'dingo and you cocoon him, you deny him a lot of value, and this can be applied to other things such as
 Jaina
Jaina getting a great
 Ring of Frost
, but being unable to deal damage because you placed her in the cocoon.
Shield Build Top
This build is overall the best build at higher level for it is very flexible and lets Anub'arak maneuver around fights extremely well.
At Level 1,
 Nerubian Armor
 increases
Harden Carapace's Spell Armor from 40 to 65. This simply makes Anub'arak nigh-immune to spell damage for a few seconds.
If however the enemy team has a lot of Physical Damage to pressure Anub'Arak,
 Regeneration Master
 is the pick, as the extra 500 HP will really make a difference later in the game.
At Level 4,
 Shed Exoskeleton
 grants Anub 30% movement speed (mount speed) for 3 seconds. This talent is simply amazing as it grants another mobility tool on a fairly low cooldown, helping Anub'arak reposition during fights, chase or escape enemies, or simply dodge key abilities.
 Bed of Barbs
 is a very popular talent, and it is a good talent, but you will find more value with the movement speed in most cases, especially in this build.
At Level 7,
 Chitinous Plating
 reduces the cooldown of
Harden Carapace up to 3 seconds. The initial cooldown is of 7 seconds, the shield lasts for 3 seconds, this basically means only 1 second of downtime on the ability. It is not a reason to spam it, it simply makes it so that you will basically always have your shield available when needed!
At Level 10,
Cocoon is always the pick. Learn to use it properly and the impact you will have in teamfights will just be immense.
At Level 13,
 Urticating Spines
 is the option that makes most sense with the build.
 Burning Beetles
 may still be picked to help remove spell armor charges from enemies with
 Mirage
,
 Determination
,
 Fire Ward
,
 Force Armor
, making it so the spell damage from your team has more chances of not being reduced by those spell armor charges. Other instances of
 Spell Shield
 don't work with charges, and thus this tactic does not work.
At Level 16,
 Debilitation
 is the default pick, as it will reduce the spell power of enemies hit by 50%, achieving two things: Enemies will deal less spell damage, making it even harder to pressure Anub'arak that way, but also helping his team survive. It also reduces spell healing, so self-sustain and healing from allies can be halved that way.
 Epicenter
 is the other choice, increasing the area of
Burrow Charge, and it might be the pick if your game plan is to go for large combos. The cooldown reduction is not really important on this talent, especially considering what comes next.
At Level 20,
 Rewind
 is the pick; not only does it give you everything you need, but the competition is just very bad as well.
Charge Build Top
This build is high-risk high-reward and basically wants to engage all the time.
Only pick this build if you have a team composition that goes well with it, and teammates who will followup on your engages.
It's also important to note that if the enemy team has too many disengages tools such as
 Mighty Gust
, this simply does not work, and you should switch back to the Shield Build instead.
At Level 1,
Regeneration Master is picked for the extra 500 HP, although
Nerubian Armor can still be picked if the enemy team consists only of spell damage.
At Level 4,
 Underking
 will increase the range and damage of
Burrow Charge, making it a stronger engage tool.
At Level 7,
 Subterranean Shield
 grants a shield when engaging with
Burrow Charge in order to sustain more after the engage.
At Level 10,
Cocoon remains the only pick, and it can really make a difference if used on a target that could save the team from your all-in engages.
At Level 13,
 Acid Drenched Mandibles
 will provide extra damage to help kill targets after the initial engage.
Burning Beetles may still be picked to help remove spell armor charges from enemies with
Mirage,
Determination,
Fire Ward,
Force Armor.
At Level 16,
Epicenter is the pick to increase the area of the stun, but
Debilitation may be picked to reduce enemy healing if they have a high output healer such as
 Whitemane
 that you cannot
Cocoon reliably.
At Level 20,
Rewind is again the pick.
Beetle Build Top
This build works really well in Storm League, especially at lower ranks.
I do not recommend it at Master level, although it can still work in some situations.
This build can also be picked for split-pushing strategies, but that requires a coordinated team and specific situations.
At Level 1,
 Legion of Beetles
 will spawn more beetles and give them 30 Spell Armor.
At Level 4,
Bed of Barbs is the default choice, but
Shed Exoskeleton can be picked for movement speed, or
Underking for longer range mobility, this depends on the situation. If unsure, pick your comfort talent.
At Level 7,
 Leeching Scarabs
 will increase the damage dealt by beetles and give them a lifesteal effect that will heal Anub'arak. This talent is the key that makes this build work in Storm League, making it a statcheck build with good damage and self healing.
At Level 10,
Cocoon is still the pick for teamfight impact.
At lower ranks,
 Locust Swarm
 can be picked in order to give yourself more damage and secure kills, but otherwise it is not recommended.
At Level 13,
Burning Beetles will grant consistent damage over time as well as waveclear capabilities.
At Level 16,
 Beetle, Juiced
 will spawn more beetles as you auto attack, and their health is increased by 30%
At Level 20,
Rewind if you picked
Cocoon,
 Hive Master
 if you picked
Locust Swarm.


Quick Comment () View Comments
You need to log in before commenting.