Probius is a StarCraft specialist, and is representative of the Protoss Probe worker unit. As a specialist he has a large focus on zone control and waveclear, similar to Gazlowe, however instead of relying on a field of Turrets to protect his area he simply obliterates any enemy that steps too close (or too far). Many people are dissatisfied with his representation in HotS, and wanted someone with a greater focus on building a nest of Cannons, but the way he is now I think he's an excellent and powerful hero. Unfortunately I think that most players play Probius far too passively, relying on his zone control and hoping enemies don't jump on top of him. Instead people need to play him like the lord of Destruction he is!
Hi, I'm Demolij, a Masters player who has enjoyed this game since the Alpha. Probius may have some quirks, but for some reason he's one of my best heroes, and that's coming from a bruiser/melee assassin main. So sit tight, and I hope you get some value out of my first guide.
Strengths:
Abilities hit hard like a Li-Ming 2.0
Tactical poking
Extremely slippery, and chasing him can lead you to your doom
Peels well for allies with strong slows
Waveclear better than pretty much any other hero
Startlingly good mercing capabilities
Can take objectiv and defense it
Nobody knows what he does (except you if you read this guide)
Just an adorable killer robot
Weaknesses:
Health pool equal to the squishiest mages
Has no way of handling long range or hyper mobility
Zero self-sustain outside of maybe some shields
Basic attacks are almost worse than Abathur's
Heroic abilities are kind of clunky
Terrible PR, people think he sucks when he doesn't
Base health pool: 1310 (+4% per level)
- Compare
 Chromie
: 1323 (+4% per level)
- Compare Pilot
 D.Va
D.Va: 1153 (+4% per level)
Base Health regeneration: 2.73 (+4% per level)
Mana pool: 600
- Compare other heroes: 490 (+10 mana per level)
Attack range: 3.0
Base attack damage: 34 (+4% per level)
Attack speed: 1.11
Base dps: 38 (+4% per level)
- Compare
 Abathur
: 37 (+4% per level)
- Compare Olaf from
 The Lost Vikings
: 52 (+4% per level)
- Compare
 Samuro
's Mirror Image: 15 (+4% per level)
Balance Patch history
Summary of all patches: Null Gate and Photon Cannons buffed, Pylon Overcharge nerfed, minor talent nerfs.
|
|

|
Trait: Warp in Pylon
|
Understanding how to use this ability is an important step in playing Probius well. Innately you have a pretty sizeable mana pool but you do not regenerate mana passively and all abilities have massive mana costs. 4 casts of his W at full mana brings you oom. In order to offset this you can activate your Trait, letting you place a Pylon that generates an aura around it, and while inside the aura you regenerate mana at the massive rate of 100 per second. In summary if you're in a Pylon field you have far more mana than you can actually spend, and if you're not in a field you're on life support.
Pylons should be placed in locations where the enemy won't think to destroy them. If you place a Pylon in plain view enemies are going to want to destroy it, but if you put in in a bush or behind a wall they're less likely to kill them. Although they aren't the tankiest of units, a Pylon can still survive a full on Li-Ming orb with a liver of health, meaning they won't die randomly unless the enemy devotes some attention to removing them. Since you are a much bigger threat than a Pylon enemies tend to ignore hidden Pylons, even if they aren't hidden well. In other words, out of sight, out of mind.
A good strategy is to place one Pylon somewhere that it's unlikely to be destroyed easily (such as by your gate) and then place another Pylon in a much more aggressive location, so if the second one is destroyed you can fall back on the backup. If you have time you can also place your initial Pylon nearby (but not directly on) a dangerous area such as a gank bush or jungle path to provide vision, and as a bonus if your team gets into a fight you have a Pylon there already. Finally, It's strongly advised that you think about where you plan on moving with each Pylon, because if lategame you place a Pylon down for mana but then your team moves, you can't regen mana for a decent chunk of time.
|
|

|
Mount: Worker Rush
|
Most heroes have a channeled mount that grants them 30% movespeed. Probius on the other hand has a passive 10% movespeed at all times, which isn't enough to keep you away from fast-moving enemies like Lunara or Tracer, but is plenty for simply running away from a pursuing normal hero. The active component is much more important, granting you a gigantic boost in speed for 5 seconds letting you cover a huge space of land quite rapidly. It has a really short cooldown too so use it for rotating between lanes whenever you can. It is one of your only escape mechanisms, so keep an eye on the minimap while it's on cooldown.
The active has one downside, and that is the fact that it's instantly disabled if you take any damage while it's active.
This applies to DoT effects as well! It is not supposed to be a "get out of jail free" card. If you see the enemy nearby, your base movement speed can keep you safe. If the enemy starts moving in you should use the active right away without hesitation. When you get caught by the enemy as they jump on and around you, you deserve to get caught for not getting out sooner, and should use your brain to figure out how to get out (one tip would be to kite them around your Pylon until help comes).
|
|

|
Q: Disruption Pulse
|
This ability is extremely simple: you fire a projectile that deals average damage to all enemies it passes through. The projectile moves decently fast, travelling approximately twice as fast as a heroes' movement speed but has a brief delay before it is fired. On its own, it's a rather simple ability. It has a very short cooldown, at a measly 3 seconds, so it could theoretically be used for poke it it didn't have a much more important purpose. More on this below.
|
|

|
W: Warp Rift
|
This is single-handedly the defining feature of Probius. Knowing where to place Pylons will make you not useless, but knowing how to use Warp Rifts will make you a God. The ability itself is unassuming, it creates a rather small AoE field after a 1.25 second delay that slows enemies inside. What's important is that if a Warp Rift's center is hit by a Disruption Pulse then it will explode, dealing high damage to all enemies in the AoE immediately. And by high damage I mean pretty good damage early on, but extreme damage later on due to the 5.0% per level scaling. This means that at the beginning of the game you should use it mostly for poke damage, because although it doesn't have raw killing potential on its own you can still chunk a squishy for a quarter of their health. Also the 6 second cooldown means it can be used over and over, so be frivolous with it. One Disruption Pulse can hit multiple Rifts at the same time, so although you can't place a Rift right on top of another one, placing them close together will double your damage. Also, if you hit an enemy with both the Pulse and the Rift explosion, you'll deal that much more damage.
Now,
here is the most important part about playing Probius: quick-detonations. While arming a Rift is very small and unnoticeable, but upon arming it turns into a large and imposing globe. You can't expect an enemy to stand on top of an active Rift and let it explode on them. The problem is that Disruption Pulse must be used to trigger it, and the Pulse has a cast point and projectile speed, adding about half a second onto the detonation time. That means that if you wait for the Rift to pop up the enemy has a chance to dash or walk out. This means that the key is to make it detonate the instant it finishes arming. If a Disruption Pulse is on top of a Rift when it arms it will instantaneously detonate, which means with good timing enemies will have only 1.25 seconds to react to an unassuming globe before it hits them. If you get good at it you can be hitting enemies with essentially a Flamestrike every 6 seconds, and can even chase down fleeing foes.
|
|

|
E: Photon Cannon
|
Cannons are an amazing zone control tool that many people underestimate. You simply place down a turret that arms after a brief moment to fire on nearby enemies. The Cannon does deal surprisingly decent damage, having dps roughly equal to Muradin untalented, but that is not the main purpose of the ability. It does not prioritize heroes, so if it's in a minion wave it will shoot minions instead. The main strength is how durable the Cannon is; it has just enough health to make it annoying to kill, but not enough health to make it pointless to attack, so enemies have to waste time attacking it if they don't want to keep getting poked. That also makes it a great tool for PvE, because it can absorb all the damage minions or mercs might deal to you, and can even be placed under a Fort to divert 4-5 shots. It also has a decently large hitbox making it excellent for absorbing skillshots! The cooldown is only 2 seconds longer than the duration so there is no reason not to have a Cannon active whenever possible.
|
|

|
R1: Null Gate
|
Null Gate is my personal choice of heroic because it provides Probius with some actual crowd control. The ability creates a vector targeted slowing field that applies a massive slow and minor DoT to enemies in a very thin hitbox. It has a pretty sizeable delay on-cast meaning you have to place it in anticipation of where the enemy will go, and the vector targeting starts at the edge of the ability so if you start the cast outside of your range you will have to move until you get in range, even if the other side is close enough. It's janky, but if you get the hang of it you can disable enemies really, really well. Enemies fleeing down the length of the ability can't go anywhere and are sitting ducks for casual Warp Rifts. Don't be afraid to use it just to block a pathway, the cooldown is miniscule and is likely to be available for any teamfight.
|
|

|
R2: Pylon Overcharge
|
This second heroic choice is a very powerful damage tool that can deal an immense amount of damage to enemies that don't respect it. Activation instantly empowers all of your Pylons to have a larger power field size and rapidly fire lasers at enemies for a long duration. The increased range isn't a big deal, although it does give you a bit more leeway with casting your abilities, but the damage the ability deals is very high capable of almost solo-killing a squishy hero with 2 Pylons. The cooldown is annoyingly long sometimes but being able to almost assuredly secure a kill on a nearby enemy before they can run away is usually worth it. It has a fatal flaw, however, that being the Pylons themselves. Even though they have really long range, if the enemy can manage to destroy them you lose practically all the benefits, and even though you can place a new Pylon and it will keep firing (even if you die) it can easily be circumvented rather easily. It also requires you to prepare in advance, so if you don't get time to place the Pylons in advance you might as well not have a heroic.
Level 1
 Warp Resonance
 preferred.
 Gather Minerals
 viable.
 Echo Pulse
 unreliable.

Click me for details
|
|

|
Echo Pulse
|
This talent basically turns Disruption Pulse into a boomerang with a long delay, which is a cool idea but simply doesn't provide that much value in practice. Now, there is a neat trick you can do with it: if you fire a Pulse and the immediately place down a Warp Rift between you and the Pulse, the shot will come back and trigger the Rift making for some tricky surprise attacks. This is good for hitting enemies who are on their toes a lot, making it nice for heroes like
 Valla
Valla or
 Lunara
 who flit around a lot, but really it doesn't provide enough value to make it great.
|
|

|
Warp Resonance
|
My talent of choice for many circumstances. A quest talent where you simply hit heroes with a Warp Rift. It isn't hard to complete if you can reliable quick-detonate so ideally you'll have it finished around level 10 depending on the enemy's composition. Still, even if you complete it later, the reward is extremely strong. +100 damage is a nice chunk of damage but having an extra charge gives so much flexibility it's hard to pass up. Being able to instantaneously string 3 Rifts together provides those wonderfully clean one-shot explosions that wipe heroes off the face of the earth.
|
|

|
Gather Minerals
|
A great quest talent that makes your Photon Cannons far more powerful. The bonus damage is quite high and the increased health pushes the Cannons into the "too much health to deal with" area. Most importantly though is the vision, which makes Cannons function as mini Tassadars to protect your flank from gankers or stealthies. It's not a difficult quest to complete either because you are so quick at clearing waves, though you should be wary of not overextending for a couple stacks. The reason it's not my main talent choice however is because it doesn't amplify what Probius is best at. Warp Rifts are really strong and making them stronger directly increases your killing potential, while buffing the Cannons makes them slightly better at a job they do just fine at! Still, if you're up against stealth heroes or or on a map that really needs the steadfast zone control, this is the optimal choice then.
___________________________________________________________________________________
Level 4
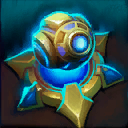 Photon Barrier
 most reliable,
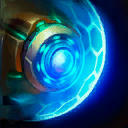 Shield Capacitor
 still good.
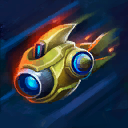 Turbo Charged
 ok.

Click me for details
|
|

|
Photon Barrier
|
If you're up against any assassins this is a great choice, the spell armor has saved me many many times. The only time it's an actual bad choice would be if the only enemy assassin was Valla or something. In mostly all other circumstances however 143% effective hp should be an autopick. This talent is in fact required vs Kael'thas in case he goes Pyroblast, so if he casts it on you there's plenty of time to place down a Cannon so you can survive.
|
|

|
Shield Capacitor
|
A useful talent in many areas, and a great choice if you're expecting to deal with a lot of poke. You don't have any self-sustain so all damage sticks, and if you can't dodge attacks well enough then this shield is right up your alley. Not to say you suck if you pick it. I pick it too, because if the enemy doesn't deal enough damage for Photon Barrier to matter most of the time then having an extra 10% health is very convenient. Funnily enough this talent is a better choice if you're picking Cannon talents because you don't want to be absorbing heavy damage in the first place.
|
|

|
Turbo Charged
|
I rarely pick this talent simply because the other talents here are much more reliable. The passive speed boost only applies while you're inside a power field, so the point where you may actually need the bonus movement speed is when the enemy is too close anyways, and if you leave the field to get away the talent is pointless. 30 seconds is a plenty short cooldown and gives enough time to clear lanes before it's back up again.
___________________________________________________________________________________
Level 7
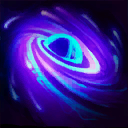 Rift Shock
 really good.
 Tower Defense
 good with level 1 talent. Never pick
 Particle Accelerator
.

Click me for details
|
|

|
Rift Shock
|
This talent might seem like a trap talent, but let me explain. This talent causes enemies hit by a Rift explosion to take an additional 20% damage from Probius for 10 seconds. The damage amplification does not apply to the explosion itself, however if you hit an enemy with multiple explosions in a row (which isn't super hard if you picked up Warp Resonance at level 1) then they will be taking bonus damage from each of those Rifts as well. Add all that together and you start unloading some crazy damage numbers. The only time I wouldn't take this talent would be if I'm speeding down the defensive Photon Cannon build.
|
|

|
Tower Defense
|
A rather weak talent, unless you picked Gather Minerals at level 1 in which is becomes pretty legit. You can have 2 Cannons constantly active as long as they keep on firing. Double Cannons deal good damage, and even just using it for some nice cooldown reduction to reposition a Cannon elsewhere, it's not hard to get value from this talent. I'd almost say it's a must pick for Cannon builds except Rift Shock also amplifies your Cannon's damage. Unfortunately Tower Defense is less effective if the enemy either has lots of poke or can simply ignore your Cannons.
|
|

|
Particle Accelerator
|
Not a good talent. The ability itself doesn't deal that much damage, and if you want to clear waves why would you rely on a talented ability that might just happen to kill the one minion in the back, or just use a Warp Rift and 1-shot the entire wave?
___________________________________________________________________________________
Level 10
 Pylon Overcharge
 better for pure defense,
 Null Gate
 better everywhere else

Click me for the answer
|
|

|
Null Gate
|
Null Gate is a far more agile heroic choice compared to Pylon Overcharge. Ideally you would have a team composition with some degree of peel and defense so you don't die instantly all the time, so if your team needs to be able to quickly push in on an objective or maneuver around a teamfight then Null Gate is much more reliable. Meanwhile if you end up in quick match and expect to get jumped on a lot then this choice is still probably the better option. Even without the raw damage it's still a potent defensive heroic on a very short cooldown.
|
|

|
Pylon Overcharge
|
Pylon Overcharge is a defensive ability with strong offensive potential. If you're on a slow defensive map where you can wait around 12 seconds to place multiple Pylons then Pylon Overcharge is a great damage option. The damage this heroic provides is no joking matter. Unfortunately there are many situations where you can't prepare in time, or where the enemy can simply disengage making you waste a massive heroic cooldown. I would only pick this talent if you're either going for a Cannon-based build or on a very slow and defensive map like
 Cursed Hollow
 or
 Sky Temple
.
___________________________________________________________________________________
Level 13
 Aggressive Matrix
 good but niche.
 Aggressive Matrix
 or
 Power Overflowing
 cover build weaknesses.

Click me for details
|
|

|
Aggressive Matrix
|
One thing that isn't clear about all 3 of these talents is that they all apply to Probius himself as well. This talent is unfortunately completely useless on him, but 35% increased attack damage for all allies in a pretty large AoE? That's crazy synergy with someone like
 The Butcher
 or
 Illidan
, and can be really helpful for clearing merc camps. It's certainly not the standard choice, but it's really
really good when you can pick it. When you do pick it make sure to tell your team otherwise they won't take advantage of it, but even if they ignore you as long as they're doing their job and distracting the enemy team, you can sneak on over and place a Pylon nearby them to force them to be stronger.
|
|

|
Power Overflowing
|
10% is a much smaller number than 35%, however it has the advantage of actually being useful to Probius. Obviously this is a better talent on teams with a lot of ability damage and can be nice to provide allies with some more mana regen (the +2 regen is pointless for yourself though), but it's less likely to be taken advantage of by all those positioning-dependent mages, so you might as well think of it as just the only self-damage increasing talent on this tier. I pick this talent for my defensive Cannon build because it provides slightly more damage on a damage-lacking build.
|
|

|
Shield Battery
|
This talent shares a name with Artanis' level 4 talent and Tassadar's level 20 talent, and generates shields like both of the others do. It's also the talent that I pick most of the time because having bonus shields equal to 9% of your max health is rather convinient, and all shields synergize great with the armor granted by level 4 Photon Barrier. The reason I pick this instead of Power Overflowing is because if you've finished stacking Warp Resonance from level 1 you should be dealing plenty of damage by now, and since your talents have given you incredible offensive power you should probably get a bit more durability if possible. Oh, and I wouldn't expect allies to take much advantage of the shields provided, because they have their own positioning to take care of.
___________________________________________________________________________________
Level 16
Pick whichever one suits the circumstance, except for
 Gravity Well
.

Click me for details
|
|

|
Quantum Entanglement
|
Having a lingering slow effect is great for chasing or escaping, and is especially effective against enemies who won't be dashing all over the place. Although it's not as flashy as the other talent choices pinning the enemy down makes it much easier to hit them with consecutive Warp Rifts.
|
|

|
Repulsor
|
This talent is surprisingly powerful. The knockback isn't all that much so don't bother trying to calculate where they're going to be knocked back to. Instead focus on timing the explosions on the enemy because the knockback interrupts, and also stacks successively with itself letting you launch enemies pretty far with multiple Rifts. Even better, it also clears all movement and cast commands the player might have told their hero to do, making it function as practically a stun that depends on the reaction time of the player. I would say it's literally a direct upgrade to Quantum Entanglement, however it does come with the severe downside of
knocking enemies out of other abilities, so I would advise not picking it unless you're not going for the standard Warp Rift build.
|
|
|
Interference
|
You may have noticed that many of his talents are geared towards defending against spells. That is because Probius is so mobile and fast that he can hit enemies with his abilities without giving them a chance to deal meaningful damage with an attack, while spellcasters don't have that disadvantage. This means that any time you can weaken an enemy's ability damage you should. This talent is really good and can have really high uptime, plus it stacks with Photon Barrier!
|
|

|
Gravity Well
|
This talent is... kind of garbage. The slow only lasts as long as the Rift lasts, enemies are unlikely to want to stand in the center of a Rift, and you generally want to be quick-detonating the Rifts meaning you get little to no value out of it anyways. It's also heavily overlapped by Null Gate anyways. I strongly recomment not picking this talent, or if you really want the zone control go Repulsor.
___________________________________________________________________________________
Level 20
Upgrade

sometimes,
 Shoot 'Em Up
 standard choice.
 Probius Loop
 very niche.

Click me for details
|
|

|
Shoot 'Em Up
|
The standard Storm talent option. Here is where your damage goes through the roof into outer space where all the other Protoss are. Basically, every time you detonate a Rift it creates 4 untalented Disruption Pulses to fire out from the center, with 2 flying out perpendicular to the shot and 2 flying out at 45 degree angles, and each dealing 50% damage. These Pulses can detonate more Rifts, letting you hit Rifts from far away if you angle them properly, but that's not the reason you pick this talent. No, the kicker is that
enemies can be hit by multiple Pulses. If an enemy is near the center of the Rift they will be hit by all 4 Pulses (The Pulses have a large enough hitbox that you don't have to be dead center), along with the original Pulse and the Rift itself. Even better, this damage is amplified by the level 7 talent Rift Shock, and each Rift will release even more Pulses!
That means that at level 20 with the standard build, if an enemy is hit by 3 Rifts at the right angle they will be smacked with

759.5 + 2(759.5 x 1.2) +

358.8 + 12(179.4 x 1.2) for max damage of around 5500 damage, with an additional 10% with
 Power Overflowing
. I am not even kidding when I say that on even levels I have 1-shot a Dehaka from full health. Granted, you won't always have the perfect money shot, but given that the high end can destroy a tank then you should be able to destroy easier targets just fine. Unless you're in a dire situation where you can't rely on landing Rifts, or you're in a curbstomp game on either end where more damage doesn't matter, I would always pick this talent on the standard build.
|
|

|
Construct Additional Pylons
|
Gaining an extra Pylon is really nice, but only works if you have enough time to place down 3 whole Pylons without getting destroyed. This usually doesn't occur in an even matchup, rather it only occurs when either the enemy is terrified of engaging or your team is losing and need to hard defend a point. In either of those circumstances you should pick this talent, it provides far more zone control than the other talents here, but if you're in a somewhat close game and can't afford to spend the time I'd advise picking a different talent, and maybe using this game as a lesson for next time.
|
|

|
Gate Keeper
|
This has the exact same issue with the other Heroic upgrade in that it's only good if you're either winning hard or losing. The zone control provided by a permanent Null Gate is amazing and can keep a pathway blocked for a long time, and heck I've even used it for a free ~140 dps on Keeps/Core. Unfortunately if the enemy can manage to get around it then it doesn't matter much, and even worse if the enemy kills the Pylon powering it because it instantly removes the Gate. Pick it if you can use it.
|
|

|
Probius Loop
|
An odd talent out, this one doesn't fit in like the other ones do. It does have some minor synergy with the level 1 talent Echo Pulse, and maybe would be good just for constantly slowing an enemy, but it's simply not a super reliable talent. There are two circumstances when I would pick this talent: if you're fighting a Samuro then it can be an autopick, and if your team has a really solid wombo-combo then having Warp Rifts multiply across the field can be pretty neat. Otherwise though it's just not worth it.
At the beginning of the game enemies don't have as much burst so you can play far more aggressively. Depending on the map you are a great choice for a solo laner, being able to clear waves quicker than anyone else at the time. Pay attention to the enemy's team comps and playstyle. If they have good rotations make sure to play a bit safer, but don't sit by your gate or you won't provide much value. You have many ways of granting vision, so consider using Cannons and Pylons as wards, or even Rifts for a quick brush check. If you're on a small map it's a good idea to double soak, so long as you rotate very carefully and be sure not to trade your life for some measly soak.
Use your Rifts cleverly. Keep pressure on the enemy laner with quick-detonations if you're free to do so, and try and score damage on their buildings when possible. If you're worried about the enemy jumping on you place your rifts defensively; putting a rift on top of your own minions will dissuade them from attacking them for risk of getting hit. If you get ganked place Rifts in front of where you're fleeing to, so if the enemy tries to chase you can hit them or slow them down. Bully the enemy out of lane while trying and distract the enemy as much as possible, you don't push buildings as hard as other specialists but if you can pull an enemy into your lane you give your team more space to move around. Poke at the enemy as much as possible, and plug up choke points with Rifts to limit the enemy's movement. The Rifts last a decent amount of time, so if you can keep concealed enemies often get lazy and think it's safe to walk through a Rift, which is the perfect time to nail them with some damage. Be assertive and don't give the enemy any space to breathe.
Once you acquire your Heroics you change to a completely different playstyle for a while. You already hit a powerspike at level 7 so be sure to mellow out for a while and focus on sticking with the team. By now you should have your quest finished and can kill a Bruiser camp with about 4 Rifts, so you can be the one to handle mercing (just make sure that your Cannons are the ones that tank for you). You don't push super hard yet but still have some great defensive power, so be sure to show up for objectives and just clear waves. This doesn't mean you should play totally passively, and if you do have an advantage on a lane you can still try and push in a bit. If your team groups up for a push try for aggressive Cannon placements to absorb damage for the team.
Around this time is where warriors and bruisers shine, and they will start to become much more intimidating. Luckily for your teammates you have some amazing abilities for peeling, so here is where you should focus on
keeping your team alive. You're probably more mobile that your squishy supports or ranged assassin, so if you keep bombarding the enemy with quick-detonations you can hold them back and even net yourself a kill once in awhile! Also your tanks should start to be able to pull off much more ballsy techniques, so if you follow up with them you can combo enemies to death. This is especially true for heroes like
 Anub'arak
 and
 Diablo
. If your team starts pulling ahead you can play slightly more aggressively, but always remember that this is your weakest phase and you can't get cocky. Just push through until the late-game.
Here is where the ball starts rolling. Due to your raw scaling you now have the capability of single-handedly sending an enemy to the Altar with a rift or two. Catching an enemy out of position can spell immediate death, and enemies can't kill you unless they commit their souls to it due to all your defenses. Left unchecked during a teamfight and you can burn through the entire enemy team's life by unloading all your abilities. A rooted or stunned enemy is equivalent to a sacrificial lamb laid on an altar by your allies, ready to be devoured by Rifts to the unspeakable horrors you can provide. All for their god. All for you.

...ahem. While that is true you still need to think a little bit about what you're doing. The slightest misposition and you can die right away, in fact most of my games the only deaths I would have are near the end. Enemies can push into a defensible position much easier too, mostly because many Storm Talents are really darn powerful. You should be the one to do whatever PvE things your team requires, and never go deep into the enemy's territory alone unless you want to die. You need your team and they really need you even if they don't say it. Don't focus on trying to make damage stick with poke as much, healers are much stronger now as well and against heroes with long range you can't afford to try and trade with them anyways. Instead focus on either zoning the enemy with Rifts, or just sieging them down with a barrage of explosives, because even if they will probably survive the hit they still don't want to take the damage. If a fight breaks out let the carries do carry things, you need to play like an assassin and kill whatever you can. When you get focused just try to deal as much damage as possible and survive, in that order.
11:00pm 2/27/18: Guide created
1:00am 2/28/18: Statistics and format improvements
1:00pm 2/28/18: Added Battleground help
11:00am 3/2/18: Color-coordinated recommendations
12:00am 3/13/18: Table of Contents and minor reformatting
![]()



 Click me for details
 Click me for details
 Click me for details
 Click me for the answer
 Click me for details
 Click me for details
 Click me for details

Quick Comment (1) View Comments
You need to log in before commenting.