The "Easy Rider" concept Top
While Sonya is not a hard hero to play with any of her builds, this guide makes things absolutely easy for you. It's ideal to explore Sonya for the first time and focus on her two main complexities: connecting with
 Ancient Spear
 and Fury management. The "Rider" part is there to remind you one basic concept: Stay mounted most of the time. Stay mounted behind a creep wave in the early game, engage while mounted, mount when your gap closers are on CD and you got distance from the target, mount right after dealing the last hit on a mercenary camp. Finally, keep in mind that Sonya is a mid-late game hero and your early game potential is somewhat limited.
Assassin, not Warrior Top
This build assumes a very simple precept: Sonya is a tanky assassin, not a dps tank. You may ignore the "damage taken" statistic completely and focus on bringing down hero after hero, making sure that no enemies escape the teamfight just under 100 hp.
Positioning Top
Levels 1-3:
Your early game should concentrate almost entirely on staying alive and mounted, safe behind a creep wave, only bothering to hit the enemy wave when it goes beyond the middle of the lane towards your Fort walls. Exception to this are maps that have a single Watch Tower for both teams, namely
 Sky Temple
 and
 Blackheart's Bay
. On these maps you should assist your team in capturing those Watch Towers always keeping in mind that it's not worth dying for them.
 War Paint
 will not help your early game at all instead it will shine in the mid-late game. If an opportunity presents during the first contact with the enemy at the lanes and you have a hero at your side that can root/stun an enemy softie, you can make an attempt for the first blood, charging mounted and using
 Ancient Spear
 and 2x
 Seismic Slam
. Keep in mind three things though:
1) If you fail to connect with
 Ancient Spear
 (you should train until this is no longer an issue) don't bother chasing. You will most probably end up wounded or even worse, without managing anything more than scratching your opponent.
2) Under NO circumstances get into range of the enemy towers unless you are about to give the final blow. They can bring you down faster than you can scream "OH S***".
3) You start with 0 Fury, and a successful
 Ancient Spear
 will generate 40 Fury. A
 Seismic Slam
 requires 25 Fury. In order to cast two of them, you need 10 additional Fury that can be generated with 2 auto-attacks (6 Fury per auto-attack) or one auto-attack and getting hit twice (2 Fury per hit received). Since a
 Seismic Slam
 deals about three times your auto-attack damage at the 1st level, it is almost essential to have enough Fury for two, if you are going to get the first blood. In practice, you will most probably receive enough Fury for a second
 Seismic Slam
 by managing one hit between the two
 Seismic Slam
s and receiving two hits by an enemy hero. If you have the chance it is much safer to get those two auto-attacks on a creep, before engaging.
Level 4-7:


Your killing potential has just begun building up with
 Focused Attack
. At this point you should be looking around for overextended enemy heroes anywhere on the map. Approach mounted while signaling your allies and attempt an easy kill. You should not abandon your lane unless either these ideal circumstances appear, or there is another hero in your lane that can keep soaking. Abandoning your soaking for a questionable ambush is not an effective strategy. Similarly, if all the lanes are being soaked and another hero is available, going for the easier mercenary camps is the best course of action. Right before entering a camp fight make sure that no enemy hero is around or that you and your allies can handle the enemy presence while fighting the mercenary camp.
Level 7-9:


The same principles of level 4-7 apply, but with
 Follow Through
, you can start looking around for less-than-ideal gangs. Again, you should not abandon your lane unless there is a good reason, such as an objective, a promising gang or to defend a fellow hero. Roaming is a waste of time for Sonya. Think of it like that: your default position is your lane. You only abandon your lane on a mission with a specific target. If the mission fails, return to your lane.
Level 10-13:


Your playstyle at this point should become more aggressive but never forget: you are not a tank! As a rule of thumb, clear a wave in a lane and move to the next, policing the jungle between them. if all lanes are pushed, clear alone the siege/doubloon camps or ask assistance from ONE ally for the bruiser camps. If at least two allies are nearby and at least one enemy is down, go for the boss. You can tank it under one of three conditions:
1) a healer keeps you up and an assassin brings the boss down, or
2) two assassins bring the boss down fast, or
3) an assassin shreds the boss while a warrior switches with you every few seconds to distribute the damage managing to heal with
 War Paint
.
In theory you can take down the boss with just one healer keeping you up, but this will take far too much time and is advisable only in one scenario: the rest of the team is down, so do 4-5 heroes of the enemy team and you have nothing particularly important to protect (2nd tier fort or core, or incoming boss).
Level 14-19:


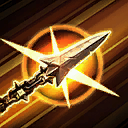

In the late game Sonya becomes a finely honed ganger. With
 Mystical Spear
 becoming viable both for entry and escape, you can roam the land mounted, ready to pick a fight. Preferably, you want a small fight rather than a full team fight but you shouldn't be shy in either case. Enter aggressively, pick out stragglers,
 Leap
Leap on sneaky bastards trying to escape with low health BUT if you become the focus of the enemy fire, do not stick around unless there is enough healing/shield/damage reduction going around to keep you up. If you are in contact with at least three enemy heroes, use
 Whirlwind
 to multiply your survivability, but remember that this won't be enough if you are not receiving any healing/shield/damage reduction.
 No Escape
 means that as soon as you engage an enemy he will have to use an ability to disengage or die. He cannot simply escape by running. Exploit this fully by catching enemies off-guard, away from the rest of their team, such as a split-pusher.
Level 20+:


At this point your build is complete and your damage potential means that you can take 1 on 1 most softies, denying their escapes, sticking to them with
 No Escape
, using
 Ancient Spear
 and
 Leap
Leap as gap closers and grinding them to dust with
 Seismic Slam
, all the while healing with every hit through
 War Paint
, and having a health pool that overshadows all softies. That said, you should be sticking with your team most of the time, taking down escapees, soft targets and whirlwinding if you are getting at least three enemy heroes. Read the rest of the guide on how to best utilize your abilities.
Fury Management Top
Let's take a look at the rules regarding Fury:
1) You start the game with 0 Fury, and can hold up to 100.
 Endless Fury
 is a talent that can increase that to 200, but is not relevant in this build.
2) You gain 6 Fury whenever you do an auto-attack and 2 Fury for every single hit you receive regardless of the source or the damage dealt.
 Ancient Spear
 generates 40 Fury.
 Shot of Fury
 restores 50 Fury every 60 seconds but proper Fury management means that you do not need that, especially without
 Wrath of the Berserker
. These are the ONLY ways to build up Fury since neither wells nor reviving provides any Fury. On the contrary, dying and reviving will set your Fury to 0. Thankfully, unlike Diablo III, your Fury is not reduced over time. If you have 30 Fury, it will remain so until you use an ability, make an auto-attack, or get hit. That's all.
3) These are the ability costs:
 Ancient Spear
 generates 40 Fury.
 Seismic Slam
 costs 25 Fury.
 Whirlwind
 costs 40 Fury.
 Leap
Leap requires no Fury and can be activated with 0 Fury available.
Generally, the main component of Fury management involves filling up your Fury whenever possible. Typically this is done with creep waves and mercenary camps, where you finish them off using auto-attacks for the last hits in order to leave the murder scene with full Fury.
You require 17 auto-attacks to get your Fury from 0 to 100 but in practice this is vastly reduced by the hits you receive. Against creep waves, all you have to do is to cast a
 Whirlwind
 as soon as possible, hitting as many targets as you can, then filling up your Fury with auto-attacks, casting
 Seismic Slam
 to as many targets as possible whenever your Fury is almost full. Ideally, you will cast your last
 Seismic Slam
 and still have enough creeps to fill up your Fury. Against a creep blob (two or more waves moving together), casting a second
 Whirlwind
 is typically viable. Against mercenary camps you follow the same procedure but you should not use
 Whirlwind
 unless there are at least 3 mercenaries (only in Bruiser camps). Once they fall down to 2, stop using
 Whirlwind
, fill up your Fury, and use
 Seismic Slam
 every time the Fury bar is almost full, except when the last creep is almost dying, in which case switch to auto-attacks in order to leave the camp with full Fury.
Sometimes you just don't have the time to clear a creep wave. In these cases it is possible to enter a fight with a wave using
 Ancient Spear
 and then restrict yourself to auto-attacks, just to fill up the meter leaving the fight without clearing the wave. Technically, you can do the same with the non-boss mercenaries but resort to this only when it is the only way to generate Fury, you don't have time to stick around and clear the camp AND a team fight is expected very soon. Even then, it is not advised to stick until your Fury is full, instead go with an
 Ancient Spear
, deliver 2 auto-attacks and haul *** (this will be enough for two
 Seismic Slam
s).
The final advice on Fury management will be explored in the next chapter and involves getting those auto-attacks between your abilities. Doing this is essential to deliver your maximum damage anyway, thus it will not be discussed as a Fury management tactic but as part of your ability sequence in...
Combat Manual Top
Firstly, here is a summary of all Sonya's abilities and chosen talents:


The
 Fury
Fury trait causes you to gain 10% speed increase for 4 seconds, every time you use an ability, upgraded to 25% on level 16 by the
 No Escape
 talent. You must learn to time your
 Seismic Slam
 correctly in order to keep the speed bonus up while chasing. You can also activate
 Whirlwind
 while escaping to gain the bonus speed without casting time. As an escape tactic, after you gain
 Mystical Spear
,
 Fury
Fury will also activate after using
 Ancient Spear
, thus getting you further away.
We have already discussed how to approach creeps and mercenaries thus this chapter will focus on fighting heroes. Sonya has extreme chasing potential due to
 Ancient Spear
,
 Fury
Fury,
 No Escape
 and
 Leap
Leap. You should exploit this skillset to the fullest by always having available enough gap closers to do the job.
The trick here is to balance the number of gap closers you and your teammates have, with the escape potential of the enemy, factoring in the double role of
 Ancient Spear
 as a Fury generator, which in turn fuels your
 Seismic Slam
.
You should always begin a fight mounted, charging up to the enemy hero, using
 Ancient Spear
 and
 Leap
Leap to catch escaping heroes.
Alternating between
 Seismic Slam
 and auto-attack is Sonya's standard damage delivery method inside a fight. The auto-attack after every
 Seismic Slam
 is extremely important to deliver the maximum damage possible due to
 Focused Attack
 and
 Follow Through
. Use
 Ancient Spear
 to replenish your Fury before it is exhausted, typically after two
 Seismic Slam
s, but read the rest of the chapter for a better understanding of
 Ancient Spear
's usage. Use
 Whirlwind
 only when there are at least 3 enemies in contact with you, or two enemies are focusing you and an ally is providing healing/shielding/damage reduction to you. So, your typical combat sequence looks like this:


Leaving the battle is also quite straightforward: If you must leave absolutely now and
 Leap
Leap is available, use it. If you are participating in a tactical retreat and have
 Mystical Spear
, then use
 Ancient Spear
, and exploit your speed bonus from
 Fury
Fury and
 No Escape
 (oh the irony), to get enough distance for mounting. If none of the above is available or the speed bonus was not enough to escape, you can activate
 Whirlwind
 to refresh the speed bonus and if
 Mystical Spear
 or
 Leap
Leap is soon refreshing you might get another chance at escaping.
The most important part in playing Sonya successfully is the correct use of
 Ancient Spear
. First of all, you must learn to aim
 Ancient Spear
, having an instinctual understanding of
 Ancient Spear
's range, its delay before it reaches the target and the vector on which the target is moving. Beyond knowing *how* to properly execute
 Ancient Spear
 you must also learn *when* to do it. There are three tasks accomplished with
 Ancient Spear
:
1) Fury Generation
2) Gap Closing / Escape
3) Damage
You want to reserve
 Ancient Spear
 whenever
 Leap
Leap is not available and the target has one escape ability, or when you do have
 Leap
Leap but your target has two or more escape abilities available. Using
 Ancient Spear
 for damage is a waste, unless you are out of Fury and the target remains engaged. If your target has no escapes, feel free to use it before the Fury gauge falls below half. Other cases where
 Ancient Spear
 can be used are the following:
1) You have heroes with cc at your side, freeing up
 Ancient Spear
 for Fury generation.
2) You need to disengage (with
 Mystical Spear
).
3) You can block a hero your team is chasing (mostly with
 Mystical Spear
).
Generally,
 Ancient Spear
 is a very versatile ability and once you get
 Mystical Spear
 its uses are multiplied, plus the cooldown is lowered thus permitting a more frequent use.
20th level: Nexus or not? Top
While this guide assumes
 Nexus Blades
 as the default talent choice at level 20, a case should be made for
 Ignore Pain
. 75% damage reduction is simply too much to neglect. The deciding factor on this choice is the hero composition of the game. Since this is a late game choice, you have ample time to appraise the situation.
Generally, you should be able to get a feeling on how well you hold up and pick
 Ignore Pain
 if you feel that your uptime is severely hampered. The enemy team's behavior should be factored in. If you are often the focus of the enemy assassins,
 Ignore Pain
 can aleviate the disadvantage. On the other hand, if your team contains prime fillets such as
 Kael'thas
 or
 Jaina
Jaina and they get all the attention, you should capitalize on that with
 Nexus Blades
. Similarly, an experienced split-pusher threatening to dissolve any structural advantage your team might have, justifies some additional punishment with
 Nexus Blades
.
Ultimately, you should try both talents to get a feel for them and the right situation to use either.
Lane or Objectives? Top
Sonya is good at clearing waves. As a rule of thump, if...
1) there is less than 20%-25% exp left to level up
2) your team does not have a level advantage
3) the next level is 10 or less
...it is preferable to stick to laning and rush to the objective as soon as the level is gained. That said, there are many factors to consider. In
 Blackheart's Bay
 the chest should get priority over everything, except a team fight right in front of it. Same goes for a tribute in
 Cursed Hollow
. If the objective has spawned far from where you are, and your team needs just a little more exp to level up, it is preferable to move to a closer lane, or let someone else closer there do the farming. Beyond level 10, you should stick to laning only if the required exp is less than 5%-10% and only if your team does not already have a level advantage. For example, it would be a mistake to stick to laning while a temple is open in
 Sky Temple
, with 8% left for the 14th level, while the enemy team is still on the 12th. As a final word on the matter, consider this: it is not worth losing an objective over a level but if you can get both, do it!
Epilogue Top
What inspired me to write this guide was the one-sided approach of almost every other guide I read about Sonya. I personally don't think that Sonya is meant to be a warrior in anything beyond concept design. I especially dislike having that concept pushed down our collective throat by trying to emulate her tanky role through
 Nerves of Steel
 and
 Ignore Pain
. That said, check
this excellent guide to expand your Sonya knowledge and learn a different approach to her!
That's it folks, thanks for reading, please feel free to comment!
PS: Special thanks to qqlolz for editing and proof-reading!
![]()


Quick Comment () View Comments
You need to log in before commenting.