Competitively, I am team captain of the relatively new squad, Convergence Gaming. While this is the team's initial foray into Heroes, a
history in Starcraft II is the organizations backbone, which I was fortunate enough to be a part of. As of April 2014, I have been apart of the tech alpha for Heroes of the Storm and
 Valla
Valla has definitely been one of my most played heroes during this time, culminating in hundreds of games and hours with the hero. With a sample size of over 150 games during the first week of the final alpha wipe, I peaked at number four on
Hots Logs with an MMR of 4200. Now this is an unofficial ladder so I understand it doesn't mean a whole lot, however it should lend some credence to my ability to understand the game. The main crux of this guide will be focusing on carrying solo queue which is why it emphasizes self peel so much, however I still feel it is a solid build in competitive. In addition, i'll be delving into some situational talents. I'll try to be thorough and I hope you enjoy the guide!

 Trait
Trait -
Hatred: Basic Attacks grant a stack of Hatred, up to 10 . Each Hatred stack increases Basic Attack damage by 2% and Move Speed by 1% .
One of the better traits in the game, this allows you to thrive in sustained team fights as well as provide your talents that augment auto attacks to get the most out of the trait. My only qualm with this being, it doesn't really allow deviated build paths in Valla's tree, as her ability augmenting talents that don't pair with the trait almost feel gutted.
 Q
Q -
Hungering Arrow: Fire an arrow that deals 66 (+15 per level) damage to the first target hit, then seeks out up to 2 additional enemies dealing 33 (+7.5 per level) damage. Can hit an enemy multiple times.
A great ability but not great enough to talent for. Since it's nerfs its range is quite a liability at times, however when properly weaved within auto attacks it can really output a ton of damage. The bouncing mechanic essentially functions as a bleed effect which is nice for picking up those juicy kills behind the gate.
 W
W -
Multishot: Deal 60 (+15 per level) damage to enemies within the target area.
The main assets of this ability are to check bushes, reveal stealthed units and clear waves. When applicable you can weave it in between your autos and still gain a net dps increase even if it's one target. The more targets you hit with this ability the more damage you're going to get, but again the range is the limiting factor. As Valla that extra small burst of damage is almost never worth your death.
 E
E -
Vault: Dash to the target area.
Valla's bread and butter escape. Knowing the range of this ability is key to escaping dives while still being on the edge of the team-fight to do damage.
 R1
R1 -
Strafe: Rapidly attack nearby visible enemies for 15 (+6.5 per level) damage per hit, prioritizing Heroes over Minions. Valla is able to move and use Vault while Strafing. Lasts for 4 seconds.
A great ability for dealing sustained AoE damage in a fight. It is best paired with a cc heavy team on your end or used to skirt a team fight from a safe distance as it's range far exceeds your autos. Never use this if the enemy team still has hard CC un-popped.
 R2
R2 -
Rain of Vengeance: Launch 2 waves of Shadow Beasts that deal 100 (+23 per level) damage to enemies within the target area, stunning for 0.5 seconds per wave.
Best used in conjunction with a premade, it can be a strong CC that can chain well with other CC on your team. Try to use this on maps that will be about controlling chokes around objectives such is Cursed Hollow.

Level 1
 Cost Effective Materials
 - I don't think there is a scenario where I would take this over anything else this tier. Even If I was going a full caster build for fun or something It doesn't make sense to take this over punishment.
 Siphoning Arrow
 - Again, I would never take this. If you're starved for life-steal this talent is not the way to go, you can easily take Rancor instead of this to pair with Vampiric Assault or Tempered by Discipline if need the sustain that badly.
 Composite Arrows
 - This isn't awful, if you plan to go for a Frost Shot/Executioner build later on. Even so if I run that build I still prefer rancor in order to get an extra +40% during the duration of frost shots slow.
 Rancor
 - This is the go-to for this tier. Not only does it synergize heavily with itself but it equates to the highest raw DPS increase. In this build we take Manticore and Battle Momentum so this is key if you want to make the most out of them. Also it just feels so good to have that extra Attack Speed at all stages of the game and can really increase your ability to orbwalk in the late game.
 Punishment
 - If you're going an ability route this would be the talent to go. I wouldn't recommend it, but it's the only way you're gonna get any use out of you're trait.
Level 4
 Vampiric Assault
 - This is my situational pick on this tree, that ill take if it looks to be a particularly long lane phase or I'm caught in a situation where I have no healing support on my side of the field. It doesn't heal for that much but it can make the difference from staying in lane or heading back to base.
 Manticore
 - This is prominently what well be taking for this guide. If your playing the champion correctly, you'll be in the back line picking away at their tanks or anyone trying to dive you. This talent allows you to deal an incredible amount of damage to a single target forcing them to either back off or die.
 Puncturing Arrow
 - If I were to go for an ability build (Read: I wouldn't) them this is what I would take. It can pump out a deceptive amount of damage on your Q, and can really catch people off guard if their not expecting the damage.
 Arsenal
 - This is what you would take to get your multishot build rolling however the purposes of this guide I advise you not take this or any other of the multishot talents. If this is route you want to go then by all means they're plenty of guides detailing just that however in a solo-que environment, where games are won and lost by 1-2 player picks over sustained team fighting and wave clear I advise you stick to a purely single target build in order to capitalize on such events.
Level 7
 Battle Momentum
 - This is the talent I have found the most success with this tier. Not only does it synergize well with Rancor but it also allows you to take almost 3 seconds off vault cooldowns in between each use.
 Caltrops
 - Never take this. Not only does it do a paltry amount of damage but it relies on the enemy team to make a mistake to utilize it. It's just completely out-shined by everything this tier.
 Repeating Arrow
 - If you're running the arrow build this is what you'll take. Two Q's can output a large amount of damage but I've seen many a Valla attempt to use this combo only to be destroyed by the enemy team for not using Vault defensively. Again, the arrow build does not utilize your passive in the slightest.
 Searing Attacks
 - Honestly, this one is really close with battle momentum. I have picked this up a handful of times and while decent, didn't feel as good for me and ran me oom a lot in the early game. It has great synergy with Manticore and while I'm not sure if the % damage increase stacks additive or multiplicative, I do know it nets to a whole hell of a lot of damage. Mess around with this one and try it out for yourself.
Level 10 (Heroics!)
 Strafe
 - With this self peel build you shouldn't have an issue dying or being focused so Strafe does end up netting far more damage then it's counterpart. The key to this ability is to make sure your positioning is impeccable and to wait until hard CC has been burned before using it. Never use this to start a fight unless you have a clear pick on an opposing hero. When using this in a team fight try to keep the most amount of heroes possible on the outer indicator ring of the ability,as you get no extra damage for proximity.
 Rain of Vengeance
 - This isn't a bad option however without solid communication and the ability to force team fights in choke points it loses a lot of it's effectiveness. The biggest down side of this heroic is that fact that it forces you to be within close range of your opponents to use which is completely counter-intuitive to what you're trying to accomplish with this build. The CC is strong however, so it is something to note. Its a great ultimate for when you want to follow up on a CC chain, such a Zagara Maw, or an Uther Divine Storm.
Level 13
 Giant Killer
 - If there are two or more tanks on the enemy team I will generally pick this up. Even on squishier targets it still adds a good amount to every auto, again showing great synergy with Rancor and your trait. Generally you'll be hitting tanks in team fights and with Manticore in tow you will find these two talents eat up the enemy's front-line.
 Frost Shot
 - I take this one out of every fifty games but on the oft chance I am feeling like running Executioner at level 16 and don't find myself with reliable CC on my side of the field I will pair this up to create my own.
 Hot Pursuit
 - To me this is the worst talent on this tier. Even in the situations where you are ahead by a large margin and might want to take this to finish kills I still can't justify taking this over anything else.
 Tempered by Discipline
 - Again, if you have no support healing on your team this can pair up with vampiric assault nicely keeping you in lane and in fights without the need to go back. If their is one tank on the enemy team, no hard burst like Zeratul or Nova and no healing support with you, then these are the ideal conditions to take this. It's important to note that stacks of Tempered by Dicipline will start dropping in place of your rancor stacks at first, ideal for maintaining damage in a long team fight.
 Spell Shield
 - If there is a Zeratul, Nova and to a lesser extent Falstad on the opposing team, take this talent without hesitation. Stealthy burst is Valla hardest counter in the game and living through an initial barrage can make or break a team fight or small skirmishes. With the copious amount of these two heroes in high MMR soloqueue you will end up taking this talent a majority of the time.
Level 16
 Executioner
 - I take this sometimes for fun, and if there is an Arthas or another similar hard CC champion on my end I may be inclined to take this. If you're going completely full damage then this is what you want however this self peel built in to other talents on this level make this less attractive.
 Tumble
 - If you find yourself needing to get as far back as possible in the quickest amount of time then this is what you want. I take this if I see an Illidan and Tyreal on the enemy team but never really any other time. Many times you don't need to be moving back as much and the mana you end up burning becomes pretty brutal. If you want to make outplays this talent looks the flashiest but falls short to BfB in effectiveness.
 Blood for Blood
 - This talent is money ($$$). If you're familiar with league of legends, this talent is a straight up Blade of the Ruined King. If someone is diving you, and you vault backwards, you can simultaneously use this on the attacker to slow their ability to follow up as well as provide damage and healing to yourself. In duels you can utilize all three aspects of the ability and force outplays in previously unwinnable circumstances. When used on the right tank the %HP shred can destroy people if your team makes a call to focus. The heal is the biggest X-factor of this ability as it can really catch people off guard if they had previously calculated what they thought your health pool was going to be.
 Stoneskin
 - Purely a defensive ability however a little underwhelming. Most of the time your spell shield already does the trick of mitigating burst. The biggest negative for this talent is the fact that Valla's base health is incredibly small so the shield ends up being negligible as well. The main thing working against this talent is the other great options in this tier.
Level 20 (Heroics part 2: Electric Boogaloo)
 Fury of the Storm
 - Clearly named after me however unfortunately unlike me this talent sucks. Maybe in some crazy split-pushing future this might have a place however this current iteration reeks of filler. Don't take this.
 Bolt of the Storm
 - This is it. Flash in HotS. The amount of plays you can make with this ability are vast. The small smoke animation makes it hard to see exactly where the user blinked making it hard to follow up. The amount of utility and versatility this talent brings makes it top tier. You can chase kills and blink away from dives. It allows you to position for a strafe or even during the duration, as well as completely mind game people in duel scenarios.
 Vengeance
 - If you are completely safe with no chance of being dove and taken out then you are not playing Valla. If by some chance you look at your hero portrait and this you in fact are playing Valla and this scenario is unfolding then definitely take this talent for maximum damage. Post-nerf the damage isn't quite as high however relative to other damage output sources it is still monstrous.
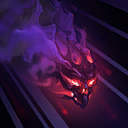 Storm of Vengeance
 - If you took Rain of Vengeance then you must have excellent communication with your team to orchestrate fights at chokes as well as the ability to peel for you. If this is the case, the extra two drops effectively double the usefulness of this heroic. Four sprays of AoE lock-down CC is not to be understated.


Haunted mines is a weird map for Valla. This is a map where the entire game can be won or taken control of by a mines team fight, which is great for any team with a Valla, however the corridors and pathways you fight in are not conducive to Valla's ability to kite backwards and disengage. A good Nova and Zeratul are very painful to deal with and my best advice would be to stay with your team as closely as possible as you will be fighting from a much closer range than normal.
Don't over-commit during lane phase as any advantage when the mines open is critical. Trading favorably when you see the 30-seconds timer is encouraged. Make sure you zone into the mines with your team together and all at once. If you catch the enemy team zoning in fist, take a different entrance as a common strategy currently, is to ball up as a team and camp the mine entrance from the inside in order to catch a team unawares. When inside Valla has a great ability to clear skulls, but be careful note to stray to far from you're team. Anytime your golem 1 is stronger you are going to want to push with it. If a team is losing in the mines a common recovery is for them to rush the knight camp mid. After taking out the mines if you can back and regroup with your team you may be able to catch the enemy team there with lowered hp and expended abilities.
Golem 3 is the most important golem you'll be fighting for. Even if you have a 0 golem on golem 3, your best bet is to push with it in most circumstances. Even if the final fort remains you can still easily end with it. It can be very hard to restrain yourself from defending as it can be incredibly enticing but having been on both ends of it I can assure you defending golem 3 will almost always end up badly. Utilize the golem's stun during a team fight to provide poke free from reciprocation.
[Editors note: This last bit of advice is no longer applicable due to changes in the most recent two patches, notably to golem strength and core health. I however will leave this last passage in the guide for posterity's sake in order to preserve how inane this map used to be.

Cursed Hollow is a tremendous map for Valla due to numerous teamfights that will inevitably occur. During the lane phase before the first tribute you, make sure you stay cognizant of where the enemy team is. If you're in a side lane be sure to stay away from the jungle side bush as this is where 90% of roaming ganks will come from. For this reason I would consider taking Valla mid on this map however if you see the enemy has strong roaming CC like Arthas and Kerrigan, stay side lane and hug the gate. Making sure you are alive and healthy before the first tribute spawn is paramount to you're teams success.
If one of your teammates is staying in lane for the first tribute and the enemy team has five grouped give up the tribute and use this time to take mercs. Giving up tributes when its only 1/3 and even 2/3 is not a huge deal if it means you can take some map control by way of mercs. Being ahead in EXP is essential when fighting for the third and most crucial tribute spawn. At 10 if you are behind or even make sure to take

Rain of Vengeance. This allows you to seal off the chokes that litter this map. If you feel you are significantly ahead at level 10 then taking strafe is your best option, as it's an ability that can keep you ahead and help you follow up on picks that can snowball you the game. Rinse and repeat until all there forts and nexus are dead.

Dragon Shire is a map that, in my opinion, relies heavily on team cohesion more than almost any other map. The first dragon knight is not important and most of the time only nets the DK team a mid lane gate and not much else, so it's important not to fret too hard over it and give up a real advantage in exp. Valla excels in all lanes for this map as she can be a real threat in a prolonged shrine fight top, or be a total nuisance at stopping DK captures mid. When you see you teammates doing mercs, pop over and drop a W and some autos to expedite the process. Team fights are routinely in wide open areas so Strafe is the better option here. Don't overextend when fighting DK's and never end up behind one. Valla is great at pushing with the DK, safely sieging from the back-line so if you can help it let someone like a melee take it. Let your team dictate the flow of the map and always stay close to help when things go awry.

A prolonged lane phase and a proclivity to large scale team fights make this a good Valla map as well. Lane tips are going to be the same here as they were for Cursed Hollow. A good Valla will always take the seeds closest to your base as well as provide back up for contest on opposing seeds. Note: I am talking about the smaller seed creatures and not the plant terror. The seeds while not hugely important in the early game still grant a substantial amount of exp. The amount of mercs on this map far exceeds other maps however this isn't Valla's strong suit. Boring though it may be a Valla's main purpose through the early to mid-game is going to be soaking lane EXP and clearing waves. Again if you can help it a Valla should never take the plant terror when your team has gathered 100 seeds. Much like Dragonshire, let your team dictate the flow of the map having you to fall back on as the lane rock that stabilizes the map.

This is, in my opinion, the most fun map in the game and it forces Valla to play quite differently than other maps. The emphasis here is going to be on many small skirmishes rather than just a few full on teamfights. The amount of nuanced objectives on this map will leave many branching options for your team to take. If you're team has a stronger level 1 it isn't a bad idea to group as five for KJ the smiley face/watchtower. If you can get a good pick it can make up for any EXP missed out from the bot and you can bet in solo que that teams will come marching in, like moths to a flame. Make sure you have it worked out who's going bot lane and that person should get there immediately when the smiley face pick succeeds or fails.
I would not recommend sending Valla to the bot lane as her ability to duel 1v1's early for the chest is not her strong suit. She is much better suited towards the fairly long engage that will happen over top chest. When lanes are held and safe Valla can be one of the fastest pirate killers in the game. Throughout the game it's important to routinely check the scoreboard to note how many coins your opponents have and to be ready to contest mid if they have enough for a turn-in. If a Valla can successfully pressure the gate in the early game before first turn-in, that turn-in will kill the middle fort netting your team a significant lead on EXP for the all important level 10. As a map that relies on skirmishes it's going to be very important to never be alone. If you play smart and use objectives and map pressure to take other objectives it can be one of the most snowball-ey and rewarding maps in the game.
![]()



Quick Comment () View Comments
You need to log in before commenting.