


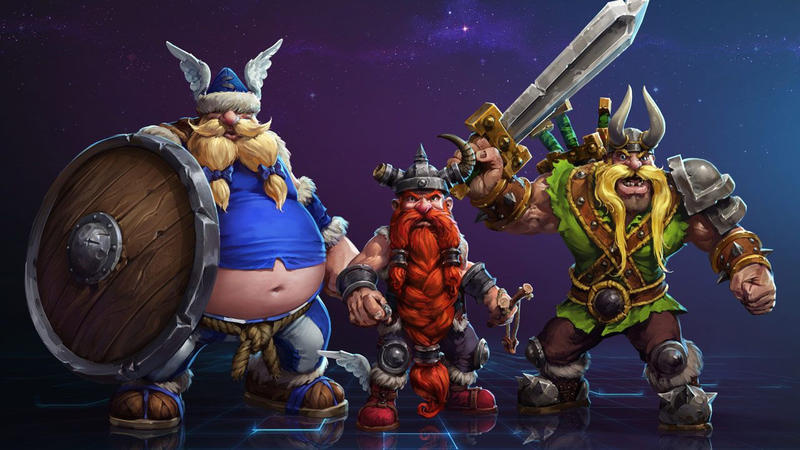
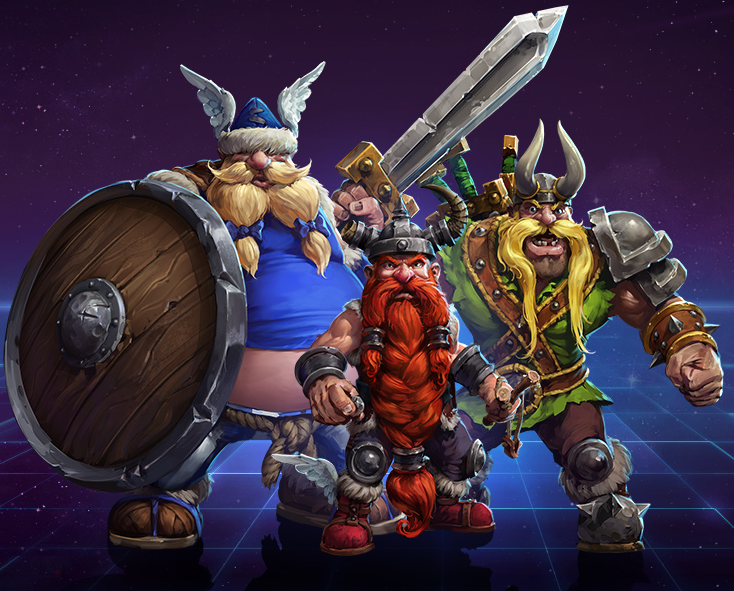
The Lost Vikings
![]()
Build: Let's Push! (Large Maps)
Level 1
Level 4
Level 7
Level 10
Level 13
Level 16
Level 20


|
 |
Olaf Olaf is the tankiest of the Vikings, having a beefy HP pool by their standards. In the wider respect of the game he is roughly as tanky as Olaf moves slowly so he's difficult to move around outside of combat. He has a couple of cool hidden passives that make him able to tank well for short periods and recover quickly, as well as peel and pin: Shield Charge: When you right click a target to attack as either Olaf or with all Vikings selected he will charge towards the target and cause them to be slowed by 30% for 3 seconds. This effect has an internal cooldown of 8 seconds and it only activates when you issue the attack command. If Olaf is attacking a target and his charge cooldown refreshes he will not charge the target again unless you right click on the target again. You can avoid Olaf doing this by using the Attack-Move command, and he won't charge if commanded to attack in this way. Regeneration: If Olaf is out of combat for a period of 4 seconds, he will begin to regenerate 5% of his maximum health a second. Olaf should be used to assist in lane with other heroes to slow targets to help secure kills. His high regeneration and health allows him to recover between exchanges in lane. The fact he is very slow, makes moving between lanes excessively time draining for him. He's least useful for split pushing compared to the other two unless you take |
| Health (Lv 1) | Health/Level | Health (Lv 20) | Attack Damage (Lv 1) | Attack Damage/Level | Attack Damage (Lv 20) | Attack Speed | Movement Speed |
| 1424 | +4% | 3000 | 52 | +4% | 110 | 1.00 per sec | 285 |
 |
Baleog Baleog is the damage dealer of the group. He has a moderate amount of health and movement speed compared to the other Vikings, he does however have the highest base attack value. His attacks splash in a cone behind his target for 50% of the base value. This makes him great at clearing minion waves and dealing damage to merc camps. Baleog is suited to solo laning due to the speed at which he can help kill minions. His ability to jungle solo also grows stronger as he levels up. He is the second tank of the Vikings, and whilst Olaf recovers he should be used to tank so Olaf's regeneration can kick in. Baleog also deals the greatest damage in teamfights due to the AOE nature of his attacks. His single target damage also increases further if you take |
| Health (Lv 1) | Health/Level | Health (Lv 20) | Attack Damage (Lv 1) | Attack Damage/Level | Attack Damage (Lv 20) | Attack Speed | Movement Speed |
| 1105 | +4% | 2328 | 72 | +4% | 151 | 1.10 per sec | 300 (base amount) |
 |
Erik Erik is the fastest and frailest of the Vikings. This little dude can't take many hits before he falls, and as such requires good micro in a fight. Late game he's very prone to being blown up quickly by abilities. Ginger prejudice is alive and kicking it seems. Erik boasts the highest movement speed of the Vikings, he outruns all other heroes unmounted as well. His ranged attack also boasts the longest range, being equal to that of other ranged heroes with exception to Erik is an ideal scout, and is the best candidate for a quick capture using |
| Health (Lv 1) | Health/Level | Health (Lv 20) | Attack Damage (Lv 1) | Attack Damage/Level | Attack Damage (Lv 20) | Attack Speed | Movement Speed |
| 773 | +4% | 1629 | 55 | +4% | 116 | 1.41 per sec | 315 |
|
|
Trait: Viking Hoard Since the most recent patch changes, this trait has grown even weaker, as it isn't until late game that the regen gained begins to do work on the lower health pool of the Vikings. At least when the Vikings had lower starting health the proportional regeneration was actually pretty good from an early game perspective! This trait requires you to split up to see benefit. You must split the Vikings as three and have them grab as many orbs as possible for this trait to mean anything late game. If you group the Vikings together you will never accumulate enough stacks to make it worth anything at all. Generally speaking focus on farming orbs along with soak up until you begin teamfighting (post 10 usually). Always prioritise grabbing orbs if one is nearby and its safe, and always grab them when split pushing too. |
|
|
Z: Go Go Go! Instead of mounting, the Vikings have the ability to activate It's useful for escaping in combat, even if only one Viking really benefits (such as using Erik to kite for example). It can also be used to help gapclose and try and bodyblock a running foe, as the Vikings are fairly good at bodyblocking due to their numbers, just be wary of AOE! Generally use also to swap Vikings between lanes, the cooldown is short enough that it's usually ready when you need it in a combat situation. Notable Talents for Go Go Go! Level 16: This increases the speed boost greatly for Go Go Go, decaying over the duration. It also makes this ability remove slows and roots. This isn't a popular talent due to competition on the tier, but it definitely has uses, effectively turning this ability into an all-but-certain escape or very effective gapcloser. |
|
|
E: Viking Bribery We can pick a bribe ability in the form of This ability can attain twice the number of stacks of regular bribe but requires twice as many to be used. However, we can actually accumulate stacks three times faster than other heroes because any minion death near any Viking adds a stack, so if we're present on all three lanes, this can stack up pretty quickly. This is a cool pick if you're thinking of going with a pushing or PvE build. It allows solo Vikings to take camps without resistance which is cool for starting split pushes or ninjaing enemy mercs quickly. If you aren't comfortable working with Vikings across all 3 lanes often, this talent is inadvisable. Like our trait, it is dead weight if you don't split up for good portions of the game. For this reason it is not recommended for Viking players learning their craft, rather when you're more comfortable with TLV and can play them split up as standard (as is the general aim as a TLV player). |
|
|
Q1: Spin to Win! The first ability that may occupy our Q key is To do so, however, means Erik needs to be close to his target. This is generally risky behaviour so perhaps leaving it to Baleog and Olaf to stick on a target is better! Aside from dealing neat hero damage, this really speeds up jungling and clearing minion waves too. It's also good at damaging buildings packed together, such as walls, gates and towers. |
|
|
Q2: Norse Force! The secondary Q ability is the defensive Perhaps if rampant AOE is an issue this is a fair pick to help soak some up without Vikings dying. It does require the sacrifice of some pretty decent talents on the tier though so it's a really tough pick to make. |
|
|
W1: Jump! As the Vikings are frailer than most heroes, the ability to dodge AOE abilities or hard hitting abilities is terribly valuable. when activated this can ignore the effects of ANY ability and will cease abilities targeting you to continue doing so. It also removes all CC on all Vikings, but it can't be used whilst stunned/silenced. However, if one Viking is stunned/silenced but another is not, they can activate this ability and it will cleanse the effects from the first Viking. Use it to escape from trouble, avoid AOEs and make engages on enemies whilst dodging their burst. Such a good ability and recommended for many builds. |
|
|
W2: Nordic Attack Squad Assuming all attacks land for the duration, this is equal to 17% of a hero's maximum health as additional damage. If This ability will be useful on an auto-attack build, as this kind of damage combined with the Vikings' own attack damage values is pretty hefty, and capable of killing frailer targets during the duration. Outside of such builds however it has no utility; the bonus damage does not affect anything except heroes. |
|
|
R1: Longboat Raid! The first heroic ability of the Vikings summons a longboat on the location of the casting Viking. All living Vikings must be relatively nearby to activate this ability, the icon will be greyed out if one or more Vikings is too far away. The boat is treated as a vehicle, so it has a separate health bar to the Vikings (and in this way it protects them), the health of the boat is increased for each Viking used in the summon. It doesn't have truckloads of health by any standards, but the protection is welcomed. So what does the boat actually do? Well, it automatically attacks the closest target (heroes are prioritised) very quickly at a very long range (it outranges Also you can use the Q key to fire a mortar at your cursor's location. The mortar deals significant AOE damage, it does however take a while to travel, so it needs to be used predictively. The Mortar has a short cooldown of 1.5 seconds so spam it! It doesn't affect your movement or attacks when you use it. Use it to phase enemies away from locations, cut off escapes or to punish enemies who stand still. It also is great for wrecking buildings if the opportunity arises. The boat moves slowly, but is unstoppable. You shouldn't use the boat to tank, as if destroyed the Vikings are revealed and stunned for 1.5 seconds. Keep away from combat in close quarters, the boat's range means it still contributes on the back lines. As the boat summons the Vikings inside and creates a "new" target in the longboat, it has uses as a juking tool. If you activate it when you are being targeted by an ability (such as Big cooldown, big impact in teamfights. This heroic is best for smaller maps because it requires all Vikings to be within reasonable distance of each other to use (if they are all alive). It's also usable on larger maps where teamfights are a primary objective; perhaps where the opportunity for split-pushing is compromised due to the enemy composition. In this case the power the boat brings to a team fight will outweigh the benefits of Notable Talents for Longboat Raid! Level 20: This talent makes the longboat attack two targets at once, increasing the overall DPS it puts out in a teamfight by a huge chunk. This also really increases the siege power it brings if you have it activate around enemy structures, combined with the mortar you can blow up condensed buildings pretty quickly. It additionally increases the range of the mortar, making it even better at potshotting fleeing targets or sniping the back lines. It can also be used to net building damage from far away if you have time and no better targets present themselves. |
|
|
R2: Play Again! Once upon a time this heroic was confined to the dusty shelves of memory. When the Vikings lost their reduced death time passive, this heroic has again become a viable choice due to the fact it presents a quick revive and heal on all Vikings. When used, after a brief cast all Vikings are fully healed and summoned to the location of the casting Viking. All dead Vikings are revived and summoned to this location also. This heroic is great for split pushing as it gives you the means to quickly bring your buddies to your side to lay down some heavy siege damage on a lane whilst enemies are distracted. Due to the nature of this ability it is useful for escapes too. You can have a running Viking (usually Erik) lead opponents away from a lane or teamfight, and have one of the other Vikings summon him back into the fray, leaving opponents chasing him out of position. It's also a good way to have all Vikings ready for a teamfight. If you take the talent The cooldown is slightly shorter than Generally this heroic is the better choice on large maps where split pushing is viable and the enemy team can't split up effectively without losing ground on the map. Notable Talents for Play Again Level 20: This talent causes Play Again to reactivate 10 seconds after first use. So any dead or injured Vikings are brought back to the initial summoning location. This gives Play Again some cool teamfighting utility as you can come back into the fight and keep pressuring the opponent. Only worth using if a larger teamfight is underway with allies around to beat on opponents. It also allows you to juke opponents by using the first summon and leading opponents away from the teamfight or objective, only to be brought back to the summoning location a while later, allowing escape or time to secure an objective/get back into the teamfight. |
|
|
Olaf The Stout Recommended when opposing team has high AA damage and the map is small, presenting issues with splitpushing Allows Olaf to block 75% of incoming hero basic attack damage, storing up to 2 charge, generating 1 charge per 8 seconds. This talent isn't weak in and of itself, but the competition on the tier is fierce, and there are many better choices for split-push play (which the Vikings should aim to capitalise on). If for whatever reason this doesn't seem an option, this is a reasonable pick. |
|
|
Explosive Attacks Recommended for most maps as intended split push play, maps where killing minions is key and jungling builds This is a great talent, and the choice between this and Bribe is largely one of preference. I find this talent tends to shine on maps where Merc camps are less numerous and maps that are slightly smaller. Also maps where killing minions quickly is key (Tomb of the Spider Queen, Infernal Shrines, Haunted Mines) also lend themselves to this talent being a probable better pick than Bribe. This talent does allow Baleog to jungle pretty well, so can cover Bribe's "benefit" somewhat, although it's slightly less quick and easy. |
|
|
Spy Games Recommended for beginner players learning how to play the Vikings in split lanes This talent is great for learning how to split lane, as it allows you to focus less on Erik so long as you position him correctly. Whilst invisible he'll still soak EXP and orbs, so it's a useful talent when you're not perhaps used to switching attention so quickly. Use it when you're starting out. |
|
|
Viking Bribery Recommended for most maps as intended split push play particularly large maps with many merc camps Bribe is a cool talent to pick, on par with Explosive Attacks. Bribe tends to shine more on the bigger maps, and certainly in semi-premade or premade scenarios where you can convince your team to strongarm a single lane, forcing opponents to respond. This allows your Vikings to safely accumulate stacks in the meantime for some early merc action. This talent will ask you to split the Vikings as a 3 more readily than Explosive Attacks for the benefit to be seen, so be mindful of this. Also the power of this talent wanes as the game goes on, whereas Explosive Attacks remains constant. |
|
|
Pain Don't Hurt Recommended for auto attack builds, jungling builds and split-lane pushing Keeps Baleog healed whilst he makes auto attacks, this talent is very versatile indeed. It allows Baleog to be left with minions without falling into trouble, and keeps him healthy in the jungle as well. It stacks nicely with |
|
|
Erik The Swift Recommended for auto attack builds and PvP focused builds. Also gains value if Bribe is taken. This speeds Erik up a significant degree, giving him nice kiting ability and also chasing ability. For this reason it's decent in auto attack builds as it allows Erik to chase down fleeing targets without much trouble at all, although he'll only really be able to finish weak targets. It also allows him to move more quickly on and off lane, which he'll be doing if you take Bribe. The regen bonus is a welcome addition towards keeping him healthier whilst kiting, chasing and moving in general. |
|
|
It's A Sabotage! Recommended for split pushing and early siege attempts The main benefit of this talent is the early disabling of towers it offers, presenting a good opportunity to rack up siege damage undisturbed. This is particularly ideal on maps which command the attention of the teams, as even if you send Baleog and Olaf to help with objectives, Erik can still cause some pretty decent siege damage and mess up the opposing towers. On maps such as Haunted Mines this is useful for rendering towers null before your golem comes to lane, as it will keep it healthier for longer. |
|
|
Mercenary Lord Recommended for jungling builds This talent is a tough pick due to the competition on the tier. Reducing merc damage taken, and increasing merc damage dealt is actually not too bad, and the Vikings can abuse the damage buff well due to the fact they can be present with several groups of mercs at once thanks to being able to multi-lane. That said, it's hard to give up the other talents which have utility outside of mercs being on lane. Pick it if you're going for exclusive jungling dominance, as this talent will allow you to solo the boss mercs at level 10 without many problems at all. |
|
|
Baleog The Fierce Recommended for auto attack builds but a good pick for most builds Accumulating attack speed up to 40% is no small amount, and this makes Baleog carve minions up like there's no tomorrow. This has applications in jungling and also teamfighting, as it increases his hero damage by a fair amount. The choice between this and Spin To Win is largely one of personal preference. Spin will result in higher damage amounts if the Vikings can stack on a target, that doesn't mean this talent is without value however. This is definitely the better pick if you indeed to go with |
|
|
Spin To Win! Recommended for most builds Gives damage, waveclear and jungling utility. This ability is a good pick in a majority of situations can serves many purposes |
|
|
Norse Force! Recommended for beginner players and safe builds This talent has some ridiculously good competition on the tier, and as such it is often not picked. Generally speaking it's only really viable when starting out, as it allows you to protect the Vikings more easily without necessarily micro managing them. If the enemy team comp is littered with AOE everywhere, it can be a valuable pick for experienced players too however |
|
|
Longboat Raid! Recommended for smaller maps and games where split pushing is compromised See the ability section for full details of this ability. |
|
|
Play Again! Recommended for larger maps where split pushing is viable See the ability section for full details of this ability. |
|
|
Hunka' Burning Olaf Recommended for split pushing builds and jungling builds Giving Olaf passive damage really helps his split push and wave clear. It also kicks up the amount of DPS he deals to a single target. If you're confident Jump! is not needed, and aren't going for a "Pure" auto attack build, then this talent is a good choice. |
|
|
Jump! Recommended for most builds I can't praise this ability enough, I've talked about most of the uses in the ability section, but to clarify- the ability to escape, become invincible and ignore collision is great on TLV because they are so individually frail. Juking high damage abilities is another cool benefit of this ability. I use it in 95% of games |
|
|
Nordic Attack Squad Recommended for auto attack builds This is a niche talent useful for one type of build only. It will aid in bringing down soft and hardy targets alike. It isn't terrible in a manner of speaking, but when you're comparing it to Jump!, it just doesn't yield the same benefits and utility that Jump! does. |
|
|
Large and In Charge Recommended for builds without many active abilities, or where enemy team has dangerous channelled abilities The stun is useful for ganking, peeling and pinning. It also allows TLV to interrupt channelled heroics such as LiLi's Jug. Always consider whether that extra stun may be useful for your team...generally speaking if you don't feel like the cooldown reduction from Impatience is needed this is the next best pick as stuns are just terribly handy to have! Remember, it only activates if you issue a direct attack command with Olaf or the group selected. |
|
|
Impatience Is A Virtue Recommended for most builds so long as at least one non-heroic ability has been picked Ability heavy builds love this talent, the cooldown reduction it provides is pretty insane if you allow the Vikings to consistently auto attack. It falls roughly somewhere between making abilities cool down 65-85% faster depending on whether attacks are clipped. Obviously if you don't have many abilities in your build this talent becomes less useful. As a note, it does benefit Go Go Go! as well. |
|
|
64 KB Marathon Recommended for split pushing, when fighting a CC heavy enemy team, can have viability on auto attack builds This talent is pretty useful in general, it makes our initial dash from Go Go Go! twice as strong (although it decays rapidly) and remove snares and roots. This is handy for escaping from ganks, or initiating on targets who snare like |
|
|
Executioner Recommended for auto attack builds where your team has access to a reasonable amount of snares, roots and stuns As TLV have a very high base auto attack value (collectively) jumping this by 40% is a large amount of additional damage. Although TLV can snare targets themselves (via Olaf) it's generally better to pick this if you can more consistently rely on snares, stuns and the like. If so, and you're an auto attack build, this will add a lot of damage to your output. |
|
|
Ragnarok 'n' Roll Recommended for when you've taken Longboat Raid! and split pushing is not a deciding factor in the game Powering up the longboat to really muscle in on teamfights is almost a must if we picked it for our heroic. This makes TLV provide a long range threat within team fights which can't be overstated. The bonus range on the mortar is great for sniping those running foes and attacking two foes at once allows you to turn around ganks made against you. |
|
|
Checkpoint Reached Recommended when you've taken Play Again! but split pushing is not a game decider Maybe your split pushing antics worked well earlier in the game, but now the opponents are super paranoid and playing defensively. In this case this talent gives Play Again! some good utility in a teamfight allowing you to use it to benefit when you're going for that final brawl to decide the game. Sometimes all the fight needs is just a couple more attacks after all... |
|
|
The Sequel Recommended for late games where sacrifice of Vikings may be necessary in distracting opponents Wow, our old passive is offered to us as a level 20 talent? Talk about insulting... Sometimes this talent is viable, it depends on the game. In some instances opponents will really go out of their way to kill a Viking on sight late game (after all, we are squishy!) with this talent you can use this fact to your advantage, luring opponents into traps where you dying isn't necessarily the end of the world. In such situations the fact you will revive 30 seconds before they do gives you time to return to the game and take merc camps, make small pushes and the like. |
|
|
Fury of The Storm Recommended for most builds unless split pushing is compromised This talent is epic, largely because each Viking has their own cooldown. That's right, we can process this effect 3 times within the 5 second window, once from each Viking! This means we can massacre minion waves and jungle camps, so if the lategame still allows split pushes to be a deciding factor, this talent is great because it means a single Viking can easily clear minion waves without issues. Auto attack builds should always pick this talent typically, although |
|
|
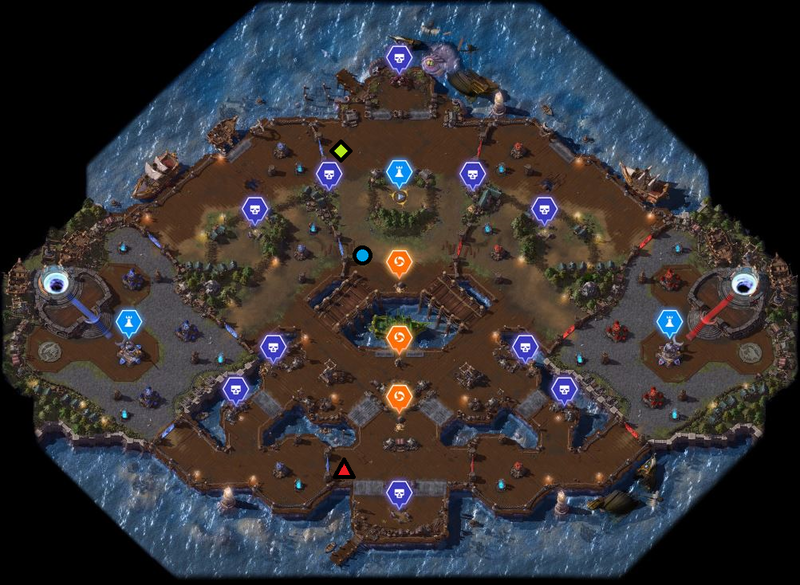
| Split Push |
|
|
|
|
|
|
|
|
|
Olaf Olaf should be positioned on the middle lane at the start of the game. His job is to try and soak orbs and exp until the chests spawn, at which point he should focus primarily on attacking enemy heroes and harassing/distracting them rather than attacking the chest, allow allies with better attack speeds to do that instead (and they can hold the coins better). |
|
|
Baleog Baleog should be positioned on the top lane at the start of the game. His job is to soak on the lane and gather orbs. Typically at the start of the game, the top lane is ignored because of the chest spawns on the middle and bottom. Staying on lane will give you a slight EXP advantage. Generally speaking for the early game Baleog shouldn't be leaving lane, except to kill the pirate minions nearby to grab the doubloons (only if it's safe). Do not use him to assist the chest fight in mid. |
|
|
Erik Erik should be positioned on the bottom lane at the start of the game. He will typically be against an enemy specialist in this situation, so be careful and don't overextend. Grab orbs where you can but don't worry too much about pushing the lane. You want to signal an ally to assist when the chest spawns as you won't be able to compete with an enemy hero solo. Rather if your ally focuses on attacking the enemy, you can use your fast attack speed to quickly destroy the chest and make off with the coins. If you manage this you should not return to laning until your coins are handed in. Group up your Vikings if necessary to distract incoming opponents who may disturb Erik's turn in. Few opponents can resist the chance to kill a lonesome Baleog or Olaf! Such deaths are reasonable if it allows you to secure the 5 coins safely. |
 |
The Group At this stage in the game, the Vikings won't really be moving as a group, there are a few things you should be aware of in relation to priorities at this stage however. Firstly, the first team to get 10 doubloons to Blackheart has a big advantage, cannon damage is very heavy early game. What does this mean? Well...it means that when the chests are down, you need to be prepared to use your Vikings as distractions at the turn in point. Even if it means goading enemies to kill you. You are worth significantly less EXP than other heroes, and if it buys time for your allies to get into position, it's well worth doing so. Generally if you have an advantage with coin takeup you can return Vikings to their original positions. If the opposing team has taken coins, group Olaf and Erik together with allies to roam the middle point in an attempt to stop turn ins. If this goes on too long return Erik to lane but leave Olaf in the smoke near Blackheart to scout for turn ins. Unless you've taken |
|
|
Olaf By this point the middle lane is often changed, whether it be by the enemy moving forwards or your team moving forwards into the lane. Olaf should be following allied heroes around to peel and pin for them at this point. As chests approach their respawn it's worth moving him back towards the chest spawn point whilst allies continue any sieges or assaults so their manpower is not significantly reduced but the coins can still be taken. Just be mindful of MIA enemies who may come to get you. |
|
|
Baleog If Baleog has been left alone he should have pushed the top lane forwards a bit. Once this is achieved he should focus instead on signalling the top merc camps (excluding boss) for capture as they approach respawn, and assisting allies in taking them (he can take them solo if he is careful). Use Baleog to roam the map taking out the small pirate mercs and as well, his good aoe damage makes him an ideal roaming coin jungler. Outside of coins, keep pressuring top lane unless the enemy has assumed a firm defence on top lane. If so, it's more sensible to pair Baleog up with Olaf and other heroes to assist them as they move around. |
|
|
Erik Bottom lane will typically be pushed forwards one way or the other at this point. Erik should apply pressure to bottom where he can, but not put himself in harm's way without due cause. Monitor Bribe stacks carefully and where possible use them to quickly capture the Siege Camp closest to the opposing keep. Signal any roaming allies to take your own merc camp (or have Baleog briefly join you to do so). As with Baleog you should continue to apply pressure where possible but don't try and remain on lane if the opposing team is building up. If enemies are MIA with coins suspected use Erik to roam around the middle and interrupt turn ins with basic attacks. |
|
|
The Group Teamfights will be happening more often at this point in the game. Thanks to If you need to summon Vikings to the battle as Olaf is best placed near allies at this stage in the game he should use the summon. If you want to split push have Erik or Baleog do it based upon which lane has the least attention. If you do end up split pushing place one Viking in any adjacent concealed entry points (brush) onto the lane so you can see when opponents are coming. Use this Viking to distract any ganks by sacrificing themselves if necessary, allowing the other two to escape. Olaf is best used as the scout in this case as he is tough, slows foes and he can't run away that fast anyway. |
|
|
Olaf Keep Olaf with the allied group at all times, as he will be useful in continuing to peel and pin for them and provide an entry point into the group for the other Vikings with |
|
|
Baleog Baleog's behaviour doesn't change much for the late game but he should be travelling with the allied group more frequently to assist in bringing enemy heroes down. |
|
|
Erik Erik should be kept mobile as a scout and a roaming summoning point for the other two Vikings if they need to escape, or you want to start pushing a lane to force the enemy team to respond. If the opposing team doesn't appear to respond to this kind of behaviour then it's best to return Erik to the other Vikings. |
|
|
The Group You should be spending a good chunk of the game with your Vikings together now, where your AA DPS and Spins can help take targets down. You can also act as a target for enemy nukes; only to use Jump! to avoid them, saving your team the trouble. At this stage in the game you can be killed fairly quickly, but even if all three Vikings die, that's still less EXP given to the opponents than would any other hero. Not only that but the collective HP of the Vikings means doing so outside of AOE requires quite a bit of concentrated damage, which gives your allies time to respond. Revel in the fact you can distract the opponents, because outside of your AAs and occasional Spins your teamfight contribution essentially revolves around your ability to distract targets and attempt to phase others (as we haven't taken Longboat, if we had, different story). This allows your allies time to do their worst.. |

| Split Push |
|
|
|
|
|
|
|
|
|
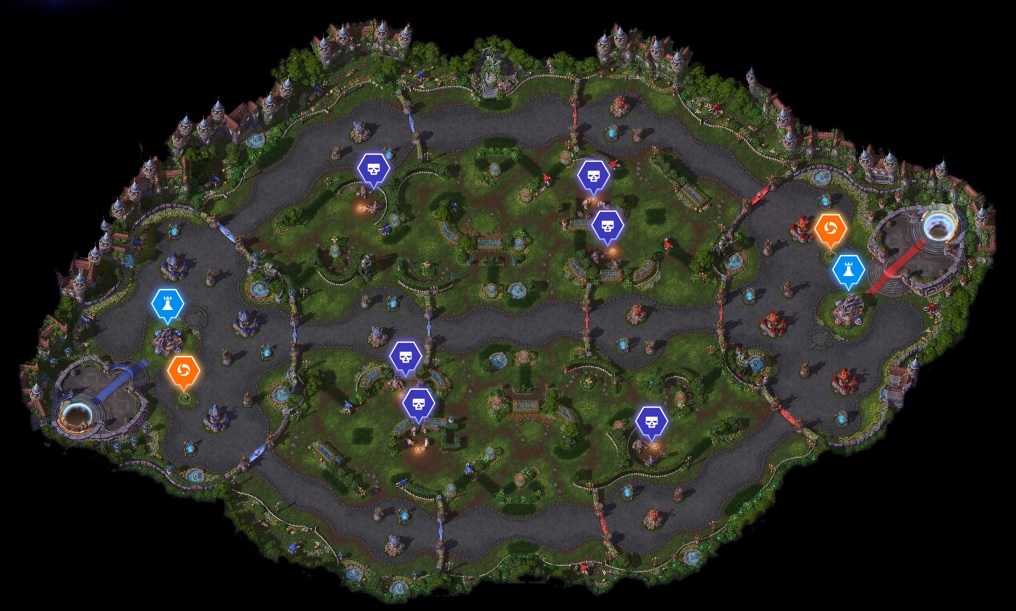
Olaf Olaf should be positioned on the middle lane at the start of the game. Soak and Orb, as usual. Olaf should be joining in for objectives wherever they spawn. He can be used to try and capture the Tribute whilst allies focus on the enemies. Alternatively he can be the spotter, hiding in grass and distracting enemies who try and approach, slowing down their access to the Tribute. He may die, but it's worth it if the Tribute is captured. When on lane do not push too much, focus on Orbs and keeping out of getting in deep. |
|
|
Baleog Baleog should be positioned on the top lane at the start of the game. Baleog will soak and gather Orbs, not trying to push if an enemy hero is present, rather hold a certain line on your lane, attacking when minions come near this line to prevent pushes against you. Only try to move further up the lane when your opponent has gone AWOL and can be accounted for. If Tribute spawns on the upper side of the map you should join in the fight, like Olaf try and capture if you can, otherwise hang around close to the Tribute acting as a guard stopping enemy captures, and do not chase enemies (let allies with higher mobility do that). Try not to worry about mercs at this stage, let your allies do that so you can soak the lanes. |
|
|
Erik Erik should be positioned on the bottom lane at the start of the game. Play cautious, grabbing orbs when it's safe. Like Baleog, try and push only when the enemy hero is AWOL. Reaching the gate early is good for Erik to net Sabotage damage, and if we're left alone we can do a number on enemy structures quite easily. If the enemy whereabouts are unknown back off and wait in the brush until you can account for them. Again, if the Tribute spawns on the lower half of the map assist in the capture. Keep your position hidden and focus on smacking enemies who try and tag the Tribute. Keep attacking and backing off to force them to chase you. Only go for a capture if you're sure the enemy is delayed, as unlike Olaf or Baleog, you die very fast so an interruption can cost you your life. |
|
|
The Group At this stage in the game, the Vikings won't really be moving as a group, unless you're going with a jungle build. If you are, due to Mercenary Lord you have the ability to solo the Golems at around level 7 onwards. It won't be quick, but it will be doable. Keep Vikings close to the golem so Spin stacks, but make sure Olaf is tanking. When Olaf is nearly dead, back him off and have Baleog step up instead. You must avoid the aoe stomp and root casts as these will deplete your ability to tank the Golem highly. Once Baleog is nearly down, swap Olaf back in and repeat again with Erik if needed. You should be able to down the Golem before this is necessary. Failing that signal an ally to join you. With Merc lord you can tank the Golem easily, and Olaf recovers his health fast, so you don't need to back to base after the capture. Outside of this situation, don't group your Vikings as three yet, because the split push and largeness of this map means one Viking should always be laning and creeping up a lane. |
|
|
Olaf Keep Olaf in the middle as you did before. You shouldn't play him too differently to early game unless you've taken Hunka' Burning Olaf. If so Olaf can be used to take merc camps with 1 assist (Baleog is best) and can push his lane much harder. If you've taken this removing Olaf from lane during Tribute fights is not always the best move, judge it depending on whether your allies have a secure footing. Olaf can get on top of keeps quite easily with Hunka', so his lane pressure can make gains when enemies are worried about Tributes. If the Tribute count is 2/3 for you or the opponent, send him in to assist of course, as with Hunka' his aoe damage is welcome. If Jump! Is taken Olaf should always assist at Tributes irrespective as his splitpush is really poor. |
|
|
Baleog With levels and Merc Lord Baleog is now capable of soloing merc camps, particularly siege ones. Flag for assists to speed up the process but get back on lane if so, so the mercs get the boost. If Merc lord is not taken you can still solo camps if you took Pain Don't Hurt. Start applying larger pressure to the lane but be hesitant to do so without backup or if the enemy is present. As Play Again is now a factor you can always be airlifted out of trouble if you overextend and then proceed to be part of a Viking rabble on another lane! As before, join Tributes if they're on your half of the map. Don't sacrifice Baleog where possible, like Erik (as they are the furthest lanes apart) he is a good user of Play Again to begin a splitpush if the opposing team is occupied on the other side of the map. |
|
|
Erik Erik's role at this stage in the game remains much the same, retain your split pushing approach and be cautious of unseen enemies. Attempt to chip away gradually at the lane, this works best with Sabotage anyway if you took it. It's important to keep Erik safe as he's typically the Viking to summon the others to begin a big ole' splitpush. |
|
|
The Group Outside of jungling, the Vikings should be joining only for 2/3 Tribute fights and also to begin a splitpush with force after Play Again use. Due to the size of the map, it will usually take the opposing team enough time to respond that you will take some structures out. Keep Olaf selected outside of commands as a group as when you're rumbled you'll want him to individually break away from the group to charge any mounted heroes who try and catch Baleog and Erik as they run away. If one hero is going to die, let it be Olaf as the other two can split push better. So if his death means their escape, that's fine. |
|
|
Olaf Olaf will be behaving precisely as he has in the midgame phase depending on your talent choices. You keep the laning game up until the very end due to the sheer size of this map. If he's needed for a teamfight one of the other two can usually summon him there if they're better poitioned. |
|
|
Baleog Baleog should focus aggressively on pushing whenever he has a lane solo. If the enemy appears back off and grab mercs instead (with Olaf or ally) and return to lane with them to counterpush. Try and steal enemy mercs and have Play Again on standby to summon your buddies to kill solo heroes who think they can take you on. Just time it correctly!. |
|
|
Erik Erik should be played similar to Baleog at this point in the game, with the exception he should not be jungling. If your lane is busy and hard to push, join Olaf on his lane and focus on that instead. Keep this splitpush up throughout the game until the reach the inner base of the enemy. |
|
|
The Group Due to the size of this map splitting up is still viable, even now. We will group up more as the game advances to assist in nearby teamfights however, but seeing as pushing is central to this map, making gains on the enemy base whilst fighting goes on is valuable. Generally speaking group the Vikings up for boss solos, quick merc captures and focused pushes. With FoTS we can trash lanes and merc camps even split up, so every Viking can push their lane. Keep your eyes peeled for which lane the opponents descend on and use Play Again to relocate to the most distant lane if this occurs. It seems counter intuitive to not be terribly interested in teamfights, but due to the size of this map you lose a lot of time running the map to get to the fight, and keeping Vikings together reduces your split push threat greatly. If you aren't comfortable sieging if a teamfight is happening, you can always try a Golem instead, as it presents an instant threat to the enemy team if it's left to it's own devices. Whilst the enemy deals with the Golem, you can always take the other one if you're quick. |
| Split Push/Late Game Attackers |
|
|
|
|
|
|
|
|
|
Olaf Olaf should be positioned on the top lane. Passive play focused on Orbs. Keep him in Brush if possible to avoid ganks, alert allies and keep him safe. Olaf is basically an exp and orb bot at this point. Ignore the objective when it occurs, focus on soak exclusively prior to 10. |
|
|
Baleog Baleog should be positioned on the middle lane to assist in the top jungle when the objective spawns. Focus on pushing and orbing but don't overextend without ally support on your lane. Always assist with the small camps in the jungle asap, but don't enter fights without backup. Do not attempt big Shamblers without backup. If small camps are down, return to lane to soak and push until allies can help you, or try soloing a merc camp (this will be easily done if you take Pain Don't Hurt, more so with Baleog the Fierce). |
|
|
Erik Erik should be positioned on the bottom lane at the start of the game. Play safe and distant with orbs and poking the enemy as your focus, we want to soften them up for the jungle, and to force them an early fountain drink so they can't top up prior to jungle. Once the objectives spawn we behave based upon talents. If we took sabotage: stay on lane and aim to poke towers, gate and wall. If we have not taken Sabotage try to join up with allies in jungle to help kill shamblers and poke enemy heroes. If nothing productive is happening return to your lane though. |
|
|
The Group At this stage in the game, the Vikings should only group to solo a big shambler, giving your allies breathing room to strongarm a lane. This is perfectly viable if you communicate it to your allies prior. If the enemy spawns a Shambler do not group up to kill it, have Erik and Baleog track it to kill it but leave Olaf where he is. Focus their attacks on W pots where they appear always. |
|
|
Olaf Bring Olaf into objectives when they appear now. If Hunka' is taken let him directly collect seeds, if not he's better acting as a spotter for entry points to the jungle to prevent ganks. He should also act as tank for the big shambler if an ally is around. Return him to lane once the big shambler is settled on his side to push and soak. If he is needed we use Play Again to bring him to us. |
|
|
Baleog Baleog should be making good push gains, and if we've built him as such, is a jungle soloing machine. If Olaf has indeed taken Hunka' these two can really push a lane pretty quickly, as well as dominate the merc camps. It may be worth pairing them from level 13 onwards if Hunka' is indeed your pick, so they can push a lane more quickly. |
|
|
Erik Erik should keep chipping enemy structures and slowly moving up the lane. He will be a valuable source of DPS once you hit 16 if you take Executioner and have some snares other than Olaf's charge. Keep harassing in the jungle if the big shambler is being competed for. Otherwise Erik needs to remain mobile and away from any enemy shamblers as he is our best bet to summon the others for a counterpush. Erik is also a good candidate for the Terror control. |
|
|
The Group We gather for the same reasons as above, but also when splitpushing after Play Again. If your allies are quick to interrupt a Terror and kill the W pots, you can easily inflict the same if not more siege damage on the opposing base within the same time if you are not disturbed. If our build has the more "auto attack" focus we should stick together from 16 to make sure our DPS remains high as possible. |
|
|
Olaf Olaf is a good choice to control the Terror lategame as he has the poorest DPS, this is specially so if Hunka' was not taken. So don't be shy about hearthing him back to control the terror. Otherwise use him in the same manner as the post 10 levels but generally speaking he'll probably be supporting allies more than soaking lanes due to the way the lanes may well have been pushed. |
|
|
Baleog Jungle, jungle, jungle! Also bring your push to lanes that are underpushed for some of that extra exp. If the auto attack build has been selected then you need to make sure you're taken care of as you are the highest source of DPS from the Vikings! Get straight in with the shambler camps whenever they spawn, but otherwise you should be pushing hard when focus isn't necessarily on you. When it is regroup or if viable, try fighting back. |
|
|
Erik Like Baleog, if the auto attack build has been picked Erik is valuable as his DPS is pretty high. So keep these two together. Erik remains your best bet for Play Again use due to his ability to quickly exit a fight if need be, so always ensure he's on the fringes of any conflicts. At this point it isn't becoming terribly hard for any hero to push buildings down, so Sabotage is less powerful and out split pushes carry less impact as a solo endeavour. We should generally hang around with Olaf or Baleog to help them with whatever they want to do and to make these splitpushes pack more punch |
|
|
The Group If we've built for auto attacks we should always hang around as a group and focus hard on any targets slowed, stunned and such. Our collective DPS will make short work of such targets and we can easily severely wound frailer heroes who are snared within a few seconds of auto attacks. If auto attack is not our build, we group for focused split pushes after Play Again only. At this stage in the game we can roll down a lane pretty quickly and even assault buildings without minions intermittently if Olaf tanks and backs off to heal. With Sabotage as a choice, this need only be done a few times before the keep is without ammo, then it's easy pickings. |
| Waveclear and teamfight |
|
|
|
|
|
|
|
|
|
Olaf Olaf should go at the top, and keep to himself, playing defensively and aiming to soak and grab orbs. Olaf should ignore the objective for the first few times, as his contributions to killing skeletons is minor. Whilst soaking we can still gain some exp and orbs. Rally Olaf to the other Vikings in the event of an enemy Punisher to help kill it. If your team spawns the Punisher, leave Olaf where he is unless the Punisher is on your lane, in which case move to Baleog's lane to help splitpush. |
|
|
Baleog Baleog should be positioned on the middle lane. This is so we're always in position to help with the shrines. Our AOE damage is certainly going to come in handy for killing those skeletons! Outside of objectives similar early cautious play, minor poke for over-extenders and orb grabbing when safe. When shrines spawn ignore enemy heroes if your team has presence within the shrine and focus on killing those skeletons. If your team is looking to enter the shrine space position yourself so your attacks splash over as many skeleton minions as possible; you may be able to killsteal a few, even when harassing enemy heroes. If we get a Punisher spawn, if it spawns on our lane join Olaf on his lane and push. |
|
|
Erik Erik should be positioned on the bottom lane, what a surprise! We play a safe and poking early game here, due to not taking Sabotage, we don't want to push towers prematurely unless it's safe. Focus on poking enemy heroes who are in lane and collecting orbs. When objectives spawn join Baleog to assist. Leave Baleog to the minions, you should focus on attacking enemy heroes in an attempt to distract them or to help bring them down. You lack AOE damage but your single target DPS is okay and better suited to this purpose. Only focus skeletons if no enemy heroes are present. Return to your lane if you spawn a Punisher for soak and gentle pushing. |
|
|
The Group At this stage in the game, only group the Vikings to kill an enemy Punisher. Olaf and Baleog should join up if you spawn an allied Punisher in order to push a lane it is not present on, whilst Erik pushes the other one. |
|
|
Olaf Olaf plays identical to how he always has, with exception that Olaf now joins in Objectives. Use Olaf as bait and lure in these situations, placing him distant from the shrine and engage enemies who approach and waste their time, even if you die. If the enemies are in the shrine also focus your attacks on the same target as Erik. If you have Hunka' you should always be within the shrine space helping to kill minions. Allow Olaf to tank for Baleog/allies for top/mid lane merc attempts. If you have Hunka' you can solo goatmen camps. |
|
|
Baleog Baleog will be playing exactly as he always has, exception being in lane we focus less on orbs and also on chipping heroes when they appear. At shrines, continue to focus on the minions. With Pain Don't Hurt, we can solo the goatmen camps and can take the Fallen camp with 1 other Viking, so do these where possible. Focus pushes on underdeveloped lanes without Punisher presence to secure bigger exp gains for your team. |
|
|
Erik Without Sabotage our siege is pretty mediocre but keep chipping away where you can. Have Baleog join you for lower merc attempts where possible. Otherwise keep chipping enemy heroes in lane safely. With shrines, again, focus on the squishiest heroes possible along with Olaf. Be prepared to Go Go Go to safety if necessary as you are the Play Again summer of choice. |
|
|
The Group We gather to kill enemy punishers but also to assist with shrines. This allows Longboat use if we've taken it, but also brings more clout to killing skeletons or harassing enemy heroes. If Longboat has not been taken, we must be ready to eject a Viking (usually Erik) from the fight in order to summon and revive. If the Viking's return to the fight will swing the fight, return them into the battle afterwards. If not, eject Erik and use Play Again in a safe lane spot in preparation for the Punisher. Also we can use Play Again to quickly set up a split push if Vikings died defending the shrine but a friendly Punisher is summoned. In this case have Erik quickly summon the others and begin pushing hard with your FoTS. |

| Split and Team fight |
|
|
|
|
|
|
|
|
|
Olaf Keep Olaf on the top lane. Early game Altar spawns number 1-2 altars and Olaf's best role early game is to simply soak and collect orbs until altars spawn. Don't try to push with him, simply keep him back but within range of soak, and only engage if you need to peel for an ally in trouble. If 1 Altar spawns keep Olaf where he is on lane to soak the passive exp. If 2 spawn bring him down to the altar less populated by your allies and use him to harass enemy capture to bide time until your allies arrive. If the Altar is unguarded capture it with him, or if Erik is assisting at the Altar focus Olaf on capture and Erik on harassing. |
|
|
Baleog Baleog should go on the bottom lane. With his aoe damage we're aiming to make quiet pushes on the lane, speed up merc captures and assist at nearby altars. When Altars spawn bring Baleog to assist in the fight and focus him on harassing enemies rather than capturing as his attacks are AOE so he's good at stopping multiple enemies from capturing at once. Keep weaving him in and out of attack range to force an enemy to come after you to stop your harass. |
|
|
Erik Erik should be positioned on middle lane. He's quick and can be anywhere we need him to be relatively promptly. This is useful for Altar control as his high attack range paired with decent movement speed and attack speed means he's awesome for annoying opponents trying to capture altars. Try not to pick straight up fights when doing this, you're aiming to annoy the opponent to either take them away from the Altar or bide time until backup arrives. If 2 Altars spawn and Olaf is facing off against an opponent or two at the altar you send him to, take Erik to help him interrupt them both and use Olaf to try and capture the Altar. This exercise should keep opponents busy splitting their attention until your allies arrive. |
|
|
The Group You will be wanting to group the Vikings rarely at this stage. You should do so if the Altar spawn is singular and near Olaf's lane, as you can eject him to soak easily if needed, but his extra slow and harass can help win the altar. If early jungle attempts are made bring the Vikings together with allies to do a quick sweep of the camps. Alternatively if an altar fight goes well, in the aftermath regroup the Vikings to attempt to knock down towers and gates and get some keep damage. Early game though your collective damage isn't quite strong enough to wreck a keep that quickly without your other allies so don't get too caught up on the idea. |
|
|
Olaf Olaf's role doesn't change, except that as more Altars spawn he should always assist with objectives now. Sometimes three will spawn, which means he can try for a lone solo capture if the enemy team neglects one. Move him into position early but try to keep his movement away from enemy vision if possible so it's unclear he's being sent for a solo capture. Olaf can also take the merc camps with Baleog at this stage, just position them both correctly for Spin stacking. So after objectives are settled pair these two up and go for merc camps if they're up. |
|
|
Baleog As he levels Baleog will be getting stronger at pushing lanes and by now forts will be in contention. Baleog should always assist with your allies during objectives and not go for solo captures. His aoe damage is too useful for stopping captures. Once control of Altars is established he should return to lane early to whack down the minion waves ready for your allies to join for a fort capture, or join Olaf for jungling if merc camps are up and allies aren't going for them. |
|
|
Erik Thanks to Sabotage Erik presents a good solution to recovering lost forts, as these buildings don't have walls guarding them and but a single tower, which Erik can quickly neutralise on his own so long as the buildings in question aren't attacking him. If Erik's original lane is pushed through to the enemy doorstep, he should move onto Baleog's lane and help him push it. Keep him nearby for objectives when they appear. Like Olaf, Erik should try and go for crafty solo captures if he can manage it and be deployed to altars where the least amount of enemy and allied presence is. |
|
|
The Group If Altars do not spawn in larger numbers the Vikings should group for their capture to allow Longboat usage at the objective. As with earlier, following capture in such circumstances (or indeed if Erik and Olaf manage solo captures) bring the Vikings together for a push on a lane. At this stage their combined damage is hefty and will take a keep out pretty quickly if you have some time. The Vikings as a group can solo most keeps too, as Olaf can typically tank them long enough for Erik to remove their ammo. Additionally the Vikings can try and solo the boss merc at this stage as a three, if they're careful. The fact this boss does AOE damage means you need to be microing a lot in the battle and if it's available and not needed elsewhere, Longboat may be required to do so. |
|
|
Olaf Keep Olaf with allied heroes to peel for them, but still use him to attempt solo captures where possible and use him to tank merc camps when you are taking them with the Vikings as a three. Unless objectives are up Olaf shouldn't be alone at this point as EXP gains at this stage are determined largely by repeated fort taking rather than simple soaking and Olaf is bad at taking forts on his own. If no one else, pair him up with Baleog for fort taking. |
|
|
Baleog Baleog should be maintaining lane control by keeping minions down and checking forts to put pressure on the enemy team. Baleog can solo the pumpkins if he's careful at this stage, it's best to pair him with Olaf from here on in whenever he's operating outside of objectives. |
|
|
Erik Erik should still be solo capturing and trying to take back lost forts. Unlike the other two he doesn't need to hang around with them until objectives spawn and longboat is required.. |
|
|
The Group As with all Viking games the alter the game, the more time you'll spend together. We can take any merc camp and the boss fairly easily at this point, and our presence on a lane will threaten a keep unless we are challenged. As per earlier, regroup for singular objectives and the resulting push, or to speed up boss captures. Split pushing does remain viable throughout the game however for more exp and Bell Tower power, so when the opportunity arises split Erik away to chip on one lane whilst Baleog and Olaf do the other. |

| Team Fighting Auto Attackers! |
|
|
|
|
|
|
|
|
|
Olaf Place Olaf with Baleog on a lane of your choosing. Feel free to keep Olaf in cloaked areas so he scouts for you and wards off enemies who try to hide in the smoke, you'll generally want Olaf on a reasonably populated lane so his slow can help kill the enemies. |
|
|
Baleog Team Baleog up with Olaf and use him to whittle down creep waves. At this stage he can't jungle too well so he should stick to laning, poking enemies where he can. He will capable of jungling once he hits level 6 or so if he has a bit of help (such as from Olaf) |
|
|
Erik Erik should be positioned on opposite lane from the other two. Erik is quick and easy to manouveur so it makes sense to keep him by himself as he avoids trouble not through fighting but through avoiding and running! You hopefully won't be alone on your lane. If you are, convince your allies to make an early push on the opposite lane to force the walls down. Erik can keep himself safe if he needs to, just don't try to overextend and play defensively. Aim to kill caster minions to farm orbs, otherwise stand back. If Murky is on the lane kill his puffers whenever they appear. |
|
|
The Group Your Vikings won't group until the first objective in all likelihood. At this point it is wise to group them together to assist in the fight. However you can leave Olaf behind to soak. That's right, Olaf. Erik and Baleog are generally quicker, ranged and higher damage so they are more useful in the fights at a distance and damaging the enemy immortal than Olaf is. Olaf should stay on lane to soak some EXP for us, grabbing orbs if they appear. Keep Erik and Baleog away from direct combat, you want to hold off entering fights until supports reveal themselves and focus on them at range in an attempt to scare them off and distract them from healing their allies. If the enemies try to follow you try kiting them through the smoke and into your Immortal's attacks, or lead them to waiting allies. |
|
|
Olaf Olaf should retain the same roles of pinning and peeling for allies and also as a scout in cloaked entry points onto lanes. Tis is particularly important if jungling. Olaf should help Baleog jungle as well, without allies needing to get involved, leaving them to push the lane. Once you hit 16 have Olaf save his stun for supports who flee or begin channelled abilities. There's plenty of small walkways in the middle of the arena and Olaf can actually block the route pretty well if he stands in the right position. This can be useful for separating supports from their carries if you cahse a support into one of these corridors and them block their re-entry into the battle. |
|
|
Baleog With talents in tow Baleog is now your most valuable Viking as he's the one dealing the damage! Baleog should be able to jungle pretty well without help by now, so he can do that whenever he's not hanging around with the team. Keep him safe and have him poke from the back lines. If you're hesitant, have Olaf halt ("H") near him and use him to peel any attackers near you. Baleog should be left to DPS the immortal when it spawns, whilst you use Erik and Olaf to distract the opposing team and potentially soak. |
|
|
Erik As the game progresses the ability to split push becomes less simple as even the bases are pretty small and moving from one gate to the next is pretty easy. Erik will need to start hanging around with the other two Vikings at these later levels. Use him to patrol and scout occasionally, but you want him available to team fights as his dps is pretty good. |
|
|
The Group You'll need to start grouping the Vikings together so you can use the Longboat when you need it! The sustained damage of the Vikings with this build is pretty decent, so if played correctly and grouped together, you can actually scare off many would-be-assailants if you're careful. Grouping the Vikings together speeds up jungling also, which is invaluable to pushing lanes whilst the objectives are up. Don't be afraid to have your Vikings dps the enemy immortal whilst allies work on defence, your AA damage is enough to wound the Immortal reasonably well so long as you're not disturbed... |
|
|
The Group At this point in the game you will be controlling the Vikings together pretty much throughout. Split pushing rarely wins this map, so you need concentrated DPS from all three of your Vikings to help bring enemies down. Use Erik to lure opponents into traps within the middle area where your team waits: create the illusion you're going to split push before running away and gaining distance with a Longboat summon. By level 20 this map's games are almost always decided by whoever gets obliterated in a teamfight. Whether this occurs at the Immortal or not, is another matter entirely. |

| Split, Spy and Team fight |
|
|
|
|
|
|
|
|
|
Olaf Keep Olaf on the top lane. Soak exp and grab orbs and don't push too much. You stay here and try not to leave lane outside of objectives. When objectives spawn join top shrine to help capture it. Your extra HP and slow is more helpful here than anywhere else. Your regen also makes you suited to hit and run tactics around the shrine and brush. You'll need allies to join you top though, and encourage allies to focus top whilst Erik focuses on ninjaing the bottom. |
|
|
Baleog Baleog should go on middle. He stays here focusing on a balanced push whilst netting orbs. When objectives spawns he should remain on lane to soak exp, but remain fairly close to the shrine. Don't overextend due to the high amount of brush near the shrine. You retain the soak and aim for a quick capture if the shrine is able to be activated. |
|
|
Erik Erik should be positioned on bottom lane. Similar to Olaf, gentle push with orbs as focus. If Spy Games has been picked place Erik near (but not within) one side of the brush and keep him stealthed. This way he will be able to detect enemy hero movement and still soak the lane. Also placing him inside the brush means he will commonly be intercepted by enemy pathing so he will inadvertently reveal himself. Best bet is nearer the middle of the shrine just to the side of the brush, as enemies will either path through or just around the brush. Don't compete with shrine fights when they occur on this lane. You aim to hang around and retake the shrine when the enemies leave. Spy Games makes this very easy. If you don't have stealth, when objectives spawn back off down the lane and try to conceal yourself to give the illusion you have left the lane. Be patient and wait for a good opening and don't reveal yourself too early. When enemies leave bottom to join top, Baleog will need to move himself back to avoid being killed by the hero train. |
|
|
The Group Do not group the Vikings at this stage except if the Dragon Knight spawns. If you have the DK, then take Erik and Olaf on one lane and Baleog on the other, leaving the DK and allies on the last lane. This way you can generate fair splitpush whilst the enemy team is distracted. Ask your allies to not leave the lane and focus on protecting the DK and push that lane hard. If the Dk lane swaps, swap your Vikings onto the lane he has left. If the enemy DK has spawned it must die very quickly. Regroup your Vikings and focus attacks on it above everything else. If you allies have decent damage potential and you've taken Sabotage, you may leave Erik on lane to try and disrupt enemy structures whilst the enemy focuses on their push. |
|
|
Olaf Olaf should stick to the top lane as he always has, be careful not to overextend if the lane has been pushed very far though. Signal allies for upper lane mercs where possible, or have Baleog join you to take them out. Always be available for fights at the top shrine, keeping yourself on the outer rim of the Brush so you can act as spotter for your allies and slow incoming foes. Once top is secured, you need to be ready to move down towards the bottom lane in an attempt to help force a teamfight with the opposing team and abuse Longboat. |
|
|
Baleog Stick to mid, grab orbs and push hard. Join Olaf and Erik for jungling when each has a nearby merc camp available. Baleog should not ignore objectives outright anymore and depending on whether he is needed support the bottom Shrine. If bottom is contested by 1 enemy for example, Erik and Baleog can take them out, if you play smart. If more than 1, have Baleog stay near the central shrine. He needs to say in place to threaten a quick summon if Erik can ninja bot still. If ninjaing isn't working have him follow Olaf down when moving towards bot so you can use Longboat for teamfights. |
|
|
Erik Keep playing Erik in the same manner you always have, shrine ninja and general pain in the backside. Remember patience at the shrines and time your contest wisely to allow an easy capture. Don't be afraid to lead enemies on a goose chase through the bottom brush if it gives your allies time to arrive. This is particularly effective if you take Erik the Swift. |
|
|
The Group Other than the Dragon circumstances mentioned in early game (which don't really change as some lanes are still up at this point) we regroup to be around for a teamfight when it breaks out. After storming top we should move Olaf and Baleog close to Erik in anticipation of the two teams meeting for a fight. The Longboat is a good way to bully people away from shrines or the central lane. If we haven't taken Longboat we should still group for teamfights, but be ready to keep a Viking safe to use Play Again for the full heal. |
|
|
Olaf Move Olaf to mid and keep him on lane for soak but no further than the enemy's inner base (unless the game is ending). He is our new summoner of choice, as Baleog will be dealing nice AOE damage at this point and we need to keep him splitpushing to keep pressure on the enemy base (via defending catapults) which means they won't contest shrines. |
|
|
Baleog Lane swap with Olaf to force yourself down his lane in the hopes of breaking keeps along the way. If you take FoTS you can solo the merc camps without issues. Once the keeps are down on your lane focus on keeping spawned minions down so your catapults can stack up, but don't approach the core directly. |
|
|
Erik Erik should still aim to roam bottom lane for soak and being in position for shrine capturing. With clever movement (only if Erik the Swift is taken) and Spin stacking, if you've taken FoTS he can solo the merc camps too, so do this whenever possible. Like Baleog keep spawned minions down where possible to allow catapult buildup if you're winning. If you're losing tactics change somewhat. |
|
|
The Group Vikings should group for teamfights and shrine defences. If you've taken Play Again you can summon all Vikings to a single lane or shrine to defend it or assault the lane. At this point in the game we are capable of split pushing pretty hard so we can put appropriate pressure on an enemy team if needed. If the game is not in our favour we need to aim to do this where we can to try and force enemy attention backwards and away from the shrines. Late game a dragon knight capture is very important. If boat is taken obviously stick close when the enemy team is congregating so we can use it when the fight breaks out. Keep the Vikings parallel across their lanes so regrouping isn't an issue. |

| Split Push |
|
|
|
|
|
|
|
|
|
Olaf Olaf should be positioned on the lane which the enemy golem will attack from. Which lane this is will depend on which side of the map you're playing from. Early game just soak and grab orbs. You will stay on lane when the mines open to retain an exp advantage as you bring very little to the fights beyond a slow, and the exp advantage will help us more at this stage in the game. Position yourself in the grass near the mine exit in case you can charge and stop a nearly dead enemy escaping. |
|
|
Baleog Baleog should be positioned on the same lane as Olaf. Stick Olaf in the grass and "H" halt him, focus more on controlling Baleog. WHen the mines open Baleog should go inside. Don't worry about fighting enemy heroes when inside, avoid them and focus on killing as many minion waves as you can. Once you've cleared as many as you can then join your allies. If the enemy has retained dominance of the mines and is doing big golem, ignore them, return to lane attempt to do the Knight merc camp and siege camps if possible with Olaf and Erik and any allies. |
|
|
Erik Erik should be positioned on the lane your golem will march down. This is particularly important if you pick Sabotage. We want to weaken the enemy towers before our golem pops, as even a weak golem will deal fair damage if no towers soften it up prior to the keep. We can deplete the towers before the Golem pops, if we are aggressive and push the lane. Keep Erik safe, but don't let your lane get pushed back too far. If enemy heroes overextend on your lane by pushing (particularly melees) smack them with attacks to encourage them to back off, strafe whilst doing so to avoid skillshots and such. We want a nice foothold for when the mines open, and once they do we should check on Erik regularly to make sure he reaches the towers and begins to deplete them. Assuming a tower is attacking and Erik keeps his Sabotage DOT on both, it will take them approximately 13 seconds to empty their ammo from full. This is about 1-2 minion waves against the gates, and is certainly doable during the mine duration. If your Golem has no tower resistance it forces the opposing heroes to address it directly else it will heavily damage (if not destroy) their keep without the prior tower damage on it. |
|
|
The Group Vikings won't be moving as a group yet, unless the enemy team has the mines covered well and you need to quickly pinch the merc camps. You should regroup for this to make it happen more quickly. You can also regroup to quickly try and punch down the towers on Erik's lane in prep for your own golem, because even if it's weaker, without towers it will do far more damage. If it is the case your own golem is weaker, sometimes enemies won't defend against a golem relying on a keep/towers to kill it. If this is the case keep your Vikings together and push with the golem in an attempt to force the enemy team to abandon the defence of their own Golem or to risk losing buildings of their own, reducing the exp disparity created by losing the objective. |
|
|
Olaf If we have picked Jump, Olaf plays as he always had, with exception that during the mines we bring him down and have him follow Baleog and Erik to prep for Longboat use. If Hunka' was picked, play him more aggressively and attempt small pushes and siege camp captures with Baleog outside of mine-time. When the mines open with Hunka' Olaf can venture off from Baleog to collect skulls by himself. It doesn't matter if he dies particularly as the skulls cannot be dropped. |
|
|
Baleog With Olaf, Baleog's lane will probabley be pushed against you a bit as this is the enemy golem lane after all! Focus on pushing it back as soon as you can, taking time out for Mercs and such. When the mines open get into position ready for spawns early and again, focus on the smaller groups. If the small groups are compelte and the big golem isn't being done, venture out for mercs. If mercs have been done, exit via the shaft closest to Erik's lane and join him in pushing until the skulls have all been collected. Once this happens prepare for attacking of defending depending on whether your Golem is stronger or not. |
|
|
Erik Erik's lane is most likely to push compared to the other lane due to it being the one your golem comes down, so focus on softening towers and keeps but once the towers near the primary base are destroyed, stop focus on that lane and switch focus to the other lane pushing instead. Also once this is achieved, Erik should assist in the mines to help collect skulls. Erik's job is to soften his lane up, once this is done he should follow Baleog around unless nobody is manning his original lane, in which case stay for soak. |
|
|
The Group Teamfights occur more frequently as the game goes on, and they are important, as majority skull golems are ridiculous once some towers have gone down. The Vikings should really stick together to defend or attack with/against golems once they are up depending on whether yours is stronger or weaker. Generally defend against strong golems or defend them if they are yours. This said, Erik should stray if he still has work to do on his lane as he can help a weak golem create trouble for the enemy. Within the mines stick closeish to eachother, Longboat will be useful for teamfights as there isn't far to run in the mines, and the fantastic range of the boat means the damage is good at sticking to enemies. Netting the big golem is very important here so bear that in mind. Consider attempting to solo the big golem with the 3 Vikings whilst allies skirmish with enemy heroes at the small groups if possible. This can be a good way to guarantee a bone advantage or at least minimise the difference between your teams (The Big golem is worth 45 skulls). |
|
|
The Group Split pushing is usually a bit pointless at this stage, as it will likely be a big golem that either make the final push, or enables enough distraction to allow you to split-push in the first place, so the objective is key. Besides, Erik's lane will definatly be all but pushed at this point, unless you are being completely trashed. We can best assist the objective as a group by splitting up for rapid skull gathering in the mines, or soloing the boss golem for our allies. We can also easily take merc camps as a three, and our damage output is best when we're together, it also makes the boat usable when we need it. Only split up at this point to distract enemies or to enable quicker skull gathering. If you took Pain Don't Hurt you can split Baleog from Erik and Olaf when mercing (one group takes one siege camp, the other takes the other, generally have Baleog do the camp closest to your own base). |
HeroesFire is the place to find the perfect build guide to take your game to the next level. Learn how to play a new hero, or fine tune your favorite HotS hero’s build and strategy.
Copyright © 2019 HeroesFire | All Rights Reserved

Quick Comment (4) View Comments
You need to log in before commenting.