- Green indicates "Recommended", "Very effective", "Flexible and useful"
- Yellow indicates "Situationally powerful", "Alternate", "Team dependent"
- Red indicates "Not advised", "Average talent for niche scenario", "Straight up not competitive"
Level 1
 [Enhanced Agility]
This talent right here defines my core playstyle as Dehaka. Fierce, aggressive, opportunistic. Dehaka's main drawback is his lack of mobility, be it roaming or in-combat. Lo and behold your solution! There is also excellent synergy I'll later detail.
Improving the bush speed retention to 5 seconds lets you hop from bush to bush to traverse across an entire map. Battlegrounds that enable this strategy are hence categorized as
"Ideal." Dehaka is an amazing splitpusher and macro hero - bouncing between two lanes for XP, essence, and pressure is as easy as breathing. What's more, the talent increases the speed up to 40%!
Let's talk about combat. Dehaka is already incentivized to attack from bushes for that nifty 20% speed boost as well as brief concealment. With Enhanced Agility, you will double this speed boost AND it'll last a generous 5 seconds afterwards. You can reach any target you want with impunity and kill them.
Furthermore, your abductions become infinitely more dangerous with Enhanced Agility. Picture this: Dehaka catapults himself from a bush toward an unsuspecting enemy. He connects a Drag. He starts sprinting backwards into the bush/his team. For 2.25 seconds of dragging, you can displace anyone more than half a screen away from their original position. The enemy team is trying their best to stop Dehaka, but he's faster than all of them. In fact, your paralyzed victim will move faster being dragged than he ever will on his own feet! Your target gets ganged up upon by your team, dying alone and isolated.
Very often in many games you will need to turn tail and run. Fight's going bad, whatever, and now the enemy team is pursuing you. All you need to do is dart from bush to bush until you get to base. People will get desperate and attempt to throw out some big abilities as you're making distance. Prepare yourself to quickly sidestep them and continue running to the next bush. Dehaka becomes one of the best escape artists in the game with Enhanced Agility.
Oh, and also your level 13 talent, Ferocious Stalker, provides its damage boost whilst bush-stalker speed is active. Increasing speed duration to 5 makes this last the whole duration of your Dark Swarm, rather than being cut short 2 seconds in. The talent's slow is also useful in further leveraging your speed difference. You're insanely fast, and your enemy is getting slowed. This guarantees many opportunities to drag someone to their death.
This is the MOST IMPORTANT talent in Dehaka's entire kit. Nothing changes him as drastically as this. So, when do I pick it? Truth be told, you'll pick it in 80% of your matches. Look at the team line ups and ask yourself these questions:
- Is the enemy team primarily made up of assassins/healers? If you can reach them, you kill them. Speed lets you easily reach them.
- Does the enemy team have kite-able bruisers? Speed is important to distract and distance yourself from them as you go for a killer flank on the backline. They may have high damage and durability, but it is meaningless if they can't get in range to do fighting. Funny, this principle also applies to Dehaka.
- Are you the play-maker of your team? If your team lacks crowd control, then you must step in and provide it. Speed allows for more frequent and meaningful abductions, as well as good kiting potential. This criteria can instead be satisfied by being a brick-wall with Tissue Regeneration, and playing for a slower and more defensive playstyle.
- Are you playing on a map full to the brim with useful bushes located around objectives and frequent fighting locations? You'll get a lot out of the speed boost, get it.
- Inversely, you do NOT want to pick Enhanced Agility on maps with few bushes, like Volskaya Foundry and Hanamura Temple.
- Do you want to have lots of fun? Of course you do.
 [Tissue Regeneration]
Where-as Enhanced Agility was the aggressive, speedier option, Tissue Regeneration is your durability option. This is a very, VERY good talent at giving you unlimited health regeneration. You can safely consume essence to top yourself off and clear mercenary camps with impunity.
I will pick up this talent under the following conditions:
- I am literally solo-tanking and my entire team can output an incredible amount of damage. In this case, the longer you live, the more damage your whole team can safely project.
- If you’re on a map with too few bushes, or meaningless bushes, then you want constant benefit rather than 0 benefit from Enhanced Agility.
- Some enemy teams are also heavy into durability and have slow killing potential. You can match that tankiness and the passive health regeneration will act as a soft outer layer of defense. Later, pick up Primal Rage with the higher total essence to output more damage.
- If you do not have a healer, and the enemy team has high poke damage, Tissue Regeneration will keep you in the fight and on the map doing useful things.
 [Enduring Swarm]
Whoa-ho, does the enemy team ONLY have magic damage output? The spell armor will make you invincible in fights if so. I often opt for Enhanced Agility in spite of an ideal magic resist game so I can apply more map pressure or kill pressure. Especially so against ⅔ magic:physical damage ratio compositions. But if the enemy lineup is a team whose damage consists solely of magic, this is really good.
Level 4
 [Lurker Strain]
Here’s a cool talent that I have a hard time getting the most out of. I only ever pick this if you’re facing off against auto-attackers that cannot easily break stealth, such as Artanis, Illidan, Butcher, Raynor, etc. You can often leverage 2 or 3 whole seconds of stealth for an easy get away.
WARNING: If you exit the ground whilst Dark Swarm is active, you will automatically de-stealth. Keep this important fact in mind if you’re banking on using the stealth to get away.
This is also a good defensive option against HEAVY dive compositions. People will gang up all around you whilst burrowing, so shoving them aside with a nasty slow is great at jail-breaking yourself.
I don’t like to use burrow in offensive scenarios due to how unbelievably good it is to have an on-command stasis. But if there isn’t much to dodge, then feel free to jump in and out of the ground to disjoint channels and apply a slow into drag combo.
One final trick you can pull off - and it is more of a dream than a practical tactic - is to sit in a bush with Enhanced Agility and intentionally burrow to trigger the stealth. Then you go for a deep dive onto an enemy back-liner to attempt a drag. It rarely works, but camoflauging your silhouette can delay someone’s reaction speed just long enough for you to connect a game-winning drag…
Most of the time, you want to augment your essence-collecting speed to accelerate your lvl 1 quests, and to always be primed with a fully stored essence count. There are two lines of thought:
 [One-Who-Collects]
 for passive, PvE maps
Humongous 3 laned maps with lots of mercenaries is just begging for a split pushing playstyle. This talent incentivizes your global Brushstalker quite nicely. Quickly clear out two minion waves to max out on essence and apply your Dehaka pressure. Tunnel into fights when someone comes to answer you, or when a fight breaks out.
The bonus damage to your swarm when clearing mercenaries is incredibly nice when either taking camps, or clearing enemy mercenaries. The added map pressure is enough to break an enemy team.
If your team is behind on early game tempo, or you’re fighting a lower-than-average enemy hero count (such as Aba or Cho’gall), then One-Who-Collects is a safe and guaranteed alternative to gathering essence.
I’m a big fan of One-Who-Collects on Garden of Terror, Warhead Junction, and Tomb of the Spider Queen.
 [Hero Stalker]
 for clownfiesta, PvP maps
Any map that you can see players throwing themselves right back into the fray death after death is the IDEAL map for Hero Stalking. Battlefield of Eternity, Alterac Pass, Hanamura Temple and Volskaya Foundries encourage king-of-the-hill playstyles. The more players dying around you, the more essence!
Your essence generation is simply overwhelming. Remember to consume essence RIGHT BEFORE you land a killing blow so you don’t waste 20 essence. Once you get the first kill, nothing can stop you from regenerating massive portions of your health bar. Even in fights where you’re about to die, a kill on the side can swing a fight decisively in your favor.
I tend to prefer Hero Stalker for the clutch mid-fight healing for these reasons.
Level 7
 [Feeding Frenzy]
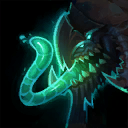
Hands down the best talent you can pick from this tier, and the next several ones. Drag is powerful, but gated behind a massive cooldown. This talent reduces the downtime of your drags by ~60%, allowing you to stick onto a single target indefinitely, or score a kill and look for your next victim. This talent also encourages a very important tactic - auto attacking whilst dragging. Land an attack every time it is available whilst back-pedaling in-between attack cooldowns. You’ll still travel 75% of your distance and have another drag available in the next 3 seconds.
Oh, and to make this cake even sweeter, your drag is now a 2.25 second stun. Simply insane.
I’ll skirmish here and there in the early game as Dehaka when convenient, but I want to gather XP as quickly as possible to rush toward level 7 before the objective comes up. This talent is unbelievably important to your extended fighting capabilities.
 [Paralyzing Enzymes]
Gambit. Uninterested. On its own, it’s an impressive talent. Doubling your Drag damage and adding a lethal 40% slow is pretty cool! But I find missing a drag just neuters your potential too hard when you can’t refresh it with Feeding Frenzy. It doesn’t help that dying will reduce this damage. Furthermore, the added stun duration is more useful in more scenarios than a decent slow. Don’t pick this in serious matches.
 [Symbiosis]
Dark Swarm is a simple AoE ability with nothing more to write home about. Increasing its potential is not something you should be prioritizing, when Dragging is the most pivotal element in Dehaka’s arsenal. Still, this is a good talent for what it does. Dark Swarm now has a 50% uptime duration against a single hero. If you dive deep with high survivability talents, or even the magic armor talent you got on level 1, you can keep this up indefinitely for an impressive presence! I’d only choose this when combo-ing with level 1 against a mage team, or if fighting a melee-heavy team of bruisers and tanks.
Level 10
For your ultimates, I’ve described how to use them in the ability section. I will detail scenarios on when you should choose one over the other.
 [Isolation]
Dehaka is the master of the divide-and-conquer strategy. He himself is one of the best 1v1 duelists in the game, so he is constantly looking for a duel. And he does exceptionally well when you leverage number advantages to gang up a high priority target with strong single-target CC. However - you won't always have the luxury of fighting at a numbers advantage. How about we force that scenario, hmm? Isolation allows you to split a fight in half and fight on your own terms. This is why I default to picking Isolation in most matches.
Most team compositions will gravitate towards being well rounded. A healer, a damage dealer, a tank, so and so forth. The idea being that more of the same will produce diminishing returns, whilst a team with variety is greater than the sum of its parts. Isolation brutally knee-caps this strategy by shutting down a single target for 6 whole seconds. In that allotted time, your team can:
Engage an enemy team with no frontliner and rush straight to the squishy backline,
Fight a team without healing by focus firing and swiftly killing targets without them escaping,
Assault an enemy composition that cannot kill you without any damage dealers, whereby your healer will mend any small dinks,
Shut down a hyper-carry and mop the floor with their subordinates.
You should also keep an eye on death-ball compositions, those that rely on 5 manning when pushing or teamfighting. Since all enemies are present, you'll tend to see them clump together. Contagion at level 20 is the antidote to this problem. Also, remember to splitpush and gather an XP advantage for your team!
 [Adaptation]
When fighting a mono-team, such as one with too many assassins or too many tanks, isolating one of them often achieves little to nothing in practice. The enemy team still fights in the same formation whether they are effectively a man down or not. In this case, you must overpower your enemies with your superior stats and strategy.
Slow and Steady Composition
A slower paced enemy team with versatility but little burst damage can never execute a Dehaka that has adapted. You should leverage your higher-than-average speed to jump on high-priority targets and begin attacking them. Sure, it'll take time to kill, and the entire enemy team will shift focus to stop you. Simply activate your Adaptation and they won't be able to harm/kill you for 4 seconds + the time it takes to kill afterwards. Hopefully you'll kill your target yourself, or your team will come in to back you up on the space you just created for them. Regroup with team and win the 5v4 or 5v5 where the enemy team is heavily weakened.
Even if you achieve nothing but waste the enemy teams time, that's ok. The longer you can stay alive the more damage and CC your own backline can dish out.
Fast and Deadly Composition
The enemy team is comprised of only damage dealers. Their only win-con is killing all of you. Adapting makes it all the harder for them. In such a scenario, your body is infinitely more important than launching a hard-to-hit Isolation. You can easily run down and kill an opponent, and your drags are death sentences as is. Once more, work with your team and act as the anti-assassin. If your backliners get jumped, come to their aid and hunt down the assassin. In other circumstances you will be the frontliner. Activate Adaptation when you are getting focused and bob and weave out of the fight. Every second you make the enemy team waste their damage on you, that is damage not being put on the rest of your team.
Level 13
 [Ferocious Stalker]
Cool thing to note about this talent - your Dark Swarm will always apply the -15% slow, speed-boosted or not. Just a tiny slow makes it so much easier to guarantee drags! People will no longer be able to sidestep you, they must expend an escape ability. Running someone down at a +40% faster speed, and simultaneously slowing your opponent by -15% is a 55% speed difference.
Of course, the real catch here is that you get +60% damage to your Dark Swarm whilst brushstalker movespeed is active. That would be 2 seconds normally… but enhanced agility at level 1 will boost this to a full 5 seconds. This damage is outrageously good! It’s great at taking down enemy heroes, it devastates entire minion waves, and it helps with camp clear.
 [Primal Swarm]
It may not seem like much, and to be frank it really isn’t. However! You’d be shocked by how easy it is for your team to absolutely annihilate anything you drag. Tanks included. Personally, I prefer your other level 13 talents for a more independent benefit, but if you are the team’s tank and you just NEED to provide more utility, this is what you do.
You should choose something else if your team already has a plethora of armor reduction abilities or talents.
 [Primal Rage]
Primal Rage is pretty awesome. You’d want to pick this in matches where you simply need more damage to take down tougher enemies, or if there aren’t many bushes for combat. I almost always pick it when I’m in a match with an abundance of essence, like picking Hero-Stalker against D.Va or Murky.
Also, always pick Primal Rage if you chose Tissue Regeneration. The synergy is very good. Your maximum cap will be 60 Essence instead, netting you +75% damage rather than +60%. The big increase in health regeneration makes it less necessary to eat your essence for sustain, so you can hold onto it for Primal Rage. Furthermore, gathering essence with Tissue Regeneration is extremely easy by gathering a few regen globes! So don’t feel scared to pop your Essence to live in a fight.
Level 16
 [Elongated Tongue]
Truth be told your level 16 options are pretty bad. Most heroes get massive powerspikes here, but Dehaka is already strong and gets a little boost. Of the options given, increased range on your Drag is excellent against assassin teams. Your drag is as long as Raynor’s AA at 6.5 range, which is important to remember. On average, you will catch 2+ enemies that you would have otherwise missed, which then snowballs into controlling a late game objective or boss.
This should be your default pick unless you’re fighting a brawly close range enemy team.
 [Tunneling Claws]
Super nice feeling talent, but rarely impactful in practice. It helps you escape or hard engage, and synergizes a little with Lurker Strain at 4. If you’re having big trouble reaching your opponents at range and there are little to no bushes, then the increased speed is vital in jumping on your opponents.
 [Pack Leader]
If you’re on one of Dehaka’s best maps (one with a lot of useful bushes), don’t need elongated tongue, and your team has little to no armor boosters, then you can splurge and pick Pack Leader. Dehaka effectively has two healthbars when he has stacked essence - the armor gets more value out of that. The increased attack speed is actually really important - more Primal Rage auto attacks and Feeding Frenzy CD reduction will let you kill anything. Did I mention you have 90% uptime on stunning people with drag? Your victim literally cannot move.
Great talent to pick up against bruisers, whom you have trouble dueling. Remember to take advantage of bushes wherever possible.
Level 20
 [Contagion]
Game endingly powerful talent right here. It’s thematic and extremely fun. It’s great on small, short maps with lots of narrow hallways. Aim for center of mass and watch as they scatter. Pick off the high threat enemies with impunity. I also like how this relaxes my aim - if I can land an Isolation on a slower, adjacent target, then it will spread to the quick and thin assassins and brutally shut them down.
Dehaka struggles fighting teamfight heavy comps. If the death ball gets rolling and they shove a lane, he can’t find a bush to launch himself into range. This kind of scenario is frightening and may feel hopeless. But if you hold out until you reach level 20, contagion punishes this strategy hard, and will win you would-be lost games.
I need not explain how hitting a 3/4/5 man Contagion will win you a match, but every subsequent Isolated enemy beyond the first will cascade a gargantuan amount of momentum for your team. Enemies who are isolated still have a little vision to see projectiles fly around their feet. They can usually sense if a fight is bad or good and will usually stick near one of their not-blind teammates. When EVERYONE is blind, silenced, and unable to help one another, then it is utter chaos. Noone knows what to do and will die alone.
 [Change is Survival]
You’re in every fight imaginable. The enemy team is packing an unlimited amount of damage. It’s time to bring out this bad boy. As soon as you get a whiff of the enemy team turning their attention to attack you, pop this ultimate. You will full heal. You’ll have it again sooner than if you were to burrow. If you’re half health, you can bait the enemy team into attacking you down to 25% health. You will then heal back to full since healing is doubled from the damage!
I’m also a big fan of healing off of structures. Just pop Adaptation and viola you’re back to full health.
 [Essence Claws]
An interesting, but seldom useful talent. It’s only good if you pick Primal Rage at 13 and you are fighting a bruiser heavy comps with long fights. Movement speed debuffs do not stack, and only the greatest will be applied. Ferocious stalker movespeed debuff ergo is wasted. You’re better off choosing something else in practice.
 [Apex Predator]
A very fun talent. Unlimited map pressure gives you a lot of freedom in securing everything you need. When you choose this talent, you must become much more aggressive in clearing every wave you see to get value. Push every lane you want + capture map objectives - then jump right back into a fight at 5v5. The faster dig speed helps a lot when using it to escape a threatening situation, or to jump into a teamfight late!
I recommend choosing this talent when more macro pressure is the way to win. Teams with little waveclear have trouble keeping up with Dehaka, this talent here can break their backs. Or if your team is the one in need of waveclear, this will turn the pressure onto the enemies heads instead.
![]()
 Additional Notes on Essence Collector
 Additional Notes on Bushstalker
 Additional Notes on Dragging
 Additional Notes on Dark Swarm
 Additional Notes on Burrowing
 Additional Notes on Isolation
 Additional Notes on Adaptation
 -- Full analysis on all talents --







Quick Comment () View Comments
You need to log in before commenting.