Hello everyone! Welcome to my Zarya Guide. Before we get started, a little bit about me: Zarya main currently in GM for both HL and TL so I've been around the block. I am a firm believer that Zarya is currently one of the strongest heroes because of her ability to bring so much to a game. This is my first guide so please feel free to leave comments and suggestions!
Let's break down the pros and cons of Zarya and then step right into the guide.
Pros:
-Flex hero that can be built for multiple situations
-Can serve as a secondary support
-Can Main Tank if need to
-Very few people know her cooldowns
-Strong poke
-High sustain damage
Cons:
-Highly immobile
-Weak against burst teams
-Weak against silence comps
-Very low waveclear
-Needs to constantly team fight
Basic Abilities Top
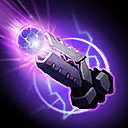 Particle Grenade
Zarya fires her energy cannon launching a projectile at a target location dealing AoE damage at the impact location. Zarya can store up to four of these charges and replenishes one stack per cooldown rotation. Since Zarya has no mana costs, this skill should never be sitting at full stacks unless travelling or setting up for a gank. Additionally, because Zarya requires an almost melee range to auto attack this skill should only be used when at high energy so that she can spend the rest of her time positioning and auto-attacking.
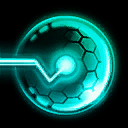
 Personal Barrier
Zarya shields herself shielding a medium amount of damage for a short duration of time. This skill is Zarya’s primary energy generation method and is the most important skill to master, (after all a Zarya that cannot shield herself is usually a dead Zarya). Even though the cast time may appear to be instant, there is a small delay between the activation of the skill and the shielding affect. As such, use this skill before you take damage instead of as you are taking damage.
 Shield Ally
Zarya shields an ally hero preventing a small amount of damage and granting Zarya energy in the same fashion as her
Personal Barrier. This skill is what makes Zarya a support comparable to Tassadar, Tyrande, and Medivh. The long range and long cooldown of this skill enables her to shield almost any ally in a teamfight but should only be used after a target starts taking continuous damage or before a large burst of damgage such as a Flame Strike.
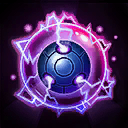
 Graviton Surge
Zarya fires a projectile similar to her Particle Grenade that creates a gravity field in a medium radius around the epicenter of the target location dragging all enemies caught towards its center. Zarya’s ult is her only form of CC and should be used carefully as the cooldown is quite long and missing the skillshot will significantly lower her damage. Because heroes can use displacements such as dash, tumble, and blinks to escape the field it is recommended to use during a team fight as opposed to using it for initiation purposes.
Tip:To land a good
Graviton Surge pretend you are casting your
Particle Grenade at the target. It has about the same cast animation and time and you will want the target to be at the center of the ult so they cannot just barely escape.
 Expulsion Zone
Zarya fires a large disc that pushes enemies away from the epicenter while interrupting them, slowing them, and dealing small amount of damage. This skill is zarya’s primary form of gap closer and allows her to zone key targets in choke points. This skill should be used frequently to secure single kills or as a means of escape from melee enemies.
Tip:The trick to landing good
Expulsion Zone is to treat it like a melee skill. It's not something you will cast ahead of your enemy as you are both running away. It's something you cast ahead of your enemy as he decides to turn and fight you to prevent a future escape since you will win most 1v1.
Selecting a Build Top
Zarya should be considered one of the strongest flex picks for any draft. Her ability to shield, damage, tank, and push as hard as any hero that specializes in any of those roles makes her extremely annoying to deal with for the enemy team. There are three primary builds to Zarya each with room for adjustment based on the current state of the game. In order of difficulty the builds are as follows: Ranged DPS, Mage, Main Tank / Sustain. Newer players should attempt to master each level of build prior to moving on to the next as each build layers skills from the less difficult builds. Once all three builds have been mastered then the following section should be followed to determine which is the most optimal build to follow.
Main Tank / High Sustain Build Top
When To Select
Often reffered to as the “Meme” build by my fellow disgruntled HL heroes this is the standard and most versatile Zarya build. The build hinges on gaining and maintaining 75 or more energy as often as possible making it one of her more difficult builds. This build should be used when running a double bruiser composition, (with a
 Diablo
,
 Sonya
Sonya,
 Artanis
, etc.) or when facing high damage enemies, (
 Malthael
,
 Tychus
,
 Leoric
,
 Kael'thas
).
How to Play
This build is your standard Zarya Build that can be used in almost all situations and for all team comps. The main focus of the build is to reach level 13 and make full use of your
 Pain is Temporary
 to effectively become one of the hardest to kill heroes in the game.
Early Game (Pre 13)
This is your weakest point in terms of tankability and damage dealing. During this phase you want to use your
Personal Barrier and
Shield Ally as much as possible to remain above 50 energy for
 Maximum Charge
. As such this build is not a build that you should solo with as you will find yourself easily pushed out of lane and without the ability to use
Shield Ally energy generation will be limited and dangerous. Preferably you can lane with a healer who can top you off in the event you take damage past your shields.
Tip: Using
Personal Barrier and taking 2 shots from each tower will provide you with an easy method of sustaining high energy levels early game.
Mid Game (Level 13 - 19)
This is where you begin to shine with your
Pain is Temporary ability. At this point you will most likely be fighting over objectives or team fighting regularly so its critical more than ever to keep as close to 120 energy as possible. You should try to always be the first person to take damage with your
Personal Barrier and move back when the shield is approximately half depleted allowing your secondary tank/ tanky dps to start taking damage. Once the
Shield Ally on the secondary target is almost depleted move back into melee range and continue auto attacking even if your
Personal Barrier is not off of cooldown. The more damage you take during this phase the better as it will draw additional focus fire towards you. If you see yourself approaching 20% hp or if you see a big burst of damage incoming use your
Pain is Temporary BUT DO NOT RUN AWAY. Using this ability will deplete your shields entirely and you should aim to get back near 120 energy since this barrier will absorb nearly endless damage. As the duration (as noted by the orange bar under your HP) approaches 0 begin spamming
Personal Barrier as the two spells cannot be cast simultaneously but will provide you with additional shielding. As soon as you pop the
Personal Barrier assess whether or not you need to switch aggro with an ally or if you should finish off the enemy.
At this stage in the game your ult should be used to either zone the enemy by casting it in a chokepoint or to secure kills by casting it in front of the enemy target blocking their exit, (think
 Tassadar
/Anivia Wall). It doesn't matter if you miss your ults as it has a low cooldown and isn't really a focal point of the build.
Protip: Precast your ult where a target is expected to land
 E.T.C.
 or to cancel channeled abilities to negate enemy ults
 Nazeebo
.
Late Game (Free Win)
If you make it to level 20 you have become one of the most feared heroes in the game. This is where you can catch up to your dps on the leaderboards with ease. Most games will not last this long if played right but in the event that they do you now have the power to carry a 3v5. At this point in the game you will have 25% CDR allowing you to stay in the fights even longer without having to risk the hp of your off-tank/dps since your
Personal Barrier will almost always be off of cooldown.
Once you take your level 20 talent it is imperative that you no longer use it for securing kills. At level 20 your ult grants you additional energy per target hit and can be used to gain an insane amount of shields thanks to
Pain is Temporary as your base energy for the shield will be higher. Ideally you will wait to be able to hi 3/5 heroes with it and cast it while relying on
Personal Barrier to keep you alive as you stand in the dead center of the team fight. If anyone dares to stand up to , (even a
 The Butcher
 or
Malthael ) stand your ground as they will not be able to kill you. As soon as the ult is over look for an opportunity to pop your
Pain is Temporary and soak as much damage as possible. Keep in mind that all this damage you are taking does not impact your healer who is allowed to focus on healing the dps and allows you to effectively "taunt" their dps forcing them to waste their time to attack you.
Ranged DPS Top
When To Select
This build is the "Times Square" build as all you see are big shiny flashing numbers everywhere. The Ranged DPS build focuses on putting out the maximum amount of damage at the expense of mobility and survivability. This build should be taken when running a triple tank, triple support, or when your team simply has no means of pushing down objectives such as Battlefield of Eternity or the enemy Terrors. Under no circumstance should this build ever be selected vs a heavy ranged dps composition or against a team immune to auto attacks such as
 Illidan
,
 Li Li
Li Li,
 Cassia
.
How to Play
This build focuses around
 Feel the Heat
 to deter enemies from approaching you or your allies instead of providing innate survivability. You're essentially choosing to become a portable
 Drakken Laser Drill
. Your primary objective is to pick a good position early in the fight and stay there and the enemy team runs back and forth around you trying to juggle between being in your beam and being in the team fight.
Early Game (Pre 13)
With this build Zarya can go straight into an early game skirmish with high amounts of damage while the enemy team will not pose a major threat due to their low damage. With
Feel the Heat Zarya will deal an insane amount of damage if she manages to gain at least 75 energy. With this build you should feel slightly hungry for danger and willing to HP damage to bait the enemy into committing to you so you can demolish them as soon as your captain orders the shields up! While this phase is referred to your early game this is the strongest boost to your damage especially when you hit level 7 and have the perfect range for some sish kabob fun with
 To the Limit
. By correctly positioning yourself you should be able to hit both the dps and the healer trying to heal them. Since your mid game will be slightly weaker than the other builds you will want to do as much as you can to gain the lead so you can coast to late game.
Protip:Zarya can capture Siege Giants quite easily with
Feel the Heat by positioning herself almost on top of the outside giant. This will allow her to deal the extra damage to both monsters speeding up the time required to capture the camp.
Mid Game (Level 13 - 19)
This is where you will want to be careful as your enemies will gain a lot of power at 13 and even more at 16 while Zarya does not get any more damage nor does she get tankier. This stage provides you with some cc to both yourself with
 Unstoppable Competitor
 and
 Cleansing Shield
 for your allies. Hopefully you should already have the lead by now so you can just let your teammates take over the carry role for a while. If you find yourself behind at this point you have now earned the privilege of playing
Tassadar by primarily focusing on shielding your ally out of bad situations and using your shields as a mean of disengage thanks to Unstoppable. Your goal should be to soak and do as many camps as possible to arrive to level 20.
Late Game (Free Wins)
Starting to notice the trend? Yep, if you make it here you are pretty much the same version of the Zarya described in the Main Tank build. You have a self cleanse, a cleanse for your allies, an insane amount of damage. Remember, Zarya gains 4% extra auto attack damage per level like all the other heroes, except she gains up to 200% extra damage thanks to her energy, oh and did we forget about the 50% from
Feel the Heat? You're thinking to yourself "wow, that sounds awesome... but wait, what's the difference between this phase and Mid Game?" Then you realize you actually have 2 cleanses in a row for yourself AND your ally thanks to
 Unyielding Defender
 all at the increased shield amount thanks to
 Give Me Twenty
. Pretty much you can turn any
 Valla
Valla into a tank killing... tank. At this point you need to decide the best time to pop your
Unyielding Defender to surprise the enemy and give your team that advantage to turn the tides all while you still stand there and watch as the enemy team runs like a chicken with its head cut off thanks to
Feel the Heat.
Tip: Don't use
Unyielding Defender if you won't get much value out of it. Sometimes waiting that extra second for the double shield cooldown reset can mean the difference between a win and a loss.
Mage Build Top
When To Select
The mage build used to be the default Zarya build prior to her nerf as her Q spam was just too much damage. Now, this is a very niche build that should only be taken when your team is all melee but you still wanted to pick zarya or when the enemy team countered your pick with an all ranged team. By working towards
 Gravity Kills
 Zarya gets increasingly annoyingore as the game goes on. As you may have guessed if the enemy hero is highly mobile this may not be the best build to go as they will dodge both your Q and your ultimate ability. However if you enemy drafts a team that is heavy on immobile heroes then this build is the perfect build.
How to Play
This build requires that you be in line with your casters as much as possible. Your job is to go in melee range just enough to get your energy from
Personal Barrier and then spam your
Particle Grenade on the enemy backline and healers. Your attention should hardly ever be on the hard to kill targets as you will not have enough charges to kill them before going on cooldown.
Early Game (Pre 10)
You'll notice that the early game phase is much earlier relative to the other builds. Once you hit
 Pinpoint Accuracy
 your damage really starts to add up. After taking your quest for
 Demolitions Expert
 at level one you will want to spam your Particle Grenades whenever they are off cooldown. Don't worry about using it at low energy as your are simple trying to finish your quest prior to getting 7. Once you have
Pinpoint Accuracy then you will want to slow down a bit and save your
Particle Grenade for high energy spamming.
Tip: Aim your
Particle Grenade ahead of your target to hit them with the center of the
Pinpoint Accuracy.
Mid Game (10-19)
Once you get your ult you can now try to make plays by denying the enemy an escape out of a losing teamfight. Wait for your tank to initiate the fight then followup with your
Graviton Surge to pick off any weak targets. If you have high energy and land a solid ult then feel free to spam
Particle Grenade from the back line. However if you are low on energy you will need to use your
Personal Barrier and
Shield Ally to gain the energy you need for this build. During this phase your biggest concern is going to be dealing with melee opponents.
Late Game (Clutch Ult Time)
At this point in the game one team kill should be enough to end no matter what the map looks like. Your goal is to land that replay worthy
Graviton Surge to allow your tank to followup. With the increased duration and damage, it's a great opener for your team and provides you an opportunity to charge up your energy via your
Shield Ally. As your tank runs in the enemy will have no choice but it attack it and gave your a decent chunk of your energy. Now you can spam
Particle Grenade and chase the enemy down with Plasma Shock. Just remember that it's not about spamming the
Particle Grenade to get some damage it's about landing the center of your grenades to not only increase the damage but to also slow them and prevent them from running away.
Tip: It's much easier to land consecutive
Particle Grenade if you land your slow through Plasma Shock so pick your first shot carefully as the enemy will not expect it.


Quick Comment () View Comments
You need to log in before commenting.