Hi! I'm Severage, long-time casual gamer and more recently a Heroes of the Storm addict. Since picking up
 Sylvanas
 as soon as the patch hit with 15,000 gold, I've enjoyed every bit of playing her. She does my kinda deeps, she is very engaging, and just a blast to play.
For a lil track record, I have played over 1200 games of Heroes of the Storm, as well as reaching (and maintaining for a long time) 4K+ MMR on Hotslogs, etc. (my current track record on Sylvanas is 64 games with 66% win rate) I more recently lost that MMR due to trying to learn how to play
 Gazlowe
 (Be careful kids, it's dangerous territory). Even still I feel like my experience spills over into new Heroes and being able to pick them up quickly.
Places you can find me:
Twitter
HotDogs
Hero.GG (Currently out of date)
Thanks for your interest, and thanks for reading!
Table of Contents - For Your Convenience!


Welcome to my Sylvanas guide! As I am an Assassin player, you should look elswhere for more Specialist-oriented builds (I will briefly mention them but my focus is on damages). If you're like me and you wanna do the deeps, read on.


|
(Q) Withering Fire
Cooldown: 2 seconds per Charge | "Shoot the closest enemy for 28 (+3/level) damage, preferring Heroes. Stores 5 charges. Gain 1 charge on enemy Minion or Mercenary deaths, and 3 charges on nearby enemy Hero deaths."
A pretty nice ability with no mana cost, stores a lot of charges for decent burst and can be cast while moving. Can unload all charges for pretty solid damage on a target, all 5 charges at level 20 will total 440 damage, which is pretty decent. At the same time it's also useful while pushing waves. With no mana cost, you can spam it as you wipe out a wave and it'll its charges as you clear it, further increasing your clear time.
NOTE: You can hold down Q to have your arrows fire off at maximum speed without having to rapidly tap Q.
Finally, your abilities proc your passive,
 Black Arrows, which disables structures, minions, and mercenaries, and allows you to do things like disable both turrets on a wall simultaneously, both Giants on a Siege Camp, etc. Black Arrows, which disables structures, minions, and mercenaries, and allows you to do things like disable both turrets on a wall simultaneously, both Giants on a Siege Camp, etc.
|
|

|
(W) Shadow Dagger
Cooldown: 10 seconds - Mana Cost: 75 | "Deals 14 (+7/level) damage, and an additional 54 (+14/level) damage over 2 seconds, to target unit. This effect spreads to nearby units."
This is what allows Sylvanas to be a bit more of a lane bully as a Specialist. The ability to push the wave and very possibly out-trade your laning opponent simultaneously - a trait only the good Specialists have (Sgt. Hammer, Zagara, Nazeebo).
Using it on your opposing laner while they are standing in their minion wave will not only do damage to them, it will disable and kill their enemy minions. In addition, the enemy minions dying will recharge your
Withering Fire charges, allowing you to do even more damage to your opponent. This gives Sylvanas some real laning power.
And like the previous ability, this affects Structures with your passive as well. Using it on a Turret will disable it and spread to the Gate and the opposite-side Turret on the wall, and anything in between.
|

|
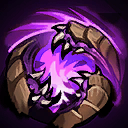
(E) Haunting Wave
Cooldown: 11 seconds, Mana Cost: 75 | "Send forth a wave of banshees dealing 41 Damage (+11/level) to all targets. Reactivate to teleport to the banshees' location."
Essentially, this is Lissandra's Claw, if you've ever played League of Legends. Works almost exactly the same, and has similar uses.
By similar uses, I mean once it scales up a little bit you can use it to more rapidly clear waves if you won't need it to teleport. For the most part in teamfights and such though, you won't care much about the damage it deals, mostly the utility of it being a teleport.
Also note that when you're in mid-transit after reactivating
Haunting Wave, you obtain the Unstoppable trait, meaning you are CC Immune. This is useful for shrugging off things like
 The Hunt or any other telegraphed CC. The Hunt or any other telegraphed CC. |
|
|
|
(Trait) Black Arrows
| "Basic Attacks and Abilities stun Minions, Mercenaries, and Structures for 1 second."
Unlike some Heroes who feel like they have their kit made and then someone comes up with a random passive, Sylvanas' kit compliments her passive quite well. Things I have mentioned before such as using W on one turret will stun both, using W on an enemy Hero in their creep wave will stun/DoT the entire wave, etc. all really give Sylvanas that Specialist power that makes her mesh.
Essential to her kit, you can use this quite creatively to optimize your push. For instance, using your Shadow Dagger (W) on an enemy Turret just as your enemies' creep wave is running through their gate, not only disabling the turrets but also significantly damaging the creep wave before it even meets yours. Or, using her Haunting Wave aggressively by throwing it through the enemies' gate as their creep wave is approaching, granting vision for a follow-up Shadow Dagger to take out a good chunk of the wave's HP. Not only that, but you're stunning the minions the entire time, which means your wave will meet them at their turrets rather than in the middle of the lane. |

|
(R1) Wailing Arrow |
|

|
(R2) Possession |
As usual, the Heroics I will break down in the Talents section.

I've put a lot of work into my build, and I think it is the best for all-around practical play. I will specify in the Map Guidelines section deviations from it, and in competitive it's possible that different talents may be picked up for very specific operations, but for general Assassalist Sylvanas action I believe my build to be the most effective.
 With the Wind
 -
"Increases Withering Fire range."
This is the damage choice in this tier. No, it doesn't do more damage, but it allows for efficient trading and safety in your lane. Your
Shadow Dagger is your primary waveclear along with AAs, and your Qs are used to prevent your opponent from clearing the wave (Zoning them).
As Sylvanas, you don't clear waves terribly quickly like other Specialists, so I find this a useful zoning tool. In addition, it later synergizes really well with
 Evasive Fire
 to catch up to or run away from other assassins.
 Click to See All Talents
|
|
 Lost Soul - "Reduces the cooldown of Shadow Dagger by 2 seconds." Lost Soul - "Reduces the cooldown of Shadow Dagger by 2 seconds."
A very low pick-rate talent. I'm not sure why. With only a 6% pick rate, nobody sees the potential in this talent. Since your Q is auto-targeted, you will often hit enemy Heroes, even if unintentionally in lane, making
 Barbed Shot significantly less attractive. Plus, you usually WANT to hit enemy Heroes for reasons I've already mentioned, making it even less attractive. Barbed Shot significantly less attractive. Plus, you usually WANT to hit enemy Heroes for reasons I've already mentioned, making it even less attractive.
And since
Shadow Dagger is your primary waveclear (While simultaneously hitting your lane opponent usually), this is kind of a two-in-one talent.
It also synergizes really well with
 Cold Embrace later into the game. Cold Embrace later into the game.
|
|
|
Barbed Shot - "Withering Fire deals 200% bonus damage to Minions and Mercenaries."
Covered this above, not really wurf giving up either of the other two options.
As a side-note, it does synergize decently with
 Splinter Shot later on, but
Splinter Shot is out-classed by Splinter Shot later on, but
Splinter Shot is out-classed by
 Unstable Poison anyway, and getting all 3 of these is overkill when you can just W a wave with Cold Embrace and Unstable Poison and blow it up instantly. Unstable Poison anyway, and getting all 3 of these is overkill when you can just W a wave with Cold Embrace and Unstable Poison and blow it up instantly.
|
|
|
 Corruption - "Basic Attacks against Structures destroy 2 Ammunition." Corruption - "Basic Attacks against Structures destroy 2 Ammunition."
Overkill, honestly. With Sylvanas' passive, assuming you're set up in a pushing lane (With something like a Zagara or Hammer), this is a surprisingly non-useful talent. It's really strong if you can only get a couple potshots in on a turret to drain all its ammo and then bail and not push the lane, but otherwise you destroy the turret with your passive and it never fires a shot anyway.
I've used it several times, sometimes to get potshots on turrets before my lane opponent even showed up to lane. After like...level 10 though I feel like it has 0 impact on my gameplay. | |
|
 Envenom
 -
"Activate to poison an enemy Hero, dealing 180 (+30 per level) damage over 5 seconds."
You know it, you love it, Envenom. I should think this is a pretty obvious and standard choice for an assassin/specialist hybrid, and I'd probably even take it on specialist builds but that's just me.
Click to See All Talents
|
|
 Paralysis - "Increases duration of Black Arrow by 100%." Paralysis - "Increases duration of Black Arrow by 100%."
I use to think this talent was really meh. That was before I tried it. I didn't see any use for it.
After using it, I think the talent has a lot of merit. It allows for soloing Bruisers without taking any damage easily, makes microing easier when diving Keeps (I sometimes miss an AA on the Keep and it shoots just 1 time before I can disable it again. Even that 1 Keep AA can kill a teammate due to the slow though, so it's nice).
When walking in and out of turret range to avoid enemy Hero harass, you won't take free turret shots (This is actually a big one IMO). This can allow for taking a turret on one side without needing a wave or keeping a turret disabled to drain the opposite turret's ammo even when an opponent is in lane who has kill pressure on you.
Also, synergizes nicely with
Unstable Poison since everything stays disabled for like, ever.
Essentially, it turns out to be a really massive QoL upgrade.
Envenom would still be my first choice, but I was pleasantly surprised when I took this talent how much effect I felt from it.
|
|
|
 Overflowing Quiver - "Whenever you would gain a Withering Fire charge from killing a Minion or Hero while at maximum charges, it is automatically fired." Overflowing Quiver - "Whenever you would gain a Withering Fire charge from killing a Minion or Hero while at maximum charges, it is automatically fired."
Yeah, no.
|
|
|
 Ranger's Ambush - "Using Haunting Wave to teleport refills all charges of Withering Fire." Ranger's Ambush - "Using Haunting Wave to teleport refills all charges of Withering Fire."
Has a couple uses. One would be in a duel scenario where you can use all your Qs before you go aggressive with your E - if you have to initiate with E then it'd be wasted since you wouldn't have used your Qs yet, so a bit situational there.
Another is W + Qx5 + Eing a creep wave, then continuing to spam Qs with your refreshed charges should quite quickly clear waves. This is probably the more common use for the talent, but even then you have to be defensively clearing waves or have vision of the enemy team, otherwise it's very risky to clear with E.
Either way, I don't like this talent as it incentivizes you to blow your escape for extra damage, when you could just take
Envenom and have similar damage (Granted on a longer CD) and can hang on to your potent escape tool. | |
|
 Shade Form
 -
"Haunting Wave grants Stealth for 3 seconds. Activating the teleport does not break the Stealth."
SUPER UNDERRATED TALENT.
You may think this is a useless talent, but it has saved my life multiple times and gives a lot of room to outplay in 1v1s, teamfights for baiting, and ganks.
Yes, Sylvanas has one of the longest range gap closers, but its travel time is very slow. The stealth will prevent opponents from AAing you as you escape, allowing clutch escapes where you would have otherwise died. It can even be used offensively to outplay opponents as it allows you to gap-close to them without them being able to attack you mid-transit or know exactly where you teleported to.
Ganks can be easily avoided by firing off your Banshees when someone shows up. If they have tools to easily reveal you (E.G.
 Psionic Storm
) it will still take them a second or two to do it, all the while your banshees are moving back toward your base. This prevents you from getting CC'd while your banshees are in transit, which really screws you over.
Not to mention it makes skill-shot CC very hard to land on you, and point-and-click CC (
 Polymorph
) impossible to use on you. Such CC is the biggest counter to
Haunting Wave, and this removes that counter.
In short, a really neat talent that adds good survivability and playmaking power, my favorite in the tier, on par with Unstable Poison.
Click to See All Talents
|
|
 Remorseless - "After using an ability, your next Basic Attack deals 25% additional damage." Remorseless - "After using an ability, your next Basic Attack deals 25% additional damage."
Remorseless gets an honorable mention here because it is very synergistic with
Withering Fire, giving your AAs very high additional damage uptime.
I don't care for it myself, since I use
With the Wind I often Q from a distance multiple times before utilizing
Evasive Fire to weave AAs in my orb-walk. This is much safer to me than Q + AA + Q + AA because you have to stay in range all the time.
Just not a safe pick IMO. |
|
|
 Mercenary Lord - "Siege and Bruiser Mercenaries near your hero deal 50% more damage." Mercenary Lord - "Siege and Bruiser Mercenaries near your hero deal 50% more damage."
Okay, yes, Sylvanas is a specialist...but not even Specialists take this talent anymore. Forces you to stick with your mercs, which can be a good idea, but you only get real value out of it until the first forts/walls are down. After that it becomes increasingly difficult to escort a merc camp all the way to a Keep wall, and it's a bit of a wasted choice. |
|
|
 Life Drain - "Shadow Dagger heals you for 10 (+3.5 per level) each time it spreads to a new enemy." Life Drain - "Shadow Dagger heals you for 10 (+3.5 per level) each time it spreads to a new enemy."
Not a very potent heal to be effective mid-combat, and the sustain you get from it, while nice, doesn't keep your mana pool up. You'll end up having to back for mana instead of mana and health, so it doesn't really make a huge difference.
I've seen the talent clutch out a fight or two by the skin of one's teeth, but that's not something you can depend on.
That said, it may be a decent pick vs hard lane match-ups where you will run out of HP before you go oom, like versus
 Zagara. Even still, you'd be picking it for the laning phase as it doesn't heal as much once you're away from creep waves. I'd rather pick talents that will be useful throughout the entirety of the game. Zagara. Even still, you'd be picking it for the laning phase as it doesn't heal as much once you're away from creep waves. I'd rather pick talents that will be useful throughout the entirety of the game. |
|
|
Unstable Poison - "Minions and Mercenaries that die under the effects of Black Arrows explode, dealing 75 (+9 per level) damage to nearby enemies."
Pretty neat talent, exceptional for clearing massive waves, or waves at all. I've also obliterated enemy Heroes that were dumb silly enough to stand inside a minion wave when all my Unstable Poisons went off simultaneously, taking the Hero with them.
Extraordinarily useful on Tomb of the Spider Queen in particular, where monster waves pack up easily because of the Webweavers' minion spawning capabilities (Basically you turn in Gems to summon 3 Azmodan Bots in your lanes).
But even on other maps it's a powerful wave clear tool and really good for Bruiser Camps.
| |
|
Wailing Arrow -
Cooldown: 90 seconds -
"Shoot an arrow that explodes for 200 (+20 per level) damage and silences enemies for 2.5 seconds. Can be reactivated to detonate the arrow early."
My go-to Heroic pick. Wailing Arrow has many cool features - it is a large AoE, so regardless of the damage it can silence multiple people easily, which is a really potent tool. It can be used in a 1v1 scenario if need be to completely shut down your opponent, snipe someone from a pretty great distance, and to top it all off, it has solid damage. Not a huge amount, but solid.
It has 1 weakness though. You have to press R a second time to detonate it, which means if you get CC'd in any way while it's in transit, you'll probably completely whiff and waste your Heroic. Just like your
Haunting Wave - so, make sure to not be in a bad position when you fire it off!
Possession -
Cooldown: 4 seconds -
"Force an enemy Minion to fight for you. It gains 20% Attack Damage and Health. Cooldown increased to 20 seconds when used on Catapults."
Interesting, to be sure. I have seen very little of this Heroic, and when I did, it really wasn't that effective. At the same time, they may have just not been using it properly. Seems standard if you were a full push-build Sylvanas I suppose, but it really isn't all that impactful and you give up one of the stronger teamfighting Heroics for it.
Evasive Fire -
"You gain 10% Movement Speed for 2 seconds whenever an enemy is hit with Withering Fire, stacking up to 30%."
After playing around with all these options, I've found Evasive Fire to be superior. It's essentially a Valla passive on steroids, and since you can fire off Qs while running away (Particularly with
With the Wind) it is quite useful. An in-combat 30% MS is also useful for chasing or even kiting, so all around it has good uses. Overwhelming Afflicition is kinda ok, but the slow isn't very strong and you can really only stack it effectively on a single target. Also, there are better Heroes for teamwide slows. Jaina can easily pop an instant Water Elemental to slow an entire team for 35% (Talented), Valla's Multi-Shot instantly slows an entire team for 40%, and so on. I just think it's a waste of potential for
Sylvanas to take this currently, but I'll continue to playtest it.
Cold Embrace -
"Shadow Dagger makes enemies Vulnerable, taking 25% more damage, but the range of Shadow Dagger is reduced by 25%."
A mind-blowingly good talent. I can't imagine anything else on this tier being worth it over this talent. Your W very quickly applies its DoT across an entire team, literally making the whole team take 25% more damage for a few seconds. Good synergy with
Lost Soul to keep the uptime high.
The range decrease also really isn't a problem. You'll quickly notice by playing Sylvanas that her W is significantly higher range than her Q or AAs, so -25% really just brings it in line with her abilities. At this point in the game you don't need to snipe turrets with your W to get cheeky shots in - it's all about that teamfight power. This talent brings it.
Also, just as a little note, it does make creeps Vulnerable as well, so it even increases your lane clearing power. Or Mercs, and increases your clear time. Pretty excellent talent all around.
Click to See All Talents
|
|
 Blood for Blood - "Activate to steal 15% of target enemy's Max Health and slow its Movement Speed by 30% for 3 seconds." Blood for Blood - "Activate to steal 15% of target enemy's Max Health and slow its Movement Speed by 30% for 3 seconds."
Generally speaking, BfB is always a good option on any Assassin and even on many Specialists. It's still good on Sylvanas, but is mostly for its burst, dueling power, and survivability. Of these, Cold Embrace brings its own burst and dueling power, but rather than survivability it brings team-wide utility. Team-wide utility I wouldn't say is weak either.
As such I'd take Cold Embrace in basically every circumstance.
|
|
|
 Windrunner - "After you teleport from Haunting Wave, you can cast a second one for free within 2 seconds." Windrunner - "After you teleport from Haunting Wave, you can cast a second one for free within 2 seconds."
An interesting talent for sure, I've used it several times and had fun with it. It really doesn't make you a godly mobile Hero though, because the Banshee's travel time is so slow. In most cases you'll find your 2nd charge being unnecessary or wasted, and if you're using it to go aggressive then back up, you run the risk of being CC'd after going aggressive and getting stuck there and dying. |
|
|
 Will of the Forsaken - "Activate to become Unstoppable and gain 30% Movement Speed for 3 seconds." Will of the Forsaken - "Activate to become Unstoppable and gain 30% Movement Speed for 3 seconds."
Another interesting talent. Could be hilarious if coupled with
Evasive Fire, but comes with a hefty 60 second cooldown and will more often than not just work as a self-cleanse.
Plus...I mean...
Cold Embrace
| |
|
 Bolt of the Storm
 -
Cooldown: 40 seconds -
"Activate to teleport to a nearby location."
Of course, the favorite for almost any Ranged Assassalist...er...Spassassin? Anyway, most Heroes. Even for Sylvanas with her powerful Banshee mobility finds this talent very useful as it is a risk-free escape. If you get caught out and a Warrior is on your face, chances are he's not going to just let you take that
Haunting Wave to safety - he's going to CC you for like...ya know, ever.
This is where bolt comes in - giving you that extra bit of safety for the lategame, where if you die, you may as well go make a cup of coffee.
Click to See All Talents
|
|
 Deafening Blast - "Enemies at the center of Wailing Arrow's explosion take 50% more damage and are silenced for twice as long." Deafening Blast - "Enemies at the center of Wailing Arrow's explosion take 50% more damage and are silenced for twice as long."
Not at all a bad option. If you feel you don't need your ezpz escape button in
Bolt of the Storm, you can take this.
Mostly I would consider this talent when you have a priority target that must be quickly burst down (E.G.
 Illidan), or have a good setup to allow you to easily hit multiple people with a ridiculously long silence (E.G. Illidan), or have a good setup to allow you to easily hit multiple people with a ridiculously long silence (E.G.
 Ring of Frost, Ring of Frost,
 Mosh Pit, Mosh Pit,
 Devouring Maw Devouring Maw
 Void Prison, etc.) Void Prison, etc.) |
|
|
 Dark Lady's Call - "Increases the Attack Damage and Health bonus to 30% and allows Possession of enemy Mercenaries with a 20 second cooldown." Dark Lady's Call - "Increases the Attack Damage and Health bonus to 30% and allows Possession of enemy Mercenaries with a 20 second cooldown."
This is where
Possession gets good. The unfortunate part is not only do you have to deal with not having
Wailing Arrow for 10 levels, but at the point of reaching level 20...does it even matter?
I mean how much can 1 Siege Giant be worth at level 20 when it almost certainly won't go far enough to even reach a Structure? It'd be interesting to see this work well but this talent just comes in as too little too late. |
|
|
 Fury of the Storm - "Every 5 seconds, your next basic attack will deal an additional 20 (+9 per level) damage to the target, and 20 (+24 per level) damage to all nearby Minions and Mercenaries." Fury of the Storm - "Every 5 seconds, your next basic attack will deal an additional 20 (+9 per level) damage to the target, and 20 (+24 per level) damage to all nearby Minions and Mercenaries."
Not bad, has a good bit of synergy with Sylvanas' kit actually. If you want a diehard Specialist talent, this is a lot better than the Dark Lady's Call. | |
|

Alright, let's start with the early laning phase. Most every map has at least 2:00 (Varies from map to map, Mines is 2:00 and Cursed Hollow is 2:40, for example) of pure laning time before any objectives spawn on the map (This includes Mercenary Camps which do not spawn till 2:00).
In this part of the game, any little bit of XP advantage you can get over the opposing team is very valuable, as it will mean you will win the race to 10 and will be able to force fights/objectives later on, or force your opponents to give up objectives.
For the most part, this means that early Turrets are very important. Successfully bullying your opponents out of lane for even a few moments gives
Sylvanas significant potential. Let me go over the different strategies I employ to try and get early walls down.
- Grab a couple friends and man-mode a turret down. This usually won't work unless you're in like a party of friends who you can communicate with, but it can be surprisingly effective if you can get away with it.
All you have to do here is use your W to disable the turret before you get in its range, have a few friends who can damage the turret safely (Particularly good Heroes for this are
 Tassadar
,
 Rehgar
, or any strong pusher such as
Zagara). But again for the most part you shouldn't be able to get away with this, so let's go on to more practical things.
- Intentionally only disable 1 turret.
The whole point here is to damage 1 turret without it ever firing a shot while the other turret's ammo is blown on 1 or 2 minion waves. Once your minion wave is almost out, you can use your
Shadow Dagger to clear the enemy creep wave as you damage the turret some more. Using Shadow Dagger too early will disable the second turret too, which for this particular strategy isn't the point. This way, you slowly down 1 turret and waste all its ammo since it doesn't fire, and you simultaneously drain the opposite turret of ammo.
You may ask, "what's the point of draining the ammo in the other turret? I can disable that one too and just take the wall." The point here really is to get the XP from the 1 turret before an objective spawns on the map. Once an objective does spawn on the map, you have to leave lane. If you leave a turret with full ammo when you leave lane, your wave won't push the wall by itself. If you kill 1 turret and drain the other, your lane will push the wall faster without you needing to be there.
- Wait until the enemy Minions appear at the gate before using your W on a turret.
I mentioned this briefly before, but just to reiterate, you don't want to waste your W mana/cooldown on just the turrets unless you have to. Optimally you'll want to hit both turrets and the entire enemy creep wave.
That about covers what I've found to be effective so far in the early laning phase, hopefully you learned something new! On to part 2: Mercenary Camps.
Taking Siege Camps - Damage Free!
As I said before your abilities proc your
Black Arrows, which allows you to easily take Siege Giants without taking any damage at all.
However, what Sylvanas saves in HP she pays for in clear time. You are relatively slow at taking camps for a Specialist, so factor that in when you're laning by yourself. If possible, try to get a teammate to cover your lane as you go take camps, otherwise you risk losing out on XP Soak for a full wave or so.
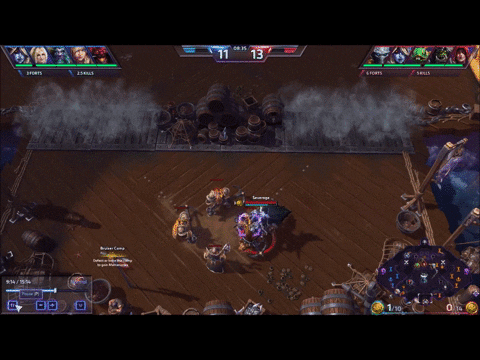
As for the how-to, you want to position yourself close to 1 Siege Giant. Once you get close enough for your little Purple Targeting System to appear on his head, that means he's the automatic target for your
Withering Fire. Simply Q him once every second while Auto-Attacking the opposite Siege Giant to keep them both disabled the entire time. Once you use 2
Withering Fire charges, use your
Shadow Dagger. This will give your Q time to recharge as your W will keep them both disabled for a few seconds.
Continue using your W on cooldown to allow your Q charges time to refresh, and you're golden in no time! Here's a gif example:
You do a similar thing with a Bruiser Camp, but you'll first need to kill the squishy Mage Bruiser. Once he's down it's a simple task of keeping your Q on 1 target and AAing the other 2 interchangeably so neither one is able to attack. W on CD for additional damage.

Essentially the 'teamfight phase' of the game. Since I play Sylvanas as more of an Assassin, I'm in teamfights rather than split-pushing a side lane when one is going on. Not saying that's strictly a bad strategy, but as I mentioned before this is more of an Assassin's Guide to Sylvanas.
So in teamfights, you are mostly worried about your positioning. You aren't a long range sniper or anything, and have no tools to jump into the backline, so you more or less hit any target that comes your way that you can safely reach.
Using your
Shadow Dagger on Warriors is fine, particularly after
Cold Embrace - not only will it spread to backline Heroes that may assist your diving Heroes, but you will surprise Warriors when their Health bar starts to vanish. Essentially you'll want to spam
Shadow Dagger on cooldown unless you're with a party or something and you want a crazy combo like
 Tyrande
's
 Hunter's Mark
 +
Cold Embrace +
 Nova
Nova combo.
Your
Withering Fire has no mana cost and is being wasted if you leave it at 5 stacks. Even if you're only in range of a Warrior, fire a couple shots to keep it from capping out. This will maximize your damage output that is otherwise just being wasted. I advise against unloading the entire 5 stacks though unless you can either get on a priority target
or the aforementioned Warrior is close to death.
As for
Haunting Wave, I nearly always use this defensively. I don't think using it offensively is a good idea personally, unless you're just steamrolling a fight and there's no hope of them turning it on you. To use your E you need to be in a position where you will not be CC'd, otherwise you will not be able reactivate it to save your life. So, when using it defensively, use it when a threatening Hero is approaching you rather than by the time they're on top of you.
Finally,
Wailing Arrow. This is a super fun ability to use in so many situations. It is a very deadly 1v1 tool, it shuts down specific Heroes who are particularly vulnerable to silence (E.G.
Illidan,
Rehgar), can be used to snipe people (Though this isn't typically worth it unless you're at the later parts of the game), and of course it functions as a good wombo combo finisher.
In 1v1s, be careful of any Hero with CC. Wait for them to use it if possible or position yourself in such a way they cannot hit you with their particular CC. The worst feeling in the world is when you pop your R only to see it fly across the map while you're CC'd and you can't reactivate it.
To elaborate on my point about sniping people, your R is a fairly long cooldown (90 seconds), and it typically isn't worth hitting a single target to finish a kill in the early game, where your opponents are on fairly short cooldowns (10-20 seconds).
Come lategame however I think there are definitely times where sniping targets is useful. When your enemies get put on 62 second death timers, securing a single kill makes it a 4v5 for a full minute, and your opponents will typically have to give up and objectives you can get your hands on during that time. Just be sure not to snipe someone like
 Diablo
 when his passive is up!
Lastly it functions as a wombo combo tool. While
Wailing Arrow can, to some extent, be used to start wombo combos (Your opponents can't use any escapes while silenced), it's not like it stuns the targets. I prefer to use it to finish someone's else's combo, like after a several-man
Void Prison,
Devouring Maw, etc. If you don't have anyone to combo it with, feel free to take your shot early on in a teamfight whenever you see the opportunity (Clumped up Heroes). Silencing several people, regardless of your damage, is a powerful tool. Couple that with
Cold Embrace on the whole enemy team and you're setting yourself up for victory.


On this map I take the normal Assassin build. I don't feel the need to switch anything up here, as ideally you will want to be pushing with your Golem pretty much every time to take advantage of Sylvanas' power unless of course there's a huge power discrepancy (70 to 30 golem in your opponent's favor or greater, for instance), so you won't need any more potent waveclear talents or anything.
Barbed Shot can be pretty decent for knocking down Golems or taking your Siege Camp faster, but you really don't want to be defending on Mines as
Sylvanas when you have the best push assistance for your golem in the game.
Sylvanas is a great pick on Haunted Mines in general, because of her ability to disable Forts and snowball the game. No matter who plays on this map, it is considered one of the most snowbally maps, and Sylvanas helps that a lot by keeping your Golem alive by disabling structures.
In the current Meta of a 4 - 1 split on this map with both teams racing for early turret kills, Sylvanas shines by not only having solid waveclear but disabling Turrets for her team to straight-up push down without needing to wait for their minion wave. This also allows your Minion Wave to last longer, so they can do more damage to said turrets. You will want to be in the offensive lane,
the lane where your Golem will push, 10/10 times with Sylvanas. She is okay-ish at defending but unless your team really has nobody who defends well, she'll do a lot more pushing than defending.
As I said before you will almost always want to push with your Golem after the 100 skulls are capped. After whatever happens in the Mines happens, you'll want to go solo your Siege Camp. But of course as always, don't capture the Siege Camp until the enemy Golem is about halfway through the lane. This will allow your Siege Giants to kill the enemy Golem safely from behind your Fort Wall. Then join your team in the push or in defense, whichever you have to do.
The game is pretty straightforward from thereon, rinse and repeat until someone wins.

For Cursed Hallow, I take my standard "Le Assassin" build. I don't feel like I ever need excellent waveclear or minion-slaying talents here, as the game is mostly about the teamfights after 2:40.
This map has a lot of Mercenary camps and frequent Tribute spawns. For the first 2:40, you will most likely be in a lane that you will want to push into the enemy's turrets to gain an advantage, if possible. You will continue to soak/push lanes after the first, second, third, and however many Tributes.
I cannot recommend to do Mercenary Camps unless you specialize in Minion-Slaying Talents, as your cleartime will be too long and Tributes will spawn while you're trying to work the camps. It will also mean more time away from lane, when another Hero could do your job better who isn't good in lane (E.G. [[Illidan]).
Even with "Specialist" talents I recommend you take to a lane and try to get early Turrets for XP and to set up easy Fort kills during Curses. I think you will gain more of an advantage this way rather than taking Mercenaries anyway. Typically I run to a side-lane on this map, most often the Bottom Lane. In the side-lanes you'll probably have a partner which allows them to take advantage of your turret-disabling abilities more easily, rather than in Mid, often the solo lane, where you'll be the only one hitting turrets.
Regardless Sylvanas can pretty much go anywhere on this map, my personal preference is just a side-lane. It doesn't
really matter that much. Now, the Curse essentially is your passive on all structures, which makes your passive less-than-useful during hard pushes where your Curse is up. This makes you a bit of a mediocre team-pusher on this map, so there isn't much to say from here on out. You basically play the map as if you were Valla.

Ah, Dragon Shire. Not a bad map for Sylvanas at all. I don't take any specific build on this map, just the normal Assassin one is fine. There are a lot of skirmishes and tussles on this map betwixt Heroes which makes the Specialist talents less appealing to me.
I prefer to go to the Bottom Lane on this map as well, because that's where all the Mercenary Camps are. If you get a breather in between Dragon Knights, you'll want to take some of those. Pretty much though, you're going to be down there poking at Heroes and trying to take the Shrine.
Ordinarily on this map, I don't push with the 1st Dragon Knight if my team gets it. When the enemy 5-man defends, I just push the lane I'm in and take some turrets there. The 1st Dragon Knight on the map is fairly weak, and if it's successful it only gets down Mid Fort Wall really. No biggie.
Later into the game though, you push with your Dragon Knight like a BOSS. Normally the Dragon Knight has to tank the Forts, which really slows down its damage output. No longer! You can disable that Fort right up and your DK can go to town with full Attack Speed to quickly nail it down. This will be extremely useful in the lategame when your minion waves are pushed but you're trying to push an enemy Keep with a DK.
Since you have so much power with the DK while pushing, it's recommended you do not take the DK unless you absolutely have to. Preferably, your Warrior (If applicable) will take it, and if not, the next-best thing, a Melee Assassin. And if not that, a Ranged Assassin. This should optimize your pushing power. Only in desperate cases should your Support or Specialist(s) ever take the DK.
That's pretty much it, this map rotates a lot with Shrine control but pushing outside the DK only happens early for the most part. If you can't get much done early don't worry about it, take the lategame with a strong DK and disable the Forts/Keeps to make it live longer and do lots more damage.

Blackheart's Bay, or as I like to call it, Booty Buttcheek's Bay! This map is all about the PvE. Once you get an advantage, you can really avoid most teamfights except the tide-turning ones at the Turn-In or potentially at the Boss Camp.
Once again on this map, I love going Bottom Lane. The typical split is 4 top (Between Top and Mid lanes) and 1 Bottom, and personally I love solo lanes. Anyway,
Sylvanas out-pushes a lot of Heroes so you should be fine for soloing a lane unless they have something like
Zagara. If your opponent has Zagara on their team, consider asking the BEST Solo-Laner on your team to take Bottom Lane because 90% chance says they send Zagara bottom. They will still lose lane because Zagara beats everyone, but laners like
 Tychus
, even Multi-Shot
 Valla
Valla,
Tassadar or
 Chen
Chen are also excellent solo laners and will at least prevent your structures from being taken down.
Now that's out of the way, take note that your
Withering Fire hits Treasure Chests! Not only do you have a fast Attack Speed for taking them out, once you get them to about 50% HP you can hold down that Q button and rifle off those shots to almost instantly finish the Chest off. This is totes convenient and can help you steal coins from your opposing solo laner quickly, or take the Chest while your opponent is clearing the wave and doesn't expect you to take it so fast.
After this, check and see if your team comp has anyone who can solo camps well.
Illidan, most any Specialist,
 Kerrigan
, et cetera. If you do, ask them to kindly (If they haven't been) take some camps, particularly your bottom Siege Camps, as they will help your push monumentally.
If you do not have anyone who can take camps well, ask someone to kindly cover your lane and soak XP (Be polite!) while you solo your Sieges. As your Sieges walk to lane, ask your teammate to assist you with the Bruiser Camp. Yes, you can solo it, but doing so will take a while and your opposing laner will have time to kill your Siege Giants. Getting your buddy to take it with you will get the Bruisers and Sieges on the enemy Fort Wall simultaneously and apply a ton of pressure, which will almost certainly pull more members of the enemy team down.
After all this happens you'll be more of the "5-man" stage of the game, where your team roams around the Turn-In trying to get the ol' Pirate to fire cannons on your opponents, triggering teamfights, and/or going for the Boss Camp. At that point you basically follow your team around and take Mercenary Camps whenever you have breathing space.

Ah, terror! Another map I don't take any real special build, although since there is a decent amount of PvEing here between the little Plant Camps and the Shambler,
Barbed Shot is not a bad choice just to amp up your DPS on them. I also don't know if Barbed Shot works on the enemy Garden Terror's W (The Pot that disables forts), if it does, it's definitely a value talent. Haven't tested it and actually paid attention though.
I honestly don't have much to say here besides that. You don't push amazingly with your Allied Terror as it will move faster than you and disables structures on its own (And typically you don't hard-push with the Terror, but drop a plant and sprint away or something) or have any real special things you can do. I play this map pretty standard, I haven't found any dirty little secrets to make my game optimized for
Sylvanas, I just go with the flow like I'm on an assassin, except I push lanes more often.

Welcome to the Temple in the Sky! Here again,
Barbed Shot is a decent option if you like taking that talent, it'll increase your DPS to the Temple mobs. I don't find it particularly great though, since you can't solo-control the Temples anyway without losing a huge amount of your HP, so it's often too risky to do. But it is another reason to take it, if you prefer it anyway.
Also here again, I find myself gravitating to the Bottom Lane. You won't really be able to push turrets before needing to rotate to Mid Lane because the Mid Temple will start spawning as early as 1:30, but you can crash a wave into them. Optimally you'll want to have a decent-sized wave stacked up on the enemy Turrets when you rotate up - this will force your opponent to clear this wave before they go up (Making it a 4v5 for the Temple for a few moments) or lose XP soak to rotate.
On this map, you'll want to keep an eye on the Game Timer. What you'll want to do is see what the current Game Time is when the Temples' ammo is consumed (Whichever temple's ammo was consumed last). 2 Minutes from that time is when the next Temple will spawn, which will be only 1 Temple, Bottom Lane.
What does that mean? It means about 1 minute and 30 seconds after the Temples are used, you will want to take your top Bruiser Camp and then rotate down to the bottom side of the map. This will let your camp push top lane unopposed as both teams duke it out 5v5 on the opposite side of the map.
Example: Mid Temple starts spawning at 1:30. After a lot of fighting, say both Temples are completely used up by the 4 Minute Mark. This means at about 5:30 you will want to be at your Bruiser Camp taking it. Once you clear the camp, wait until you see in the bottom-right corner that the next Temple is spawning before you cap it. Since your clear time is pretty slow, you shouldn't have to worry about waiting to cap it as it should take you long enough such that you will want to cap it and rotate ASAP.
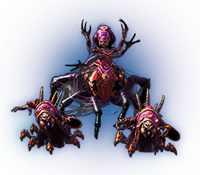
Tomb of the Spider Queen
This is the map that you really have to take at least 1 Specialist-y talent. Here, you may take any or all of these 3 Talents:
Barbed Shot,
Unstable Poison, and
Splinter Shot.
If you don't like
Barbed Shot,
With the Wind is a good pick-up if you're going to take
Splinter Shot +
Unstable Poison, as this will let you get your Q charges off more safely instead of having to walk up so close.
If you want to stick to the Assassin build as much as possible, you can get away with only taking
Unstable Poison as it is the strongest out of all of these for defending Webweaver pushes. If you're comfortable with a more Specialist-y build anyways, you have godly clear with all 3.
Personally I have gotten most comfortable with just taking
Unstable Poison +
Cold Embrace. These two are good enough for me to clear well while still being pretty strong in teamfights, other than that I stick to my Assassin build. Even still you don't get this till later in the game, and you may benefit more from more waveclear talents.
All that said, the meta is a bit unclear on this map as of yet, since it is a new one. Quick Match games seem to have defaulted to a 2-1-2 split, and as always I like to be in the bottom lane. It's a safe lane and it has Merc Camps. Also, good news! Since you will have a lane partner, you can go pick up that bottom Siege Camp whenever you feel like you have the opportunity as your teammate stays in lane to soak/get gems.
As far as the meta has developed, the overriding theme seems to be summon Webweavers, then push 1 lane as 5 to take the Fort. The enemy team has to defend their other 2 lanes so shouldn't be able to contest very well. Next time you summon Webweavers, get the next outer fort, and so on, till all outer forts are gone. Typically this is followed-up by taking a Boss Camp when you have more control over the map and then you take Webweavers again. At this point, the game is usually decided as a Boss and Webweavers flood in the enemy base, and they are unable to defend from all sides.
This seems to be how the game goes every time, and it's almost always in favor of the first team to down the 3 Outer Forts. In this way the map is strangely snowbally, because it's not like "Whoever gets Webweavers first wins", it's like "Whoever gets Webweavers 3 times first wins". At least, that's how my games have gone so far.
With your uniquely selected Talents for this map however, you can wipe out Webweaver pushes very fast. In some cases this can prevent any Forts from going down from the first Webweaver spawn, effectively delaying the "Match Point" of losing map control and Boss Camp and giving your team a better fighting chance. I have found
Sylvanas to be very effective in this manner, and usually am quite capable of preventing pushes and pushing with my own Webweavers very effectively. I would not be surprised if Sylvanas, once competitive play allows for her and the new map to be selected, is a high priority on this map.
That's all! Phew! That was a lot. I hope you learned something and that I improved your knowledge of the game! See you in the Nexus!

|
|
 |
One Word: Hydralisks. |
|
| [if=Zagara will out-lane you pretty handily early on. You can keep waves semi-pushed by spamming
Shadow Dagger, but you can't do much in the way of trading because of her
 Hunter Killer. By itself that thing can do half your HP, and if you try to kill it no doubt Zagara will use her increased MS from Hunter Killer. By itself that thing can do half your HP, and if you try to kill it no doubt Zagara will use her increased MS from
 Creep Tumor to run up and start AAing you, making you lose the trade even harder. In short it is impossible to trade 1v1 with Zagara early and you will be bullied. Try not to waste Sylvanas' early game push potential by putting yourself in a lane with Zagara. If you do get stuck vs her in lane, other options become viable such as
Lost Soul and
Life Drain that I normally wouldn't take. Take note that taking talents for the lane may not be the best talents for the later teamfights or the map in general, so I'd suggest suffer through the lane and be more effective than her later.]Zagara will out-lane you pretty handily early on. You can keep waves semi-pushed by spamming
Shadow Dagger, but you can't do much in the way of trading because of her
Hunter Killer. By itself that thing can do half your HP, and if you try to kill it no doubt Zagara will use her increased MS from
Creep Tumor to run up and start AAing you, making you lose the trade even harder. In short it is impossible to trade 1v1 with Zagara early and you will be bullied. Try not to waste Sylvanas' early game push potential by putting yourself in a lane with Zagara. If you do get stuck vs her in lane, other options become viable such as
Lost Soul and
Life Drain that I normally wouldn't take. Take note that taking talents for the lane may not be the best talents for the later teamfights or the map in general, so I'd suggest suffer through the lane and be more effective than her later.[/if] Creep Tumor to run up and start AAing you, making you lose the trade even harder. In short it is impossible to trade 1v1 with Zagara early and you will be bullied. Try not to waste Sylvanas' early game push potential by putting yourself in a lane with Zagara. If you do get stuck vs her in lane, other options become viable such as
Lost Soul and
Life Drain that I normally wouldn't take. Take note that taking talents for the lane may not be the best talents for the later teamfights or the map in general, so I'd suggest suffer through the lane and be more effective than her later.]Zagara will out-lane you pretty handily early on. You can keep waves semi-pushed by spamming
Shadow Dagger, but you can't do much in the way of trading because of her
Hunter Killer. By itself that thing can do half your HP, and if you try to kill it no doubt Zagara will use her increased MS from
Creep Tumor to run up and start AAing you, making you lose the trade even harder. In short it is impossible to trade 1v1 with Zagara early and you will be bullied. Try not to waste Sylvanas' early game push potential by putting yourself in a lane with Zagara. If you do get stuck vs her in lane, other options become viable such as
Lost Soul and
Life Drain that I normally wouldn't take. Take note that taking talents for the lane may not be the best talents for the later teamfights or the map in general, so I'd suggest suffer through the lane and be more effective than her later.[/if] |

|
|
|
DAT BUFF. |
|
| [if=Jaina got some steroids this patch and became much more powerful. Any time she would just have not enough burst to 1v1 a target before, she'll obliterate them now. She out-bursts you in short exchanges very heavily, and can follow-up with more Frost Bolts to continue to out-dps you while you're Chilled. She also clears waves at least as fast as you do, but she will run oom faster than you over time in a laning phase scenario. She also cannot push structures hard without consuming a lot of her mana, so you will be able to hold out. The real trouble comes in with the later teamfights when she 3-shots 3 people on your team simultaneously with deadly AoE. She is, however, not very mobile unless she took
 Sprint, so if she ever clumps up with her team she's a high priority target to hit with
Wailing Arrow. A lot of Jainas will try to flank however, so be careful for that.]Jaina got some steroids this patch and became much more powerful. Any time she would just have not enough burst to 1v1 a target before, she'll obliterate them now. She out-bursts you in short exchanges very heavily, and can follow-up with more Frost Bolts to continue to out-dps you while you're Chilled. She also clears waves at least as fast as you do, but she will run oom faster than you over time in a laning phase scenario. She also cannot push structures hard without consuming a lot of her mana, so you will be able to hold out. The real trouble comes in with the later teamfights when she 3-shots 3 people on your team simultaneously with deadly AoE. She is, however, not very mobile unless she took
Sprint, so if she ever clumps up with her team she's a high priority target to hit with
Wailing Arrow. A lot of Jainas will try to flank however, so be careful for that.[/if] Sprint, so if she ever clumps up with her team she's a high priority target to hit with
Wailing Arrow. A lot of Jainas will try to flank however, so be careful for that.]Jaina got some steroids this patch and became much more powerful. Any time she would just have not enough burst to 1v1 a target before, she'll obliterate them now. She out-bursts you in short exchanges very heavily, and can follow-up with more Frost Bolts to continue to out-dps you while you're Chilled. She also clears waves at least as fast as you do, but she will run oom faster than you over time in a laning phase scenario. She also cannot push structures hard without consuming a lot of her mana, so you will be able to hold out. The real trouble comes in with the later teamfights when she 3-shots 3 people on your team simultaneously with deadly AoE. She is, however, not very mobile unless she took
Sprint, so if she ever clumps up with her team she's a high priority target to hit with
Wailing Arrow. A lot of Jainas will try to flank however, so be careful for that.[/if] |

|
 |
Dat range. |
|
| [if=Used to be a high threat before her nerfs, but the HP nerf hit her pretty hard. Still not easy for Sylv to deal with on her own, but in teamfights you just smack her with a
Wailing Arrow so she can't Z away and your team follows-up for the easy kill.]Used to be a high threat before her nerfs, but the HP nerf hit her pretty hard. Still not easy for Sylv to deal with on her own, but in teamfights you just smack her with a
Wailing Arrow so she can't Z away and your team follows-up for the easy kill.[/if] |

|
|
|
Zone yourself, zone the enemy. |
|
| [if=Muradin is listed here as a fairly difficult matchup because of how easily he can get on you and CC you. With
 Avatar's mini-stuns and Stormbolt (And later in the game, Avatar's mini-stuns and Stormbolt (And later in the game,
 Rewind), he is a threat to any squishy, but particularly
Sylvanas. Your
Haunting Wave can very easily be interrupted by an Avatar AA or Stormbolt right when you press the key again, resulting in you losing your escape pretty easily and getting screwed over. Take care when playing versus Muradin, and use your escape wisely. *cough*
Shade Form*cough*]Muradin is listed here as a fairly difficult matchup because of how easily he can get on you and CC you. With
Avatar's mini-stuns and Stormbolt (And later in the game,
Rewind), he is a threat to any squishy, but particularly
Sylvanas. Your
Haunting Wave can very easily be interrupted by an Avatar AA or Stormbolt right when you press the key again, resulting in you losing your escape pretty easily and getting screwed over. Take care when playing versus Muradin, and use your escape wisely. *cough*
Shade Form*cough*[/if] Rewind), he is a threat to any squishy, but particularly
Sylvanas. Your
Haunting Wave can very easily be interrupted by an Avatar AA or Stormbolt right when you press the key again, resulting in you losing your escape pretty easily and getting screwed over. Take care when playing versus Muradin, and use your escape wisely. *cough*
Shade Form*cough*]Muradin is listed here as a fairly difficult matchup because of how easily he can get on you and CC you. With
Avatar's mini-stuns and Stormbolt (And later in the game,
Rewind), he is a threat to any squishy, but particularly
Sylvanas. Your
Haunting Wave can very easily be interrupted by an Avatar AA or Stormbolt right when you press the key again, resulting in you losing your escape pretty easily and getting screwed over. Take care when playing versus Muradin, and use your escape wisely. *cough*
Shade Form*cough*[/if] |

|
|
|
The one who needs no jury. |
|
| [if=Tyrael is a difficult matchup if he decides to focus you. Ordinarily he's no real threat, he doesn't Q over to you and start AAing you, but if he dives you with
 Judgment, you're pretty screwed. This ult is one of the most powerful Heroics in the game for locking down
Sylvanas. Not only is it unavoidable point-and-click CC, there is absolutely nothing you can do about it pre-20 when you can get
Bolt of the Storm. If you try to use
Haunting Wave when you see him coming, it will expire and you will have no escape. If you wait till after he hits you with Judgement to use your E, you're most likely going to be dead before you can get out with it, assuming he has any follow-up whatsoever. When facing
Tyrael, I highly recommend
Bolt of the Storm at 20, but other than that there is little you can do about him. Some things you can try to do are make sure to use your
Wailing Arrow early in a teamfight before he ults you just so you get it off before you die, never position yourself forward so he has to dive into your entire team to get to you, and use
Shade Form the moment Judgement's CC runs out to try and get enough of a reprieve to hop over a wall or something.]Tyrael is a difficult matchup if he decides to focus you. Ordinarily he's no real threat, he doesn't Q over to you and start AAing you, but if he dives you with
Judgment, you're pretty screwed. This ult is one of the most powerful Heroics in the game for locking down
Sylvanas. Not only is it unavoidable point-and-click CC, there is absolutely nothing you can do about it pre-20 when you can get
Bolt of the Storm. If you try to use
Haunting Wave when you see him coming, it will expire and you will have no escape. If you wait till after he hits you with Judgement to use your E, you're most likely going to be dead before you can get out with it, assuming he has any follow-up whatsoever. When facing
Tyrael, I highly recommend
Bolt of the Storm at 20, but other than that there is little you can do about him. Some things you can try to do are make sure to use your
Wailing Arrow early in a teamfight before he ults you just so you get it off before you die, never position yourself forward so he has to dive into your entire team to get to you, and use
Shade Form the moment Judgement's CC runs out to try and get enough of a reprieve to hop over a wall or something.[/if] Judgment, you're pretty screwed. This ult is one of the most powerful Heroics in the game for locking down
Sylvanas. Not only is it unavoidable point-and-click CC, there is absolutely nothing you can do about it pre-20 when you can get
Bolt of the Storm. If you try to use
Haunting Wave when you see him coming, it will expire and you will have no escape. If you wait till after he hits you with Judgement to use your E, you're most likely going to be dead before you can get out with it, assuming he has any follow-up whatsoever. When facing
Tyrael, I highly recommend
Bolt of the Storm at 20, but other than that there is little you can do about him. Some things you can try to do are make sure to use your
Wailing Arrow early in a teamfight before he ults you just so you get it off before you die, never position yourself forward so he has to dive into your entire team to get to you, and use
Shade Form the moment Judgement's CC runs out to try and get enough of a reprieve to hop over a wall or something.]Tyrael is a difficult matchup if he decides to focus you. Ordinarily he's no real threat, he doesn't Q over to you and start AAing you, but if he dives you with
Judgment, you're pretty screwed. This ult is one of the most powerful Heroics in the game for locking down
Sylvanas. Not only is it unavoidable point-and-click CC, there is absolutely nothing you can do about it pre-20 when you can get
Bolt of the Storm. If you try to use
Haunting Wave when you see him coming, it will expire and you will have no escape. If you wait till after he hits you with Judgement to use your E, you're most likely going to be dead before you can get out with it, assuming he has any follow-up whatsoever. When facing
Tyrael, I highly recommend
Bolt of the Storm at 20, but other than that there is little you can do about him. Some things you can try to do are make sure to use your
Wailing Arrow early in a teamfight before he ults you just so you get it off before you die, never position yourself forward so he has to dive into your entire team to get to you, and use
Shade Form the moment Judgement's CC runs out to try and get enough of a reprieve to hop over a wall or something.[/if] |
Changelog -
3/24/15 - Original Publish of Guide - currently only the Talents Section is completed. More to come soon!
3/25/15 - Wrote up most of the Early/Late game stuffs. Hopefully there's all the information you need in there!
3/26/15 - Got some Matchups in there, will add more as I play more games.
3/27/15 - Did some touch-ups and added
Tyrael to the difficult matchups list. Map-specific strategies/builds coming soon, along with a .gif of how to take a Bruiser Camp without taking damage, similar to how I have a Siege Camp .gif.
3/29/15 - As promised! Map-By-Map guide section complete, WOOPIE! I still have to get the Bruiser Camp .gif. I'm so lazy D:
5/6/15 - After I lost my PC and took a month to get it working again, I totally forgot about the .gif! Sorry everyone. The gif for the Bruiser Camp is now up there, and I updated a few parts of the guide.
5/12/15 - No changes in the Kael'Thas patch. The
 Follow Through
 buff didn't effect Sylvanas as her talent is now called
Remorseless, so nothing happened here either.
6/15/15 - Updated to the most recent meta changes and my personal findings.
6/24/15 - PTR Update:
Wailing Arrow and
Unstable Poison nerfs, but probably not enough to warrant build changes. Unstable Poison is still the best (Competing with
Shade Form), and it's not known whether
Possession is worth taking just yet - but I kind of doubt it.


 Offline


Quick Comment (27) View Comments
You need to log in before commenting.