Introduction Top
So you wanna be the
best eh? You wanna learn how to be the
lord of the push? Well let me tell you something, becoming
Azmodunks lord of the Push is as easy as following this guide. After watching so many Azmoderps running the same build and failing over and over again I've decided to let my build loose into the world. Now this may help some of you Azmoderps grow into full blown Azmodunks, but I'm willing to let all those free kills go just so I can stop seeing my favorite champ taking it like a cheap hooker when all the sailors come to port.
Wanna know more about me? Who cares! The only thing you need to know is that my Azmodunks W/L ratio is absurd and I'm basically handing you free wins. So let's do this.
Talent Choices Top
I know, I know. This build looks ****ing stupid, and I know you're going, "This scrub didn't even take
 Sieging Wrath
, the hell is he doing?" So here's the thing you need to come to terms with,
 Sieging Wrath
 is bad. Yes the damage is good and yes coupled with
 Black Pool
 you become the MLB champion of the world, but it is not worth it. Having to wait twenty seconds between shots or cleaning up enemies at low health is just not worth it. You're either going to overkill the enemy, or you're just going to contribute slightly more damage then your lazor.
This is where trust comes into play, trust me to lead you the promised land of frustrated enemies and destroyed forts. It's glorious and we have free cake.
 Bribe
Bribe is completely underused in my opinion. The ability to just straight up steal you're enemies siege camp is amazing, not to mention a great distraction. You're goal is to get to two stacks then push the enemy to their gate. As they are pushing out, run over and steal the camp. It's really that easy, you can even grab the camp as you run to an objective or as you head back into lane. Now the enemy has to kill the siege giants before they can deal with you and that means more siege damage for you.
The only hard part is watching where the enemies in your lane are, if one is missing they could be trying to get the camp themselves. If they are, don't contest it, it's a waste of your time without backup. Remember, you're goal is siege damage, not hero damage. That comes later. Always be looking for opportunities to snag the siege camp, and don't be afraid to go in with only one stack if you see the enemy pushing hard for an objective. Another thing to note about this talent is to watch what talents your enemy take, some others do take
 Bribe
Bribe as well and you might be able to get a free kill as they go in alone to steal your camp. Remember to get backup though, you need to be in and out quick. This also means you might only be using your two stacks to get your own camp if they keep buying their own, but that is ok. It still saves you time and keeps you in lane longer.
Ok, phew. Let's take a breather, that was a lot of text and a lot of explaining to do.
Ready?
 Burn the Weak
 is an obvious choice, lazoring down towers and forts faster is always a good thing, and it lets you solo bosses once you get to level thirteen.
 Infernal Globe
 may seem a little wonky with my exclusion of
 Sieging Wrath
 but it's really the best of the bunch. Though
 Master of Destruction
 may seem like the obvious choice, I've found that things don't tend to stay alive long enough for the mana to matter.
 Infernal Globe
 Let's you get aoe damage out to the minion wave quicker and can help deny objectives. Don't forget that Azmodunks is going to be your new name, you can easily snipe low health enemies with this ability. Also forcing a low health enemy to go back to base is just like killing them for your purposes. They don't get lane XP and you can push easier? Win win.
 Demonic Invasion
 really solidifies the build. Insta popping a minion wave with this baby followed by your General of Hell can push a lane really far back on it's own. Hell, dropping this thing on an enemy fort followed by the General and your lazor will pop it real quick.
 March of Sin
 helps you avoid stuff the bosses drop and chases enemies. What's not to like?
Now these last two talents are going to seem weird but remember,
trust me.
 Blood for Blood
 and
 Bolt of the Storm
 are talents I take purely for the late game. By now the enemy has no forts left or they have very little and are dedicating multiple people to stop you. You need the ability to heal up a little bit and to get the **** out once you got it. Because the enemy most likely has no forts left, all you can do is help in team fights. When the enemy tries to focus you for an easy kill, get some health, get into the back line and starting lazoring some peeps down. Don't forget to throw the ball at fleeing enemies, you might even snipe a kill or two.
Becoming Azmodunks, Lord of the Push Top
Always,
ALWAYS! Take the lane with siege mercs in it. That's just a given. When you're in lane, focus on attacking enemy minions. Your General of Hell and
 Summon Demon Warrior
 will naturally push the enemy back faster then they can repel it without spending huge lumps of mana. The only time you want to harass the enemy is when a melee one tries to play and hit your minions. Remember to hit the minion wave with Globe on Annihilation to thin it out a bit and help your minions push. Grab the enemy siege camp, or the neutral one near you depending on the map, when you get two stacks of
 Bribe
Bribe and always be pushing.
This is the tricky part, on some maps you must simply
ignore the objective. Each map is different so be prepared to adjust.
For
 Blackheart's Bay
, it is super easy for you to grab a chest with your lazor and you get coins naturally from
 Bribe
Bribe. Keep the bottom two siege camps clear and the doubloon camps clear and you'll have your team rolling in cannon balls. Don't forgot to grab the boss one you hit thirteen and can avoid the boss puddles.
For
 Cursed Hollow
 you will simply ignore the objective unless it is right next to you. You could try to waddle your fat *** across the map if you want a good laugh, but really you should keep pushing. The enemy will either keep someone down there to deal with you, which wont help them, or they will give you free reign over the fort. If the tribute spawns next to you, you really don't have an excuse to not help though. It's not that bad, I promise. Just keep the lane pushed with the General while you lazor down peeps getting to close to you. Hell, if you're feeling generous throw the General in to another lane to help push it out.
For
 Dragon Shire
 it's another case of you not having an excuse. You'll have the lane super pushed out anyways so you might as well grab the shrine. Try to keep it contested for as long as possible but don't die for it. Sitting on the circle and lazoring someone is a great way to hold onto that shrine. just watch for when multiple people come running for it, that fat really doesn't absorb damage that well. The biggest trick for this map is to remember to keep grabbing the enemies siege camp and to grab the neutral bruiser camp once your lane is pushed and you can't get to the enemy fort. You may need your General and Warriors for this early on in the game though if you don't have help, so be warned. Oh,and just ignore dragon. Unless he's knocking at your gate, just keep pushing, The enemy will either lose defenders or attackers trying deal with you so either way you're helping.
For
 Garden of Terror
 just ignore. Once you hit thirteen you can just solo a boss for your team. until then only go in to grab the closest small camp and help your team if they are grabbing the closest boss. Otherwise, just stay clear and move to another lane if the enemy is clearing the boss near you.
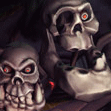 Haunted Mines
 is another ignore map. You should never be downstairs on this map. Keep the siege camps cleared and clear the mid once the fighting down there winds down. If you want, you can go solo the boss if it looks like your team can hold for you, but otherwise you'll do more damage then the golem if left alone so don't worry about it.
 Sky Temple
 is a map where you spend half the game ignoring the temples and the other half guarding them like your last slice of cheese cake. Only grab the temple if it's up in your lane, because you'll push just a hard as one if left alone. Late in the game though, they will kill the nexus for you once you've killed all the forts for them.
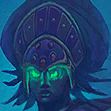 Tomb of the Spider Queen
 is an easy map for you. Push hard, get spider butts, and you'll be rolling in spider booty all day. Watch for ganks, losing 20 gems hurts a lot, so don't be afraid to turn in at ten or fifteen. However, do not be afraid to push hard either if you see the enemy hitting another lane hard. The farther you push, the farther the spider goes.
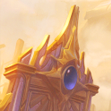 Battlefield Of Eternity
 is a weird map. I find that ignoring the immortal is the best route though I have found myself guarding it when my team wipes. Grab siege and push hard, but don't be afraid to help defend. Just watch out for splash damage, fighting directly under the immortal could get him killed by accident.
Counters!?! Top
Even the mighty can fall, and so to can your Azmodunks game come to a crashing halt when faced with certain situations. Fighting a duo lane alone is a bad time, never do it. Watch for champs with stuns or knockbacks, they interrupt your lazor so try to burst them after those abilties are used. Watch for invis, they will try to go for an easy gank but putting yourself in your minion wave and watching the map usually helps mitigate their damage. Also remember to look for them moving around in your lane, they tend to be more reserved when their stealth is popped by the ball.
Watch the minimap constantly, the enemy will always try to gank you if you're pushing hard. The first few games will be rough, but you'll get the hang of it. Remember that anybody trying to kill you is just letting your team push harder so try and be as annoying as possible with your pushes.
Never get to close to your enemy. You have no escape and are slow as, well, a fat kid. You can't push when dead so don't try to get more then a few pokes on towers if the enemy is active in lane.
Conclusion Top
Welp, that's it. That's all I can do. I've given you the tools and starting strategies you need to become an
Azmodunks, Lord of the Push. It will be rough trying to get timings down for camp stealing, and watching the minimap and lane constantly. It will take some work but this guide will cut that work down considerably. Just, please, bear in mind that strats can change on a dime when faced with a certain friendly or enemy team. You must be willing to adjust to win, but remember that you're going for siege damage and XP gain, not hero damage.
So have fun you little Azmoderps out there, and I hope my guide helps you blossom into beautiful Azmodunks that will make me hate myself when I fight.
If anyone has any questions or finds something that I didn't explain, please leave a comment. I'm not above helping anyone who is willing to try this build.
![]()


Quick Comment () View Comments
You need to log in before commenting.