Threat Assessment
So as you know from the previous section, the key to good positioning is a balancing act between trying to stay in a safe position in the team fight, and trying to get as many auto-attacks in as possible.
One thing you need to be able to do to find this golden balance is to constantly assess how much danger you're in and adjust your position in the fight accordingly. The first thing to consider is the enemy team composition. Some heroes are inherently more dangerous to attack than others. To simplify things, I made a list of heroes and how dangerous they can be to attack as Raynor in the context of a team fight. Keep in mind there are always caveats, and as always there are really too many unique situations for me to realistically cover. So at the end of the day remember to use your best judgement and treat this as more of a general reference of things to watch out for.
High Threat:
 Arthas
 - With his
 Howling Blast
 and
 Frozen Tempest
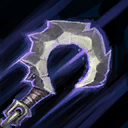
 Arthas has the ability to root you from about the distance of your auto-attack range and keep you permanently slowed. In a 1v1 scenario this is less dangerous as you can usually just push him away with a
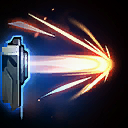 Penetrating Round
 and walk away. However in a team fight if you're rooted and his teammates react you're probably going to be in big trouble!
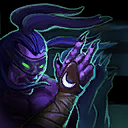
 Anub'arak
 - With his
 Impale
 and
 Burrow Charge
, he has the ability to jump in and stun-lock you. Additionally, if he has
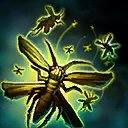 Locust Swarm
 up, he can do most of the damage needed to kill you without much need for any follow-up from his team. His
 Cocoon
 also offers the threat of isolating you in a team fight, but it's hard to play around that without help from your team - although luckily it's similarly hard for the enemy team to capitalize on it without being at least somewhat organized.
 Diablo
 - With his
 Shadow Charge
 and
 Overpower
 combo Diablo can really ruin your day. As with most of the tanks though, this is only truly dangerous if the enemy team is in a position to follow-up. That is unless he's using
 Lightning Breath
, in which case of course you'll want to walk away from that!
 E.T.C.
 - With his
 Powerslide
,
 Face Melt
, and
 Mosh Pit
 he's one of the most terrifying tanks in a team fight. Any time you're in auto-attack range of him and his
Powerslide is off of cooldown you're at risk of getting caught and being forced to dance. The best things to keep in mind here are not to clump up with teammates for his
Mosh Pit - ESPECIALLY not your support, or another hero who can cancel the
Mosh Pit. Naturally, against an E.T.C with
Mosh Pit you should always save your
Penetrating Round in case you need to bail out teammates who are caught dancing!
 Jaina
Jaina - Her
 Summon Water Elemental
 is one of the most annoying abilities in the game for a Raynor, it can essentially permanently slow you for the fight and it does great damage. Oh and there's also usually a Jaina behind it which is equally terrifying. On top of being able to perma-slow you, she does extremely high burst damage. If she lands a full combo on you she can burst you through your
 Adrenaline Rush
. Your auto-attacks slightly out range her abilities, but she can always chase you down and beat you 1v1 with
Summon Water Elemental so give her a lot of respect in fights if she has her cooldowns up. If you just saw her use
 Blizzard
 and
 Cone of Cold
 somewhere else then by all means feel free to bully her a little.
 Johanna
 - With
 Blessed Shield
 into
 Condemn
 she can really ruin your day. Like most tanks, she's not really that threatening to you on her own. But she can keep you locked down long enough for her team to kill you.
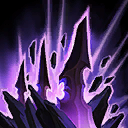
 Kael'thas
 - With his
 Gravity Lapse
 he can easily disable you out in the open. And if you fight in a creep wave or near allied heroes he has the ability to do insane amounts of damage with his
 Living Bomb
 and the
 Chain Bomb
 talent which is very popular these days. With that in mind, if I decide to trade with a Kael'thas I usually make a point of dodging side to side in-between my attacks to reduce the risk as much as possible, or abusing the fact that my auto attack range is slightly longer than his
Living Bomb range.
 Kerrigan
 - With your low mobility you are one of Kerrigan's favorite targets. She can instantly catch you out of position with a full
 Primal Grasp
 Impaling Blades
 combo, and can engage at you from a very deceptively long distance by using
 Ravage
 once to finish off a minion and then using it again to jump next to you. Kerrigan is one of Raynor's biggest threats, if you don't know where she is in a team fight, or she still has her combo up then don't go in. Your only counter-play against a good Kerrigan as Raynor is usually just waiting for her to blow her combo somewhere else. You can potentially catch her out with a
 Bullseye
Penetrating Round
Bullseye
Penetrating Round if she chooses to jump near you, but it's risky business and it won't always be easy to get the right angle unless she actually jumps on top of you.
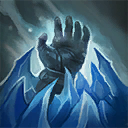
 Leoric
 (With
 Entomb
) - Until you reach level 20 and can get
 Bolt of the Storm
,
Entomb is one of Raynor's biggest nightmares. Unless you have a clutch support like an
 Uther
Uther or
 Rehgar
, you'll most likely die if you get caught with this ultimate. You'll probably survive a 1v1, but if any of his teammates are nearby to capitalize on the entomb you're most likely dead!
 Muradin
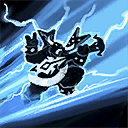
 - With his
 Storm Bolt
,
 Reverberation
,
 Avatar
, and
 Thunder Strike
 Muradin has the potential to catch you out, severely reduce your damage output, and even duel you 1v1. There's not too much counterplay against a good Muradin as Raynor, you just have to respect the stun and be prepared to kite back if he goes after you. He has the ability to zone you out of the fight and force you to shoot him which can be particularly irritating if he goes
 Imposing Presence
. But sometimes you have no choice. Some damage is better than no damage, and as long as he continues to zone you out he's out of the fight as well - however that's still usually favorable for him!
 Murky
Murky - You don't really have much counter-play to his
 Octo-Grab
 besides being far enough back when he uses it. Against Murky it's more important that your team either A. kills the
 Pufferfish
 to mitigate his damage on you, or ideally B. your support uses
 Cleanse
 so you can calmy walk out of the Octo-Grab.
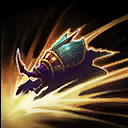
 Sonya
Sonya (with
 Leap
Leap) - Normally fighting Sonya is as simple as avoiding the
 Ancient Spear
 and poking her down. But with
Leap she has the potential to catch you out. The plus side to this is she gives up A LOT of damage by not taking
 Wrath of the Berserker
. Most Sonya players in the current meta don't use
Leap, but it's still something you should be conscious of.
 The Butcher
 - With his
 Ruthless Onslaught
 and either of his heroic abilities he can do a lot of burst and sustained damage to you and be very hard to shake off. Similar to Kerrigan you'll usually want to stay hidden from a team fight until he reveals himself unless you have a support like
Uther with his
 Divine Shield
 or
Rehgar with his
 Ancestral Healing
 to bail you out.
 Tyrael
 - With his
 Judgment
 he's extremely good at catching you out. As long as
Judgment is off cooldown you need to be careful and stay far back in the team fight.
 Zagara
 - She can out-trade you with her
 Hunter Killer
, but most importantly the range on her
 Devouring Maw
 is about as long as your auto-attack range. The hunter killer is easily dealt with by either backing off, or having your team kill it immediately. But if you get caught in a Devouring Maw in a team fight you have no way of escaping if the enemy team follows up. At least not until level 20 when you can get
Bolt of the Storm.
Medium Threat:
 Brightwing
 - Her
 Polymorph
 can potentially get you in trouble, and it's definitely inconvenient, but you can still walk away if the enemy team tries to go for you.
 Falstad
 - While he doesn't have much in the way of disables, he's an excellent duelist. As a fellow assassin he does a lot of damage. Be prepared to pull back if necessary, but be aware of the fact that he has way more mobility than you with the slow from his
 Hammerang
 and the gap-closer from his
 Barrel Roll
.
 Illidan
 - Generally speaking Illidan will be a very common target for you, and you'll probably be one for him. He can chase you down over long distances, and will crush you in a 1v1 fight. When fighting him make sure you stay close to the protection of your team. When he uses
 Evasion
 stop auto-attacking and either switch targets for a moment, or do your best to walk away and juke him. It's also the perfect time to hit
Penetrating Round however it can be very difficult to consistently hit him while he jumps around the battlefield. The Bully Build is very strong against Illidan since landing a well timed
Bullseye
Penetrating Round can mean death for him.
 Malfurion
 - If he has the Ellune's Grace talent, his
 Entangling Roots
 has a long enough range to hit you when you auto-attack him. Like any root, this can potentially be dangerous if his team follows up on it. But generally speaking it's not too risky to hit him, and Malfurion himself has no great way to follow up on the root.
 Nova
Nova - With her extremely high burst damage, she has the ability to instantly kill you. The good news is with good positioning and good awareness of her position you can usually avoid her full combo. Be aware of the fact that she will probably try to flank you mid teamfight. Once she uses her damage combo she's extremely vulnerable and has no ability to escape so try to capitalize on that if you can. Generally speaking though, it's not on you as Raynor to chase her down.
 Sgt. Hammer
 - As a fellow auto-attacker she also does very high sustained damage, however she can out-damage, and out-range you. She'll generally win a 1v1 if you're both just shooting each other so you're generally better off just staying out of her auto attack range, unless of course she's out of position or disabled.
Sonya (with
Wrath of the Berserker) - You can safely poke her behind a minion wave, and potentially even out in the open. As long as you can avoid her
Ancient Spear she has no way to close the gap. If she does land it you can still often win a trade and survive by knocking her away with a
Penetrating Round and shooting her in the back while she retreats, or orbwalking away if she charges. However with the damage from
Wrath of the Berserker it doesn't take her long to kill you at melee range so be careful!
 Stitches
 - With his
 Hook
Hook ability you always have to be conscious of your positioning. As long as you only try to attack him when there's minions or allied heroes in-between you he can't punish you. That being said, allied heroes are poor cover as they have a tendency to move. If he does manage to land a hook it's usually enough to kill you with proper follow-up from his teammates. Especially if he's using
 Gorge
Gorge and can pull you further back into his team.
 Thrall
 - With his
 Feral Spirit
 and
 Sundering
 he has the potential to catch you out in fights. However
Feral Spirit is fairly easy to dodge, and to do most of his damage he has to be in melee range with
 Windfury
 up. With a well placed
Penetrating Round you can often stop thrall in his tracks, and with
Bullseye
Penetrating Round you can often bully him in a team fight. Similar to Sonya though, he can do a lot of damage in a small amount of time. Make sure you respect that.
 Tyrande
 - You don't usually have to worry about trading with a Tyrande in team fights, you can expect her to try to hit you with
 Lunar Flare
, but it's a pretty easily ability to dodge if you know it's coming. As long as she doesn't land the stun you can out-damage her. That being said, if she has a guaranteed stun to follow-up with, you can't afford to be within her range until that stun has been used elsewhere.
 Zeratul
 - Raynor is actually very strong against Zeratul, at least if you're using the Bully Build and can hit your
Penetrating Round. If you can land a
Bullseye
Penetrating Round when he blinks in, he's going to die. The only thing you have to fear from Zeratul is him catching you out in a
 Void Prison
 and giving his team a chance to burst you down.
Low Threat:
 Abathur
 - What's he gonna do? Slap you? The only thing to worry about with an Abathur is that he might be baiting you. That is unless he's using his
 Ultimate Evolution
 in which case his threat level depends on who he's cloning.
 Azmodan
 - He has no way to disable you, as long as you're not standing in his
 All Shall Burn
 he can't really punish you for shooting him.
 Chen
Chen - He has no way to disable you, and he doesn't really do much burst damage. However you don't want to be stuck 1v1ing a Chen because he'll win eventually!
 Gazlowe
 - Gazlowe's only real threat is catching you with his
 Grav-O-Bomb 3000
 and
 Xplodium Charge
 combo. Since those abilities are both melee, you don't have much to fear by shooting him. Just make sure you keep your distance.
 Kharazim
 - Unless it's a 1v1 scenario and he has
 Seven-Sided Strike
, there's not much he can do to you. You will out-damage him, and he has no way of disabling you for his teammates.
Leoric (with
 March of the Black King
) - Without entomb Leoric is no threat to you. Just dodge, or walk out of his
 Drain Hope
 if he lands it and you'll simply be able to kite back and gun him down with your superior range.
 Li Li
Li Li - She can be obnoxious to attack if she uses
 Blinding Wind
, but otherwise you don't have anything to worry about when targetting her in a team fight.
 The Lost Vikings
 - They can do a lot of damage if all 3 of them are hitting you, or they're using
 Longboat Raid!
, but you can usually just walk away, or simply burst down the boat quite often.
 Lt. Morales
 - She has no way to threaten you besides maybe a perfectly placed
 Displacement Grenade
. Either way, you can generally hit her without any fear.
 Nazeebo
 - His
 Plague of Toads
 and
 Zombie Wall
 are easily dodged, and you can cancel his
 Ravenous Spirit
. The only thing you need to worry about with him his either getting caught by
Zombie Wall (if you do you can easily use
Penetrating Round to break out) or trying to fight him while his
 Gargantuan
 is on you.
Rehgar - He can't really punish you in a teamfight. He can technically come out ahead in a 1v1 scenario in the early game if you don't orbwalk (see next section) properly though.
 Rexxar
 - He can stun you with Misha, but she has to be in melee range to do that so you can easily kite back if she runs at you and get free shots off on her. When fighting Rexxar treat it like you would fight a tank like
Arthas. You don't want to ever trade hits, just abuse your long range and poke Misha down before you commit to trading any hits.
 Sylvanas
 - She's generally not too much of a threat to attack, she has some potential burst with her
 Wailing Arrow
 and
 Envenom
 but generally speaking she's not a great duelist and you will be able to out-trade her with your superior damage.
 Tassadar
 - With his low damage & mobility you usually don't have much to fear from Tassadar. He can potentially beat you in a 1v1 with all of his abilities focused on you, but most likely in a team fight he'll be shielding his teammates instead. Similarly, he'll beat you with
 Archon
, but you can simply walk away if he uses it. His only real threat is a well placed
 Force Wall
 followed by his teammates catching you out, but it's very hard to actually isolate someone with it most of the time.
 Tychus
 - Unless he's using one of his heroics on you he trades pretty evenly with Raynor. It's fairly easy to simply walk away from him in a fight if you're getting too low or you see him use either one of his heroic abilities. Just be conscious of the fact that he can chase you down while using his
 Overkill
 so similar to
Falstad if you're going to run away you have to start running sooner rather than later.
Uther - His stuns are only at melee range, as long as you're keeping your distance when you attack him you have nothing to worry about.
 Valla
Valla - You will out damage her and have higher health than her in a fight. If you're running the bully build and you land a
Bullseye
Penetrating Round you will almost definitely kill her. However you can't be completely reckless. Although you have a big advantage, she can potentially win if you're isloated and take the full damage of a
 Hungering Arrow
.
As a conclusion to this section keep in mind that these are all very situational and you will often have to use your best judgement and learn from your mistakes. For instance, while
Diablo might be a high threat hero when their team is in a position to follow-up, you won't have to worry about him if it's a 3v5 fight in your favor, or if you happen to know his
Shadow Charge is still on cooldown.
Remember that you want to do as much damage as you can get away with doing. Generally speaking you'll want to maintain maximum range from your opponents since Raynor has one of the longest auto-attack ranges in the game. But if you're at a clear advantage, taking steps closer to your enemy will allow you to chase them that much farther with orbwalking (which I discuss in the next section).
Pay close attention to cooldowns and the positioning and composition of both teams. Sometimes the enemy team will also be effectively zoned out from following up on your because of the players on your team. Or as I mentioned earlier if you have a support like
Uther that can bail you out of a nasty situation you can sometimes afford to play a bit more aggressively.


 Bully Build Details


Quick Comment (3) View Comments
You need to log in before commenting.