This is a guide to be competitive on ranked games. All builds got the highest win rating on
https://www.hotslogs.com/
As you know, don't focus on just a build because it depends on the map, the composition of your team and the enemy team. You may need more survival, more damage, more CC ... read the notes below and adapt to each situation!
About me: My name is Nick and Im a Blizzard casual gamer. I got all blizzard games and put alot of times into it. Also on other mobas like league i am diamond 1. I have played over 5000 games on league and around 1300 games on hots.
This guide is still work in progress leave a feedback what you would love to see in it!
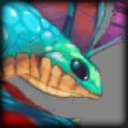
 Abathur
:
biggest strength is being able to contest map objectives while soaking experience. This is done by moving Abathur within range of Minions and then using
 Symbiote
 or
 Ultimate Evolution
 Ultimate Evolution to assist your team. This creates an experience advantage over the enemy team. If the enemy team has one of their Heroes soak a lane to try to catch up, then your team is at a significant advantage in any team fight that occurs during that time.
Due to the specific nature of his strengths and weaknesses, Abathur's place in the meta will likely remain situational. He can be extremely powerful with the right team composition, or can struggle to provide value because of a map's mechanics. Even in drafts where you have a good team composition and map for him, you should make sure your team is comfortable with the pick. Abathur requires your team to play differently than normal, and you will have the most success when your teammates understand this.
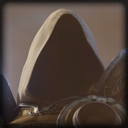
 Alarak
:
Is great for team compositions that need a strong solo lane Hero. He works best on a team that can reliably follow up when he forces an enemy out of position or silences them.
Alarak forces enemies to respect his area of influence, as getting too close can quickly result in death. His kit is composed of powerful skillshots, which can be extremely rewarding when combinations are executed flawlessly.
 Anub'arak
:
Is a unique tank that sacrifices raw durability for Spell Armor and long-range crowd-control-based utility than other tanks. As such, Anub'arak players are expected to aggressively provide crowd-control (through
 Impale
 and
 Burrow Charge
) for their teammates to follow up on with their own Abilities, and then pressure fragile backline Heroes. Finding the right time to initiate, peel, and pressure isolated Heroes while avoiding dangerous situations are the skills that one should develop in order to become a strong Anub'arak player.
 Artanis
:
Can be played as a stalwart Tank or an aggressive Bruiser. In both roles, he thrives on extended combat, as long he is able to consistently attack a nearby target. Aside from
 Phase Prism
,
 Blade Dash
 is Artanis' only gap-closer. In order for Artanis to reach enemy ranged Heroes, assistance from his team is usually required. Additionally, crowd control counters Artanis hard, as he must be able to use Basic Attacks to keep up his shields from
 Shield Overload
.
Due to his lack of crowd control and gap-closers, Artanis relies more heavily on his team than other Heroes. For instance, Jaina and Muradin are able to Slow and Stun enemies, making much easier for Artanis to stick to a target. Tassadar is another Hero that synergises well with Artanis.
 Plasma Shield
 provides survivability without healing Artanis past 50% of his maximum health, allowing him to still benefit from
Shield Overload. Conversely, be wary of picking Artanis into teams with plenty of Stuns and burst damage.
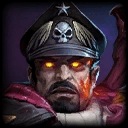
 Arthas
:
Fulfills the role of an offensive Warrior that poses a constant threat to nearby enemies. While he is innately not as durable as other Warriors like Muradin or E.T.C., Arthas can nevertheless become quite tanky. Strong defensive talents like
 Immortal Coil
 or
 Anti-Magic Shell
 provide enough protection to hold the front line during the later stages of the game against both Basic Attackers and Spell Casters. Two of Arthas' Basic Abilities, namely
 Frozen Tempest
 and
 Howling Blast
, can be used to initiate team fights by locking multiple nearby enemies down. However, the fact that Arthas has a hard time closing in on agile Heroes requires him to choose his targets wisely. In order to become a decent Arthas player, it is very important to know when to engage and when to remain passive.
 Auriel
:
Is best played with a high damage Assassin, who can supply her with the energy she requires for healing. Because she cannot heal at all under certain circumstances, it is important to make sure she has allies who can fill her energy meter reliably. Due to her lack of mobility, she does well with Heroes who can help her to reposition when needed. She can be very strong against enemy team compositions reliant on Basic Attacks, as
 Blinding Flash
 can be used to prevent a lot of their damage. Although Auriel is not perfect for every team composition, she can be truly remarkable with the right Heroes by her side.
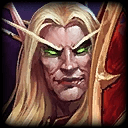
 Azmodan
:
Although classified as a Specialist, Azmodan more or less plays like an Assassin; his primary goal is to inflict damage to whatever is in sight. The main difference between him and most regular Assassins, however, is that the majority of his damage can be countered or otherwise avoided in one way or another. The trade-off for this weakness is that all of his Abilities double up as very effective sieging tools. As such, Azmodan players are expected to have a solid grasp on game flow, so as to know when to contribute to skirmishes and team fights, and when to capitalise on isolation to deal important Structural damage.
One peculiar aspect of Azmodan lies in his
 Taste for Blood
, which more or less defines the entire Hero at high levels of play. The Talent essentially allows Azmodan to improve the scaling of his damage to levels well beyond that of other Heroes. Exploiting this Talent, however, requires very specific behaviour from Azmodan players: last-hitting with
 Globe of Annihilation
. Doing so requires teamwork, patience, and practice.
In general, Azmodan does well against team compositions that lack hard-engages, and as part of teams that can help him get his Taste for Blood stacks up to a reasonable number. His very large Health pool and the threat of his
 All Shall Burn
 make him hard to assassinate, unlike most damage dealers.
 Brightwing
:
Is the only support Hero that is capable of joining a team fight from any location on the map, thanks to her
 Phase Shift
 ability. This allows Brightwing to separate herself from the rest of her team and soak more experience in lane than any other Supporter. What also makes Brightwing stand out from other support Heroes are her unique healing mechanics. Brightwing does not actively heal her allies with abilities. Instead,
 Soothing Mist
 heals nearby teammates for a small amount every five seconds. In terms of crowd control,
 Polymorph
 poses a serious threat to enemy Heroes, especially initiators and Assassins that rely on their mobility, such as Zeratul, Illidan, or Valla. Combined with the
 Critterize
 talent at Level 16, Polymorph Icon Polymorph allows your team to focus fire a single target very efficiently.
Because of her strong talent tree, Brightwing's power level increases the longer the game lasts. This makes her a particularly valuable pick on larger maps like Cursed Hollow, Garden of Terror, or Dragon Shire. One of Brightwing's biggest strengths is the fact that she is able to adjust her choice of talents according to the state of the game.
 Pixie Charm
 allows you to single-handedly capture Mercenary Camps on large maps, while
 Peekaboo!
 can provide important vision against cloaked Heroes.
 Cleanse
 is an ideal tool to protect fragile teammates against enemy crowd control, whereas
 Mistified
 can provide your team with a constant source of healing. The correct usage of your mobility and crowd control spells enables you to heavily influence the outcome of a game, which makes Brightwing a force to be reckoned with.


Quick Comment () View Comments
You need to log in before commenting.